the Lovely Wild

  • Blog
  • Archive
    • :: Archive
    • :: Apothecary
    • :: Celebrate
    • :: DIY
    • :: Eat
    • :: Wander
  • About
  • Design
  • Contact
VanillaExtract2-8326.jpg

DIY :: Homemade Vanilla Extract

November 09, 2020 by Hailey Faust in :: Apothecary, :: DIY, :: Eat

As we step gently into the darker side of the year, I have been finding deep comfort in preparing our little den for hibernation. In frosted kitchen windows and folded flannels and pots simmering contentedly on the stove. Bell jars pinging on the counter. Dough rising and dishes stacked neatly in the cupboard. The quiet productivity that settles in as winter descends.

There is something deeply soothing about working gently with my hands and turning inward this time of year. One of my favorite autumn rituals is infusing a big batch of this simple homemade vanilla extract and dreaming of all the sweet things it will soon become. Cherry Almond Biscotti with hot coffee on a snowy evening. Homemade Maple Pecan Granola with our little family piled around the kitchen table. Grandma’s famous Christmas Tea Ring with cinnamon and maraschinos.

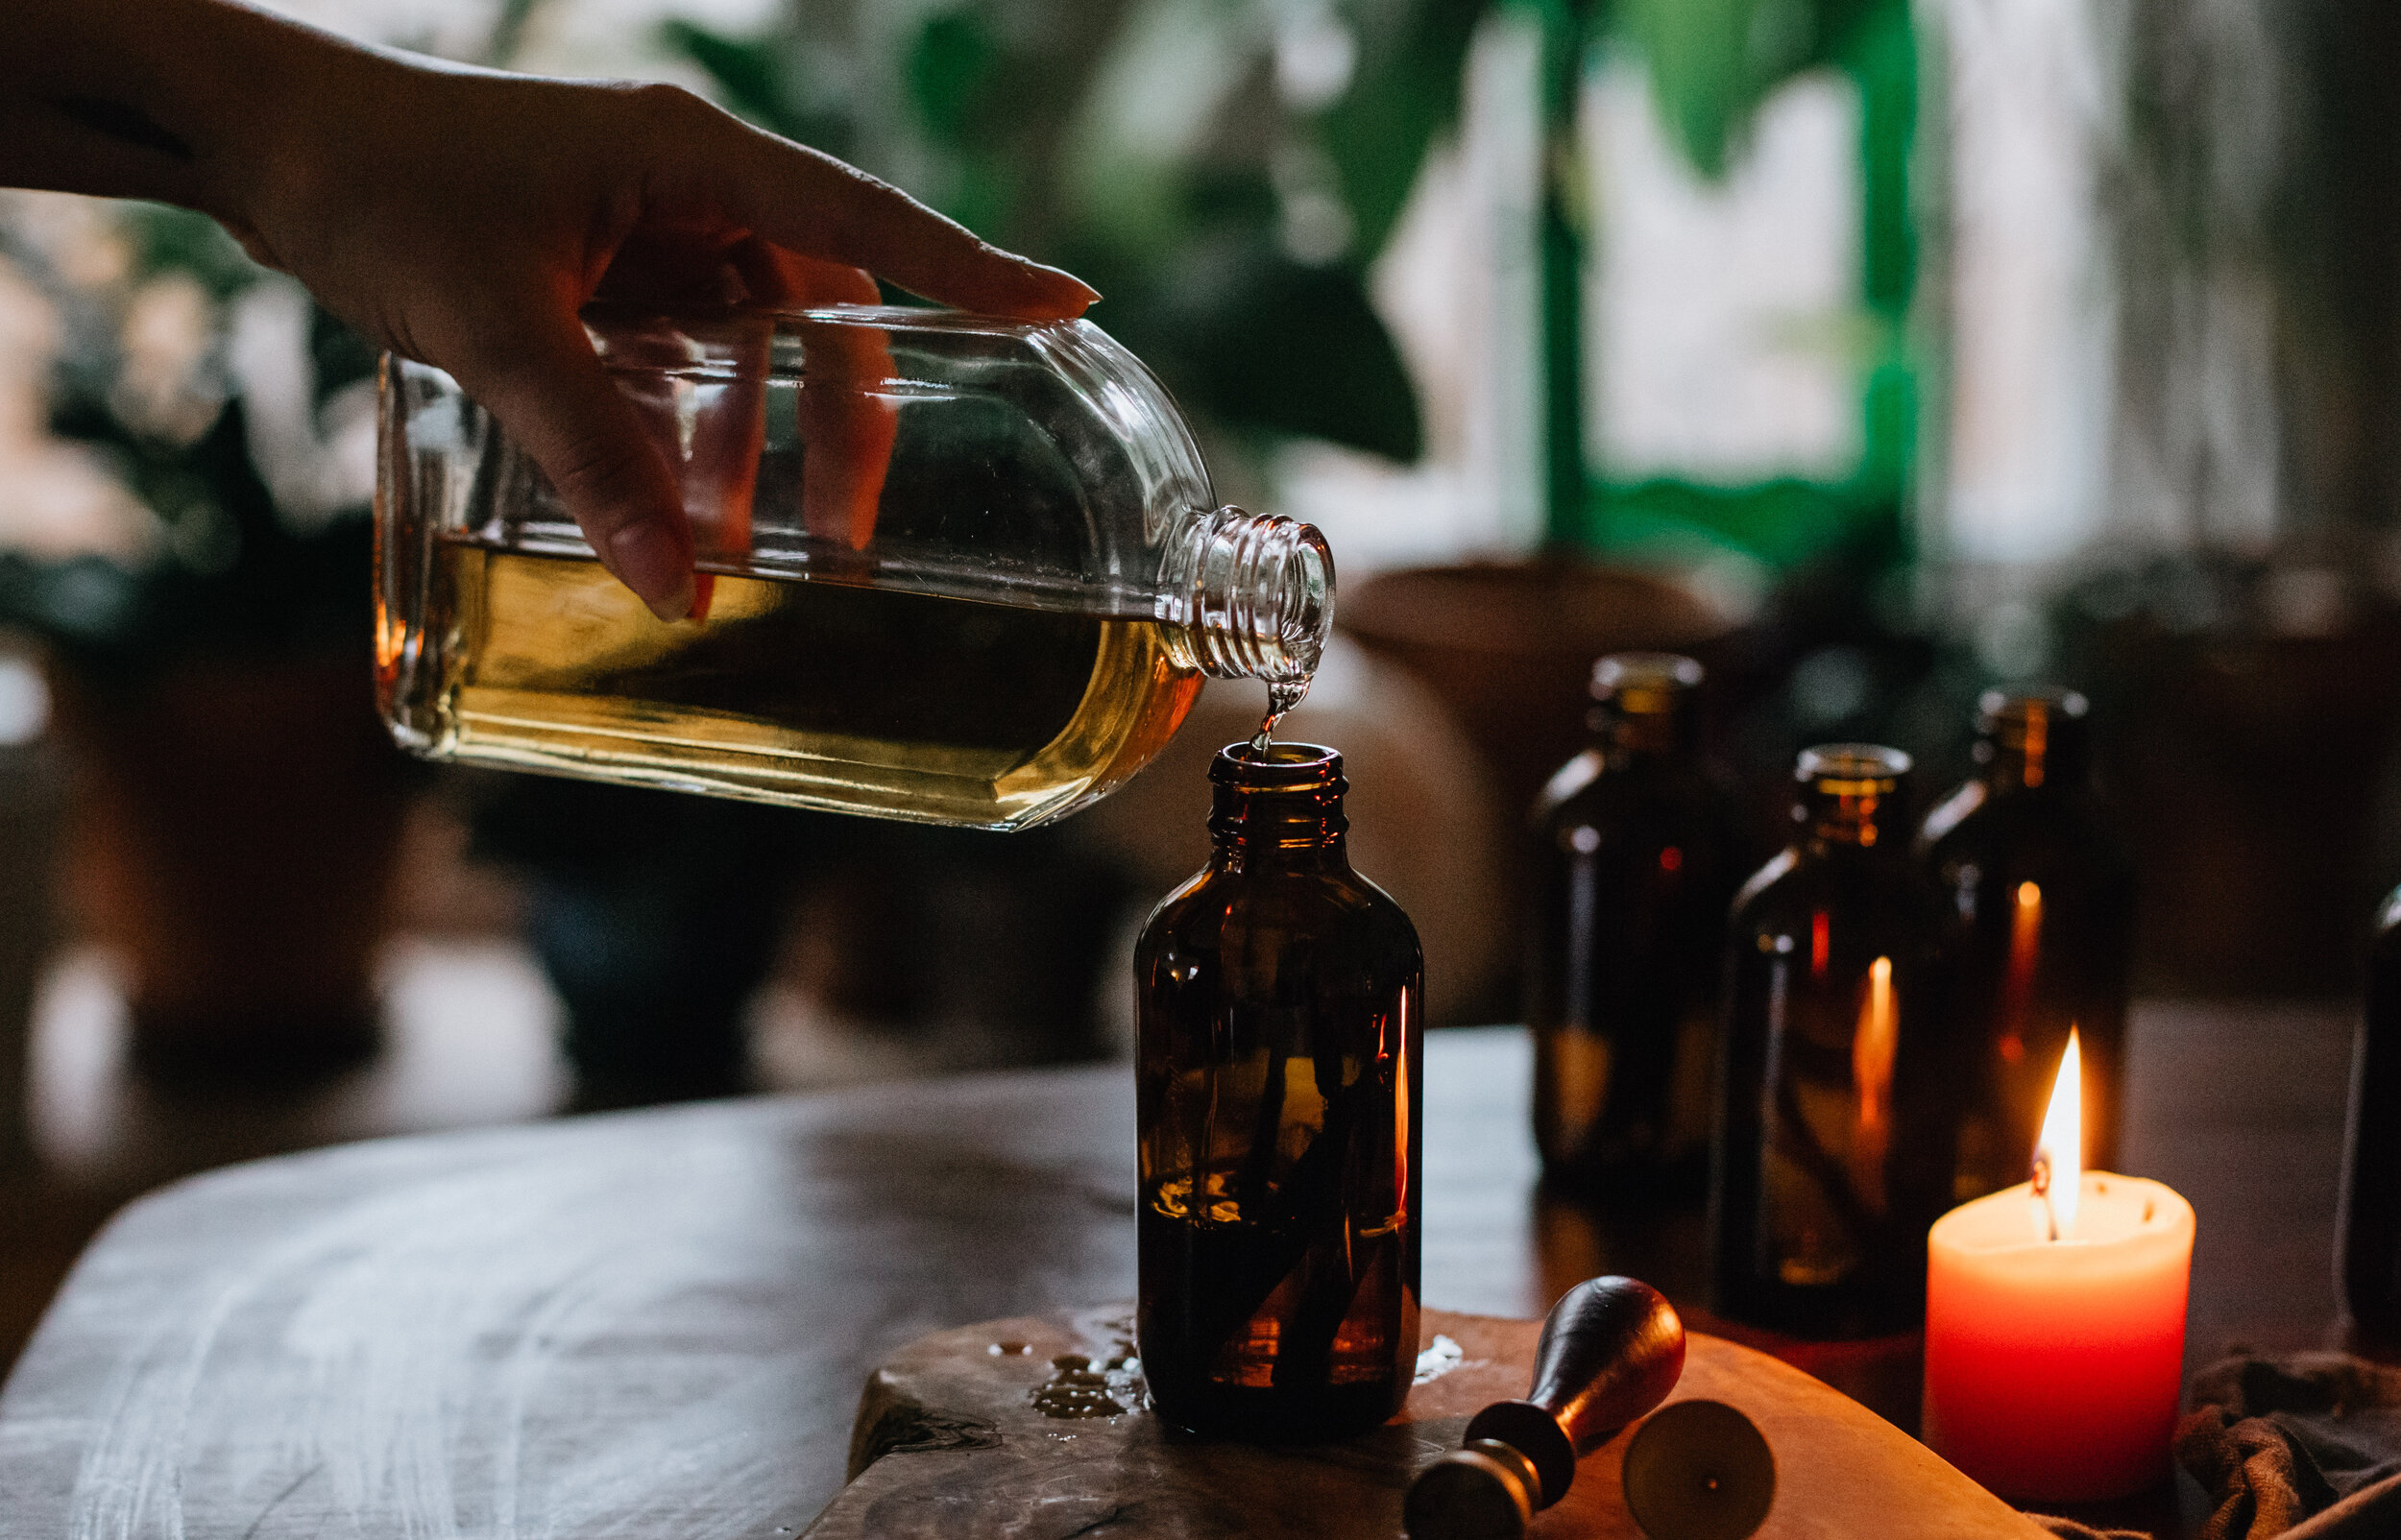
Extracts take time to infuse. Like all things, they need space to rest and integrate. So this is a lovely project to start now and have ready just in time for winter baking and gifting. It only takes about 15 minutes of hands-on time, and then a little darkness and a little patience. There are few things more magical than reaching for this sweet little amber bottle in the back of the cupboard when the time comes. Truly.

To say it’s been a strange year is a massive understatement. But when nothing seems certain, and every day brings new terrain to navigate, taking time to quietly prepare for the colder days ahead can be oddly comforting.

 Sending you warmth and love and peace of mind, dear friends.

VanillaExtract-8412.jpg
VanillaExtract-8348.jpg
VanillaExtract.png
 

Supplies:

  • Small amber jars (any size will do. I used 5oz.)

  • Organic vanilla beans (about 2 - 3 beans per small jar)

  • Bourbon - at least 80 proof (vodka also works well, but I prefer the sweet notes of bourbon)

  • Optional: Sealing wax and wax seal for packaging

VanillaExtract-8275.jpg

Step 1:

Begin by washing and sterilizing your jars and caps. You can do this with boiling water, or in a high temp dishwasher. After the jars are sterilized, allow them to air dry on a clean towel.

VanillaExtract-8281.jpg

Step 2:

Using a sharp knife, cut your vanilla beans lengthwise to expose the seeds inside. Then cut the beans in half vertically so they can easily fit into your jars with a little headspace left over.

VanillaExtract-8285.jpg

Step 3:

Place the equivalent of 2 - 3 whole vanilla beans (4 - 6 cut halves) in each clean bottle.

VanillaExtract-8308.jpg

Step 4:

Fill each bottle with bourbon or vodka, ensuring that the beans are completely submerged.

VanillaExtract-8331.jpg

Step 5:

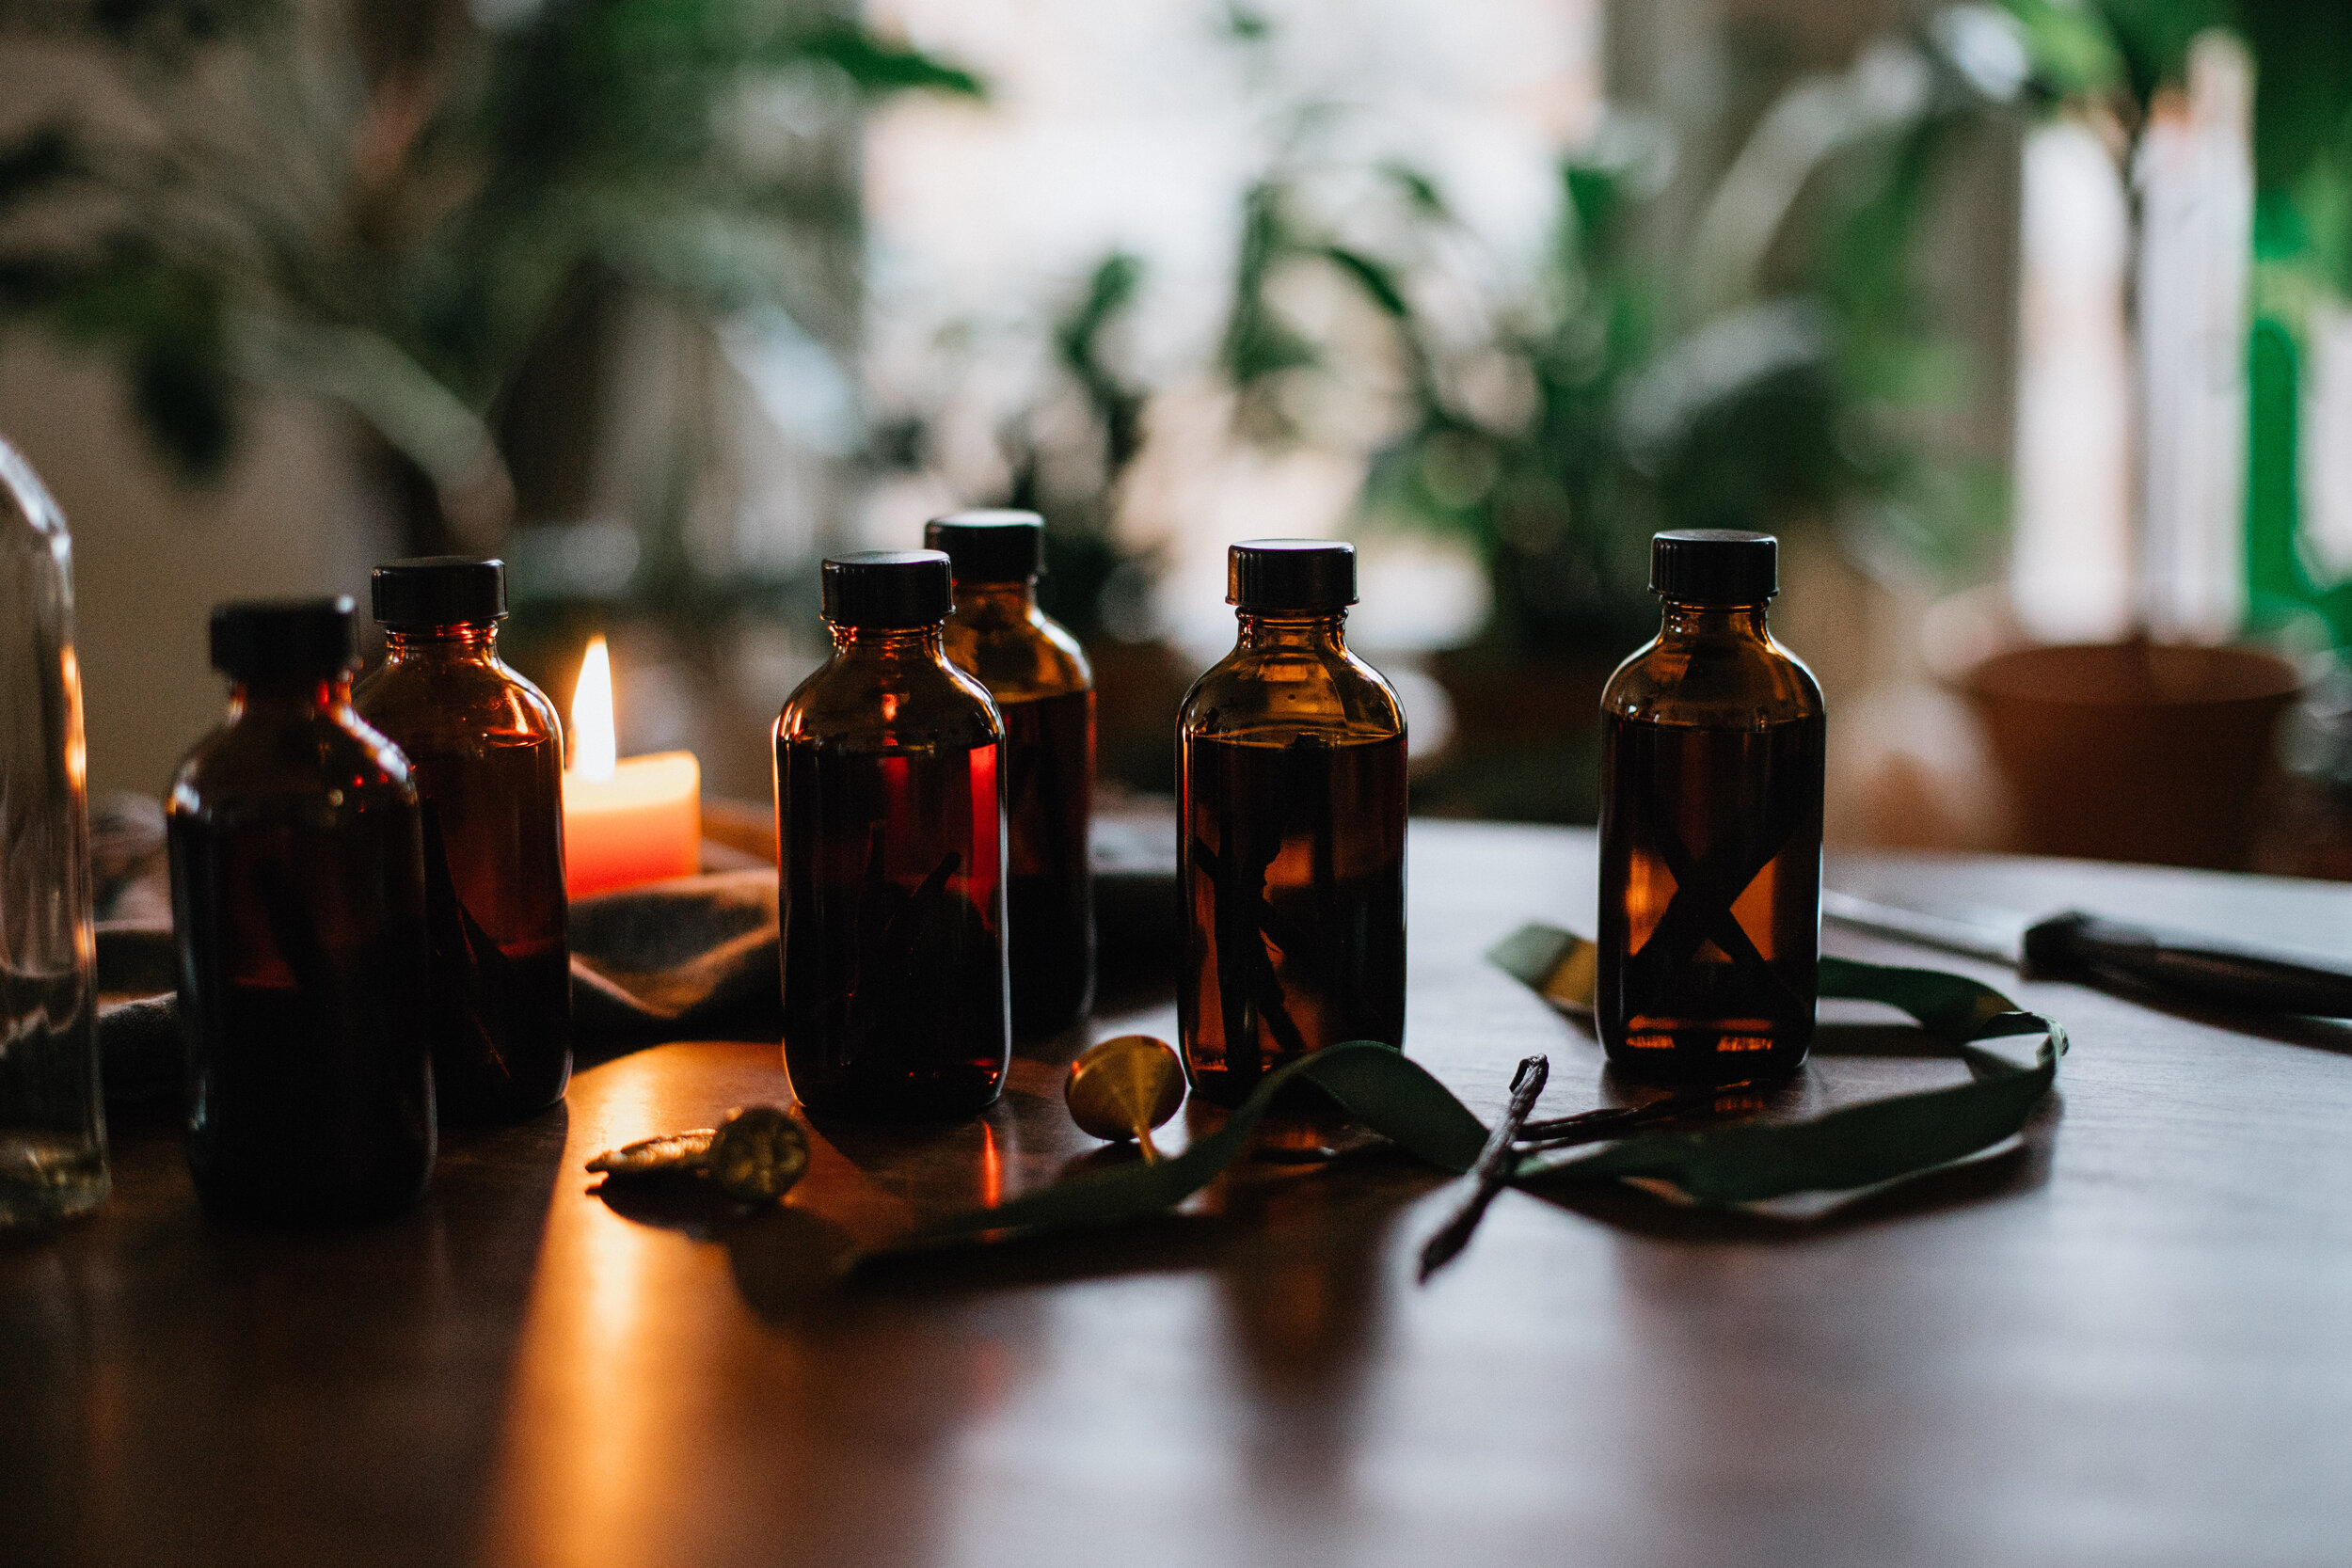
Cap bottles and place them in a dark cupboard for 5 - 8 weeks. I like to gently shake mine every day or two for the first few weeks to help the vanilla integrate.

Though you can start using the extract as soon as 5 weeks, the flavor will continue to deepen and improve with time. No need to remove the vanilla beans! You can continue to refresh the bourbon and add more beans to the jar as needed to ensure you have a perpetual supply of vanilla magic in the cupboard.

VanillaExtract-8361.jpg

Packaging:

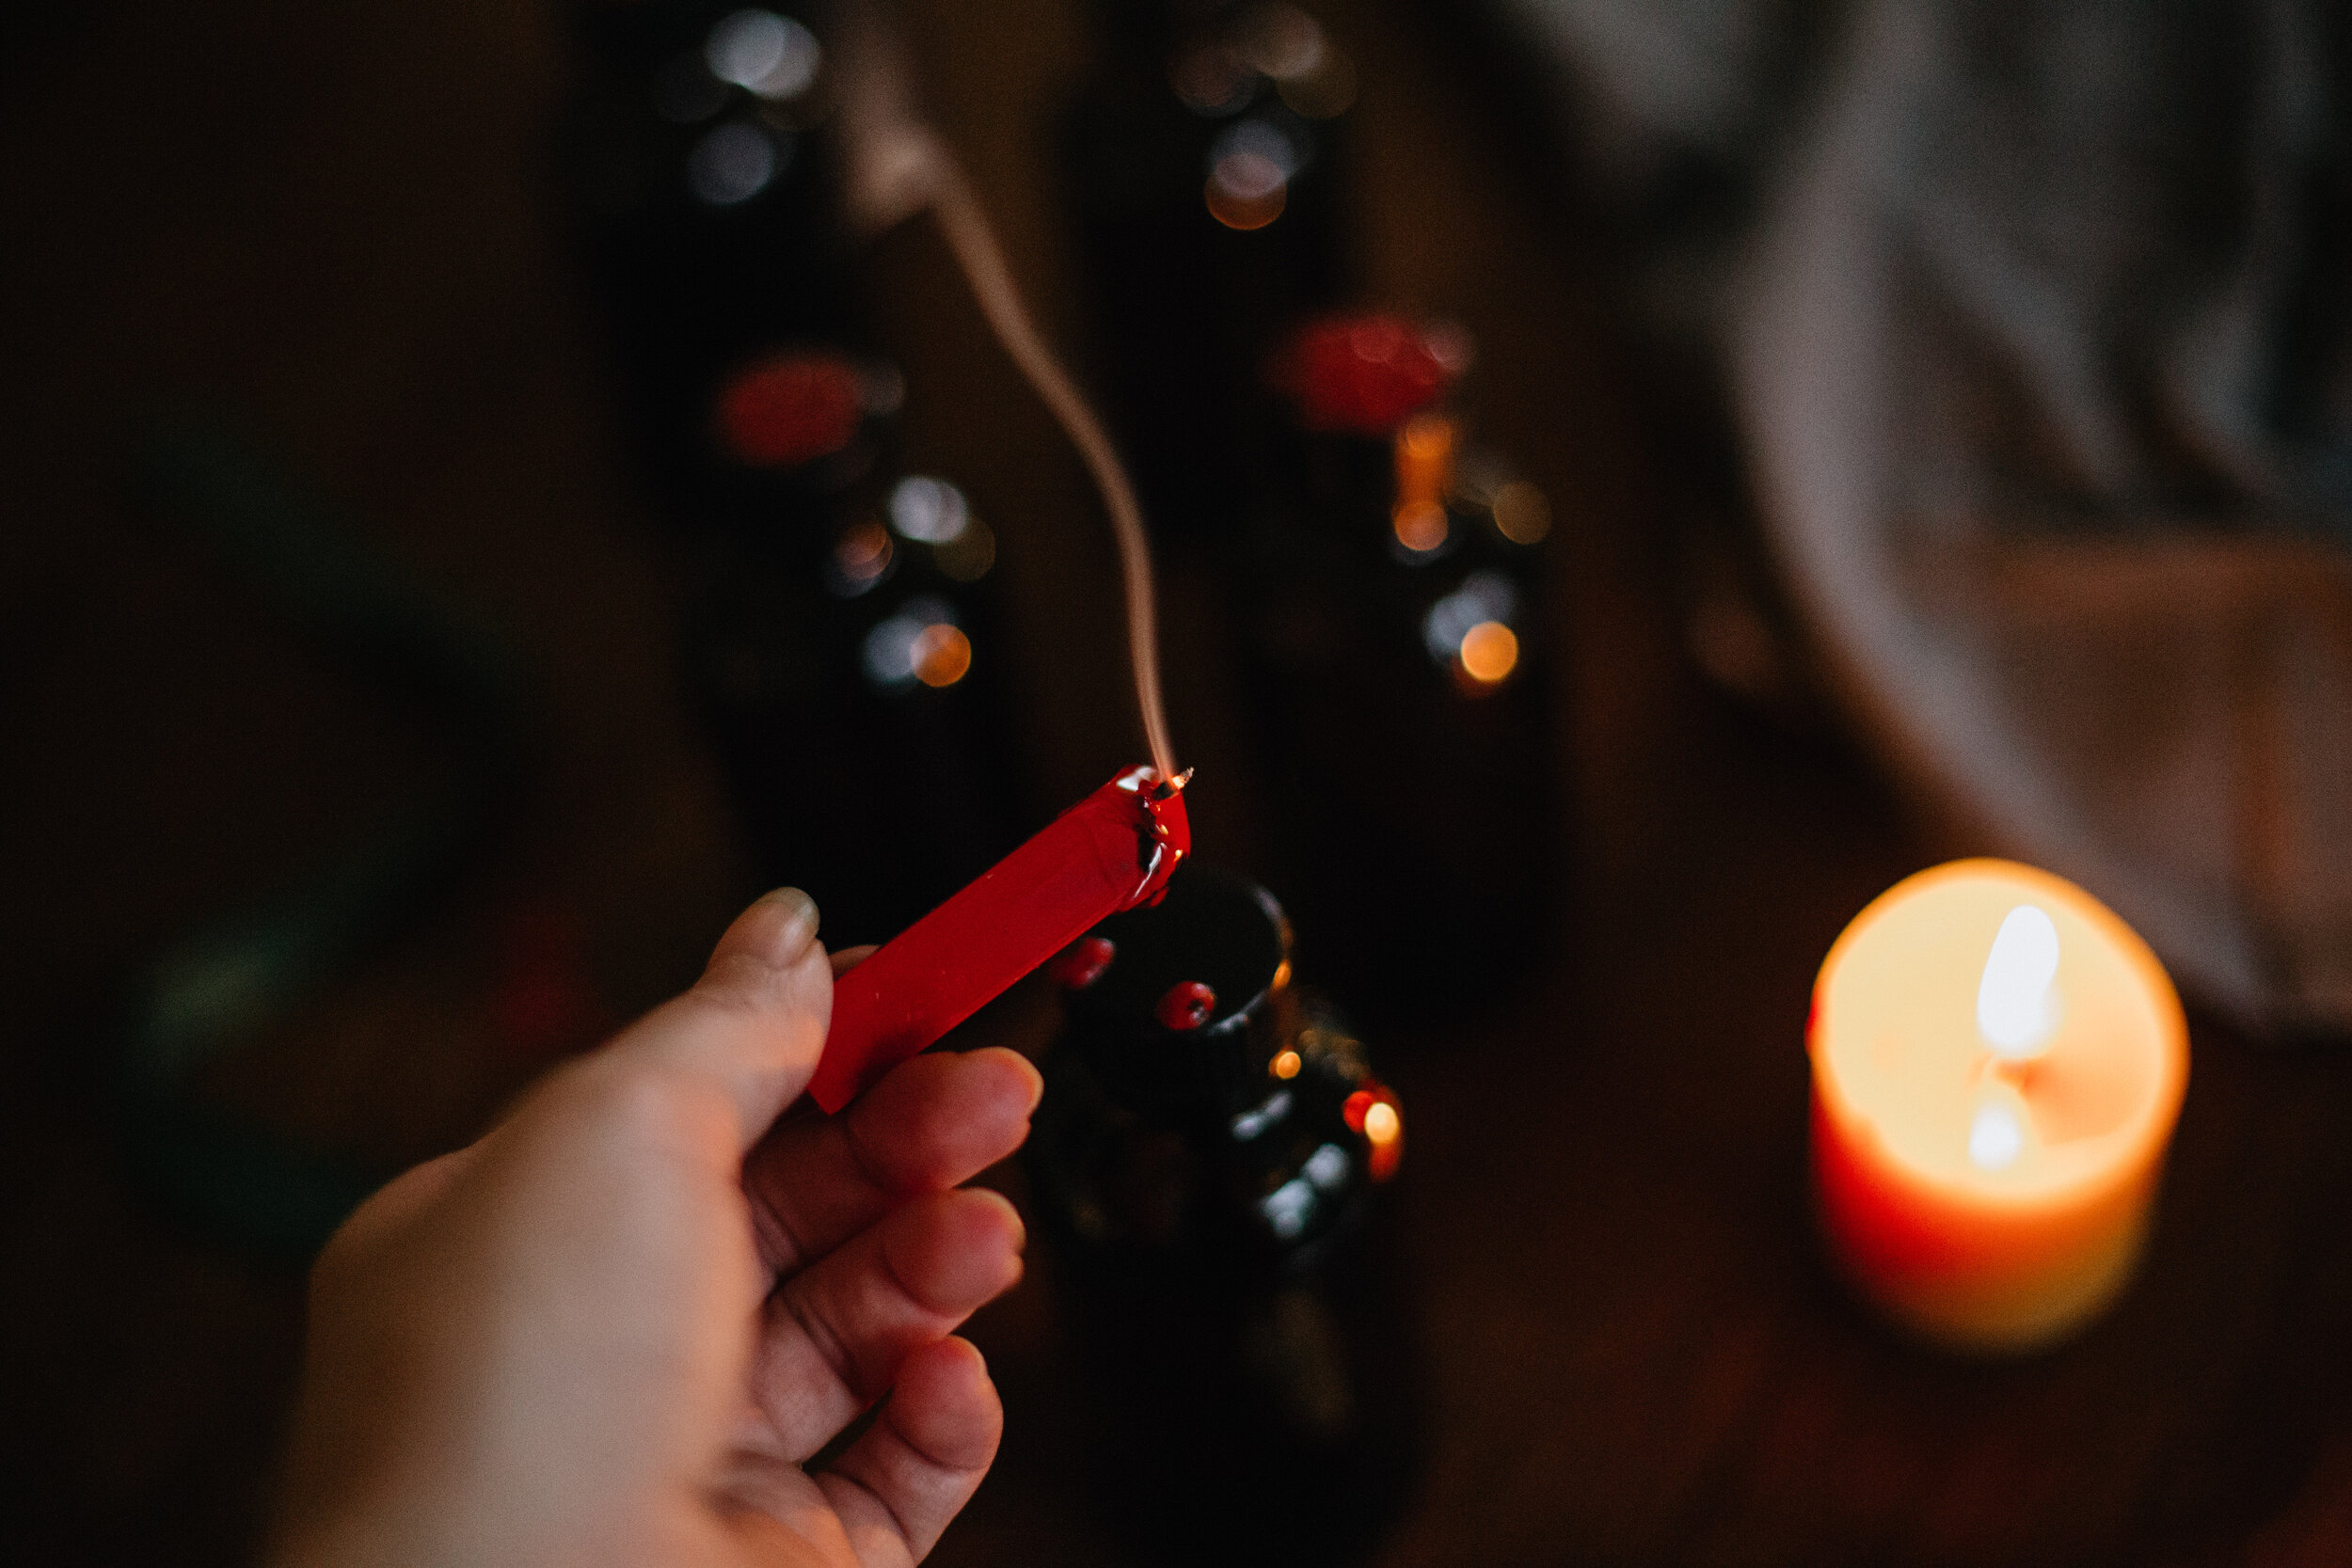
Since I will be gifting most of my bottles, I wanted to elevate the presentation a bit. I kept the packaging simple by melting a little red sealing wax onto each lid, and pressing firmly with a metal seal. I would love to try submerging the entire lid and neck of the bottle in wax to truly seal in the old world magic…but the light was fading and the baby was fussing, so this quick alternative did the trick in a pinch.

VanillaExtract-8371.jpg
VanillaExtract-8394.jpg
VanillaExtract-8380.jpg
VanillaExtract-8362.jpg

xo,

Haileysignature.png
 
VanillaExtract-8445.jpg
November 09, 2020 /Hailey Faust
homemade christmas gifts, vanilla extract, diy, diy vanilla extract, diy holiday, vanilla bean, urban homesteading, easy diy gifts, hygge, homemade, christmas, orange garland
:: Apothecary, :: DIY, :: Eat
Comment
fallwreath-3997.jpg

Apothecary :: Herbal Sinus Steam for Winter Colds

November 18, 2018 by Hailey Faust in :: DIY, :: Apothecary

The last few weeks have been a blur of stuffy noses and early bedtimes and endless pots of soup around our house. Winter is here, and she brought with her a marathon of headcolds. This Herbal Sinus Steam has been the only thing luring me out of bed in the morning.

Herbal steam baths are an ancient practice used to help ease congestion and moisturize inflamed airways. I have been using a mix of dried eucalyptus, lavender, rosemary, thyme and rose petals to help soothe my poor respiratory system. Eucalyptus and rosemary to break up congestion, lavender to open up airways and calm the nervous system, thyme as a gentle expectorant, and rose petals to soothe dry winter skin. I don’t follow a strict recipe…just a few pinches of this and that until it smells aromatic. Feel free to experiment with different ratios of these herbs, dried or fresh, using whatever you might have on hand. If I’m really congested I will also add a drop or two of eucalyptus essential oil to kick it up a notch.

This warm fragrant steam does wonders for a scratchy throat and burning sinuses. A simple healing ritual to sooth the mind, body and spirit when you are under the winter weather.

Sending you lots of tea and healing thoughts, dear ones.

fallwreath-3989.jpg
fallwreath-4018.jpg
fallwreath-4021.jpg

***Disclaimer: I’m not a doctor, nurse, herbalist or licensed healthcare practitioner. Some herbs and botanicals are not safe for children, pregnant women, or nursing mothers and may not be suitable to take with certain medications or conditions. This information is not meant to diagnose, treat, cure, or prevent any disease. Always consult your doctor before beginning any kind of new vitamin, herbal, diet, or exercise regime. Make sure to research all of the ingredients to make sure they are safe for you and your family. 

herbalsinussteam.png
 

Ingredients:

A few pinches of any of the following herbs (dried or fresh.) Make sure you are only using high quality herbs that haven’t been sprayed with anything.

  • Eucalyptus (feel free to add or substitute 2 drops eucalyptus essential oil)

  • Rosemary

  • Lavender

  • Thyme

  • Rose Petals

  • Optional: 2 drops eucalyptus essential oil and/or lavender essential oil* (may not be suitable for children)

Instructions:

  1. Put a full kettle or pot of water on to boil.

  2. While the water is heating up, place herbs in a separate large pot or heat-resistant bowl.

  3. Carefully pour boiling water over the herbs. Fill the bowl or pot about 2/3 full. Optional: Add 2 drops of eucalyptus essential oil and/or lavender essential oil

  4. Immediately cover bowl with a towel and allow herbs to steep for 5 minutes and the water to cool a bit.

  5. Hold your face about 10 - 12 inches above pot. If the steam feels uncomfortably hot, wait a few more minutes for the water to cool then try again. When the steam has reached a comfortable temperature, cover your head and the bowl completely with a towel to make a little tent.

  6. Close your eyes to avoid irritation and breathe deeply for 5 - 10 minutes. Try to clear your mind and visualize the healing energy you are inhaling.

fallwreath-4003.jpg
fallwreath-4013.jpg

xo,

Haileysignature.png
 
fallwreath-4031.jpg
November 18, 2018 /Hailey Faust
sinus, steam, sinus steam, winter, cold and flu remedies, cold remedy, sinus infection, herbal remedies, herbal, apothecary, cold remedies, steam facial, cold, flu, slow living, the art of slow living, slow and seasonal
:: DIY, :: Apothecary
Comment
fallwreath-7271.jpg

House Spells :: DIY Samhain Blessing Wreath

October 30, 2018 by Hailey Faust in :: Celebrate, :: Make, :: DIY

And now we step into the darker side of the wheel. Into the days of roots and stones and antlers and bones. A time to shed what we no longer need to carry, and to squirrel away what will carry us through the cold months ahead.

Samhain, Hallowe’en, Witches New Year…there are many names for this liminal time. For these in-between days when the veils are thinnest. We are now exactly half-way between the Fall Equinox and the Winter Solstice. This is a potent time of magic and transformation. A time that asks us to send our energy downward. Into our roots. Into the Underworld.

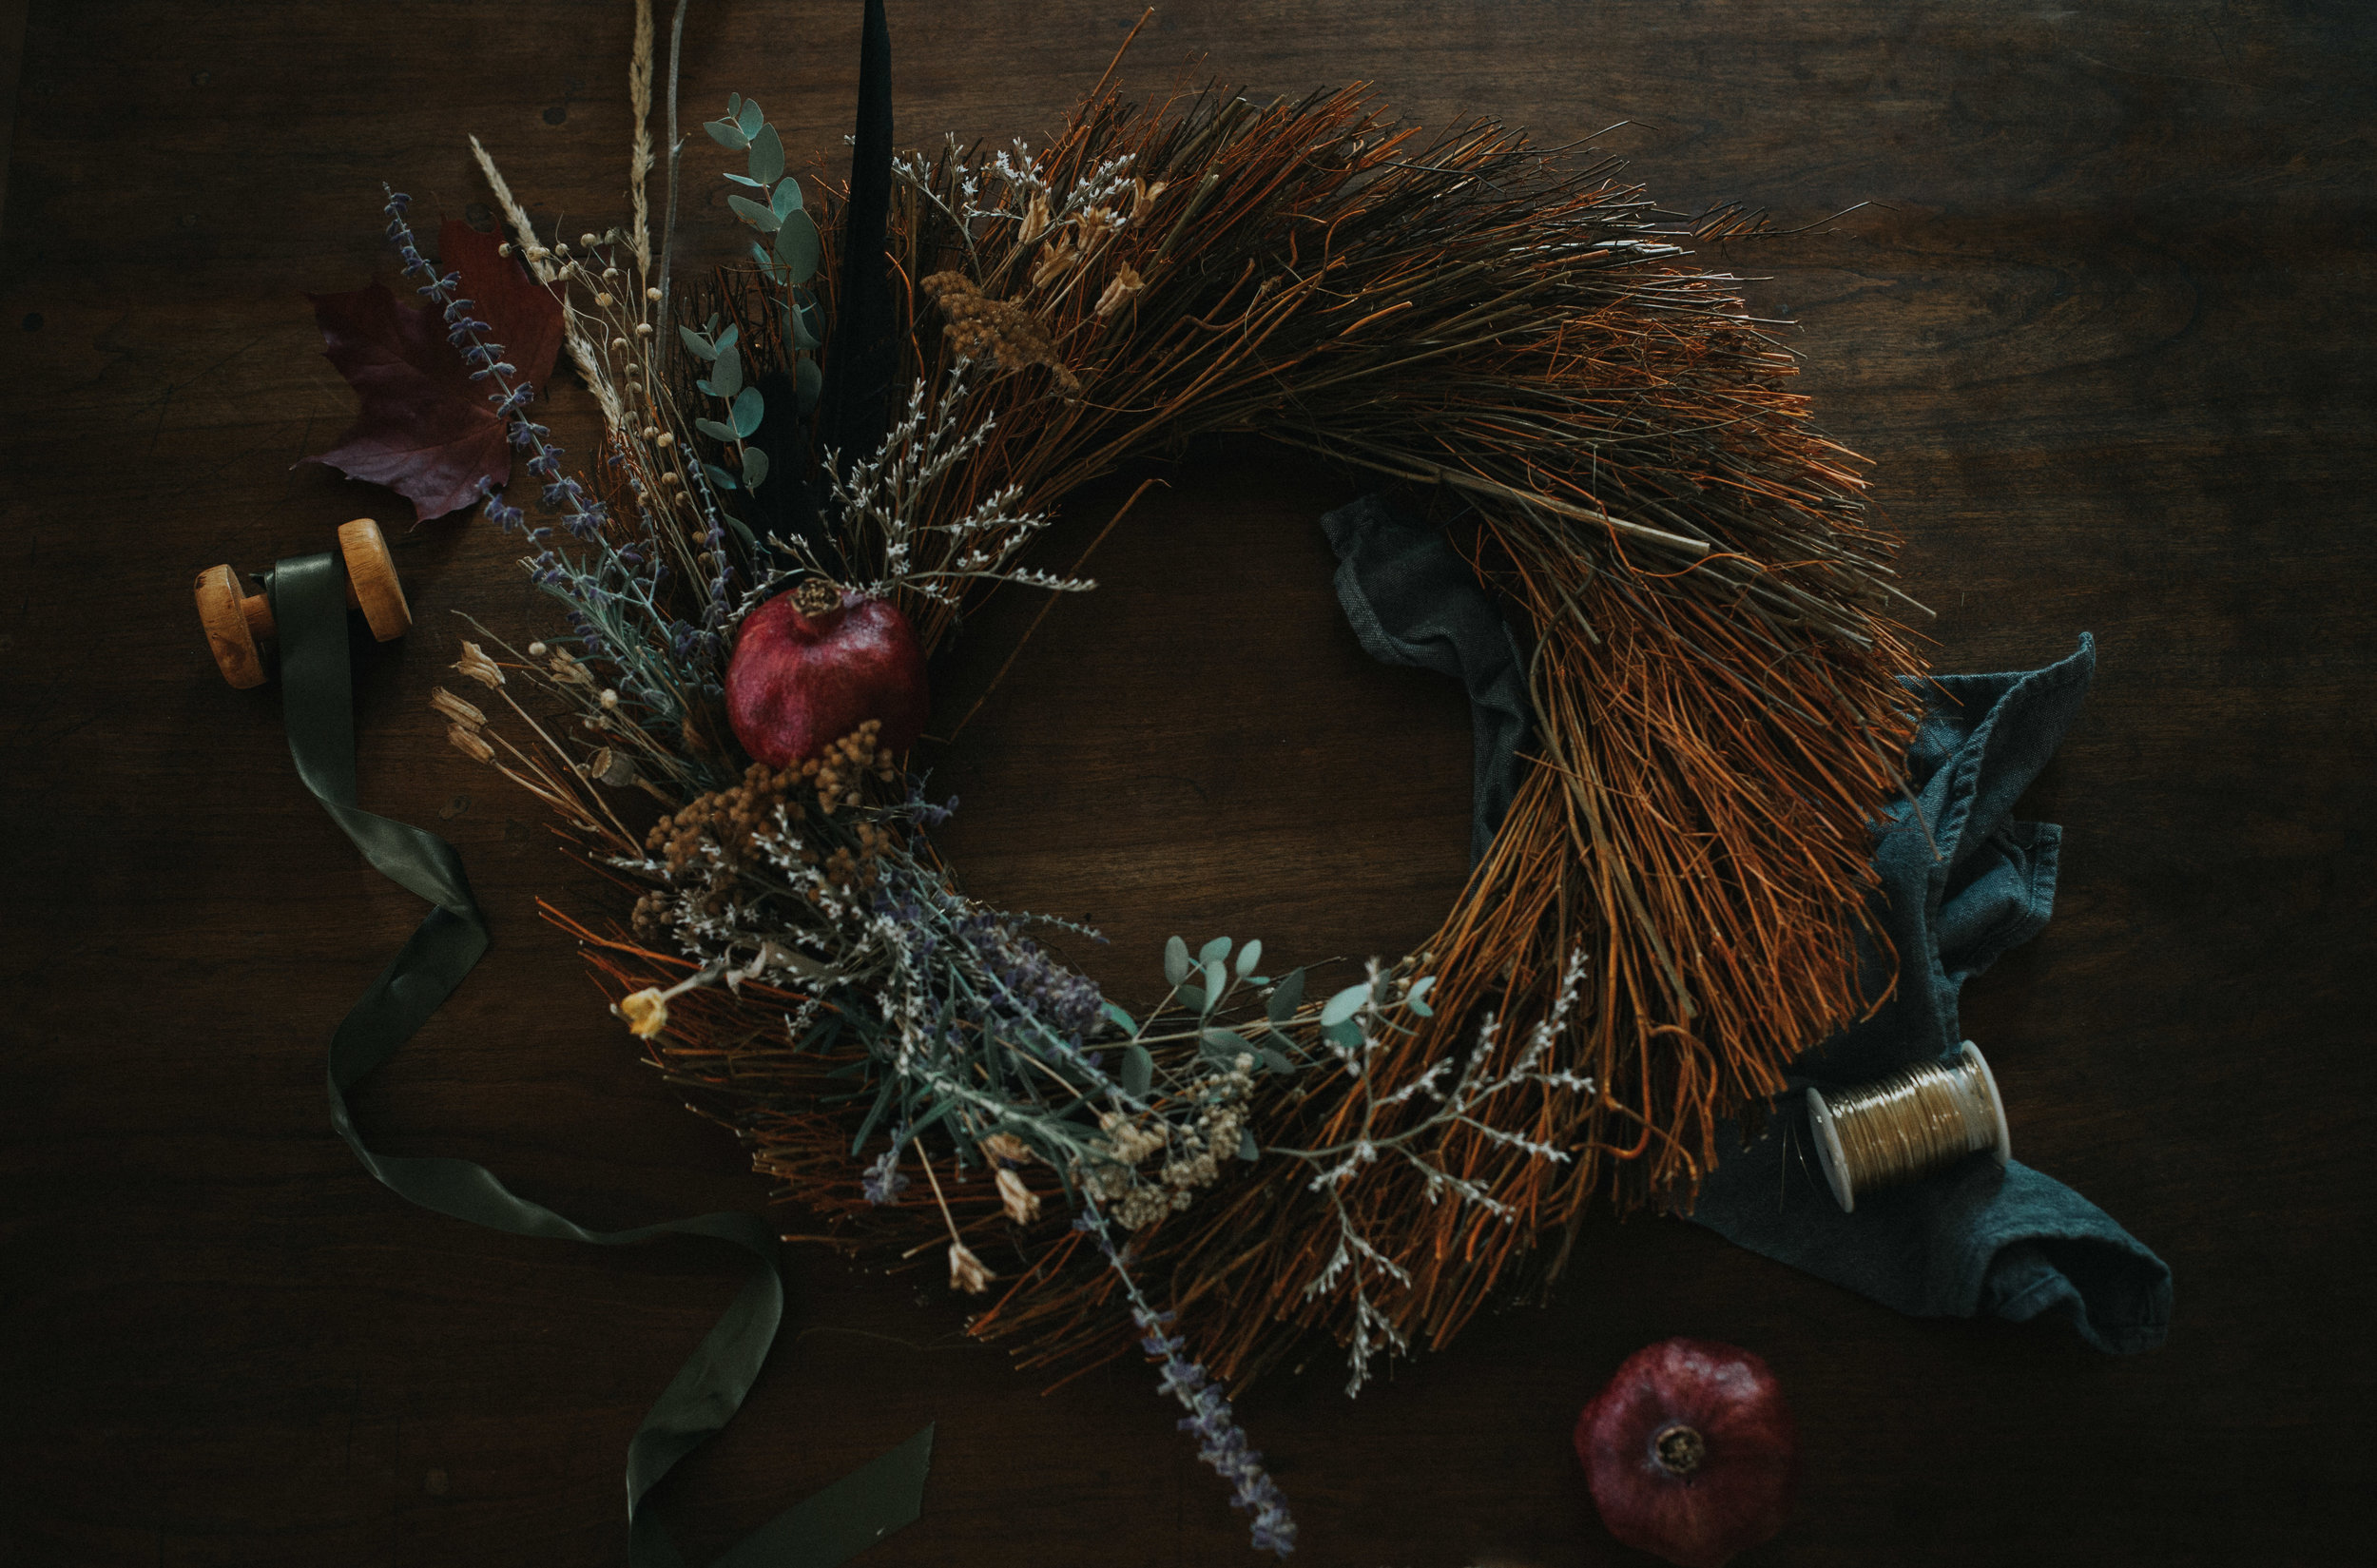
Homemade wreaths and swags have long been prescribed by folklore as talismans to protect the thresholds our homes. This simple wreath is a lovely way to enchant your space with protection and abundance for the darker days ahead, and to quietly honor the natural cycles of life and death.

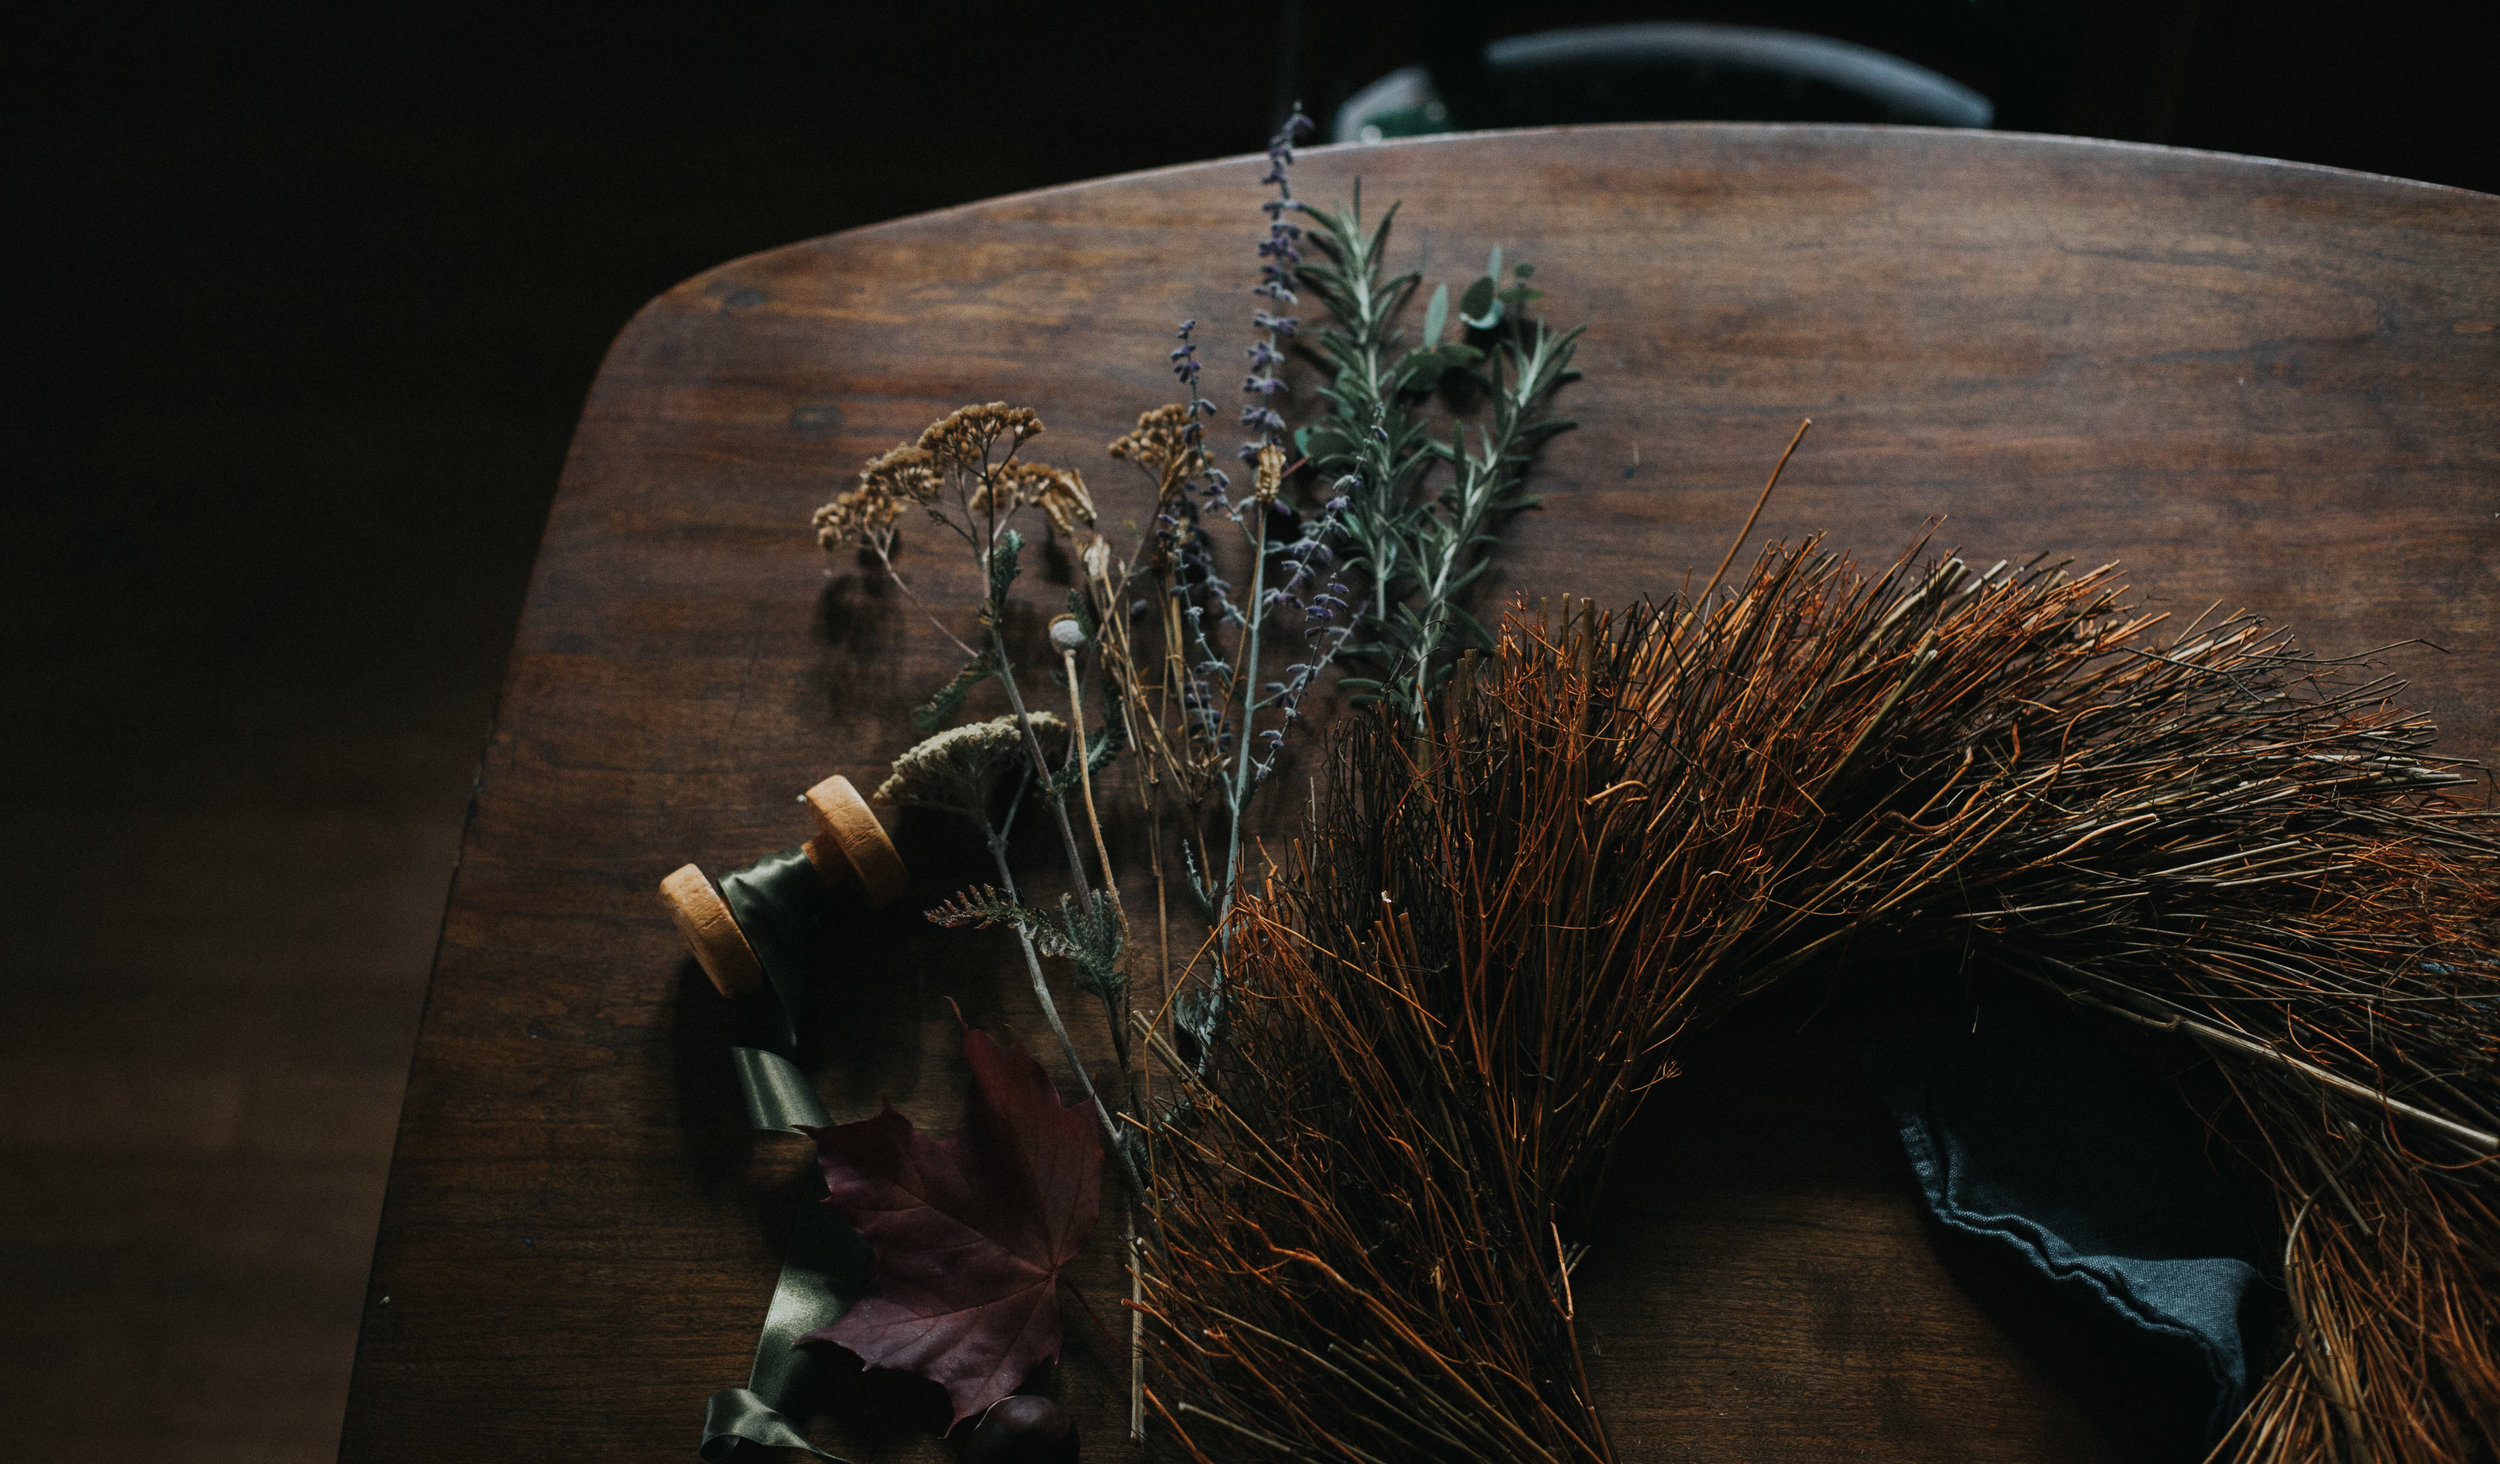
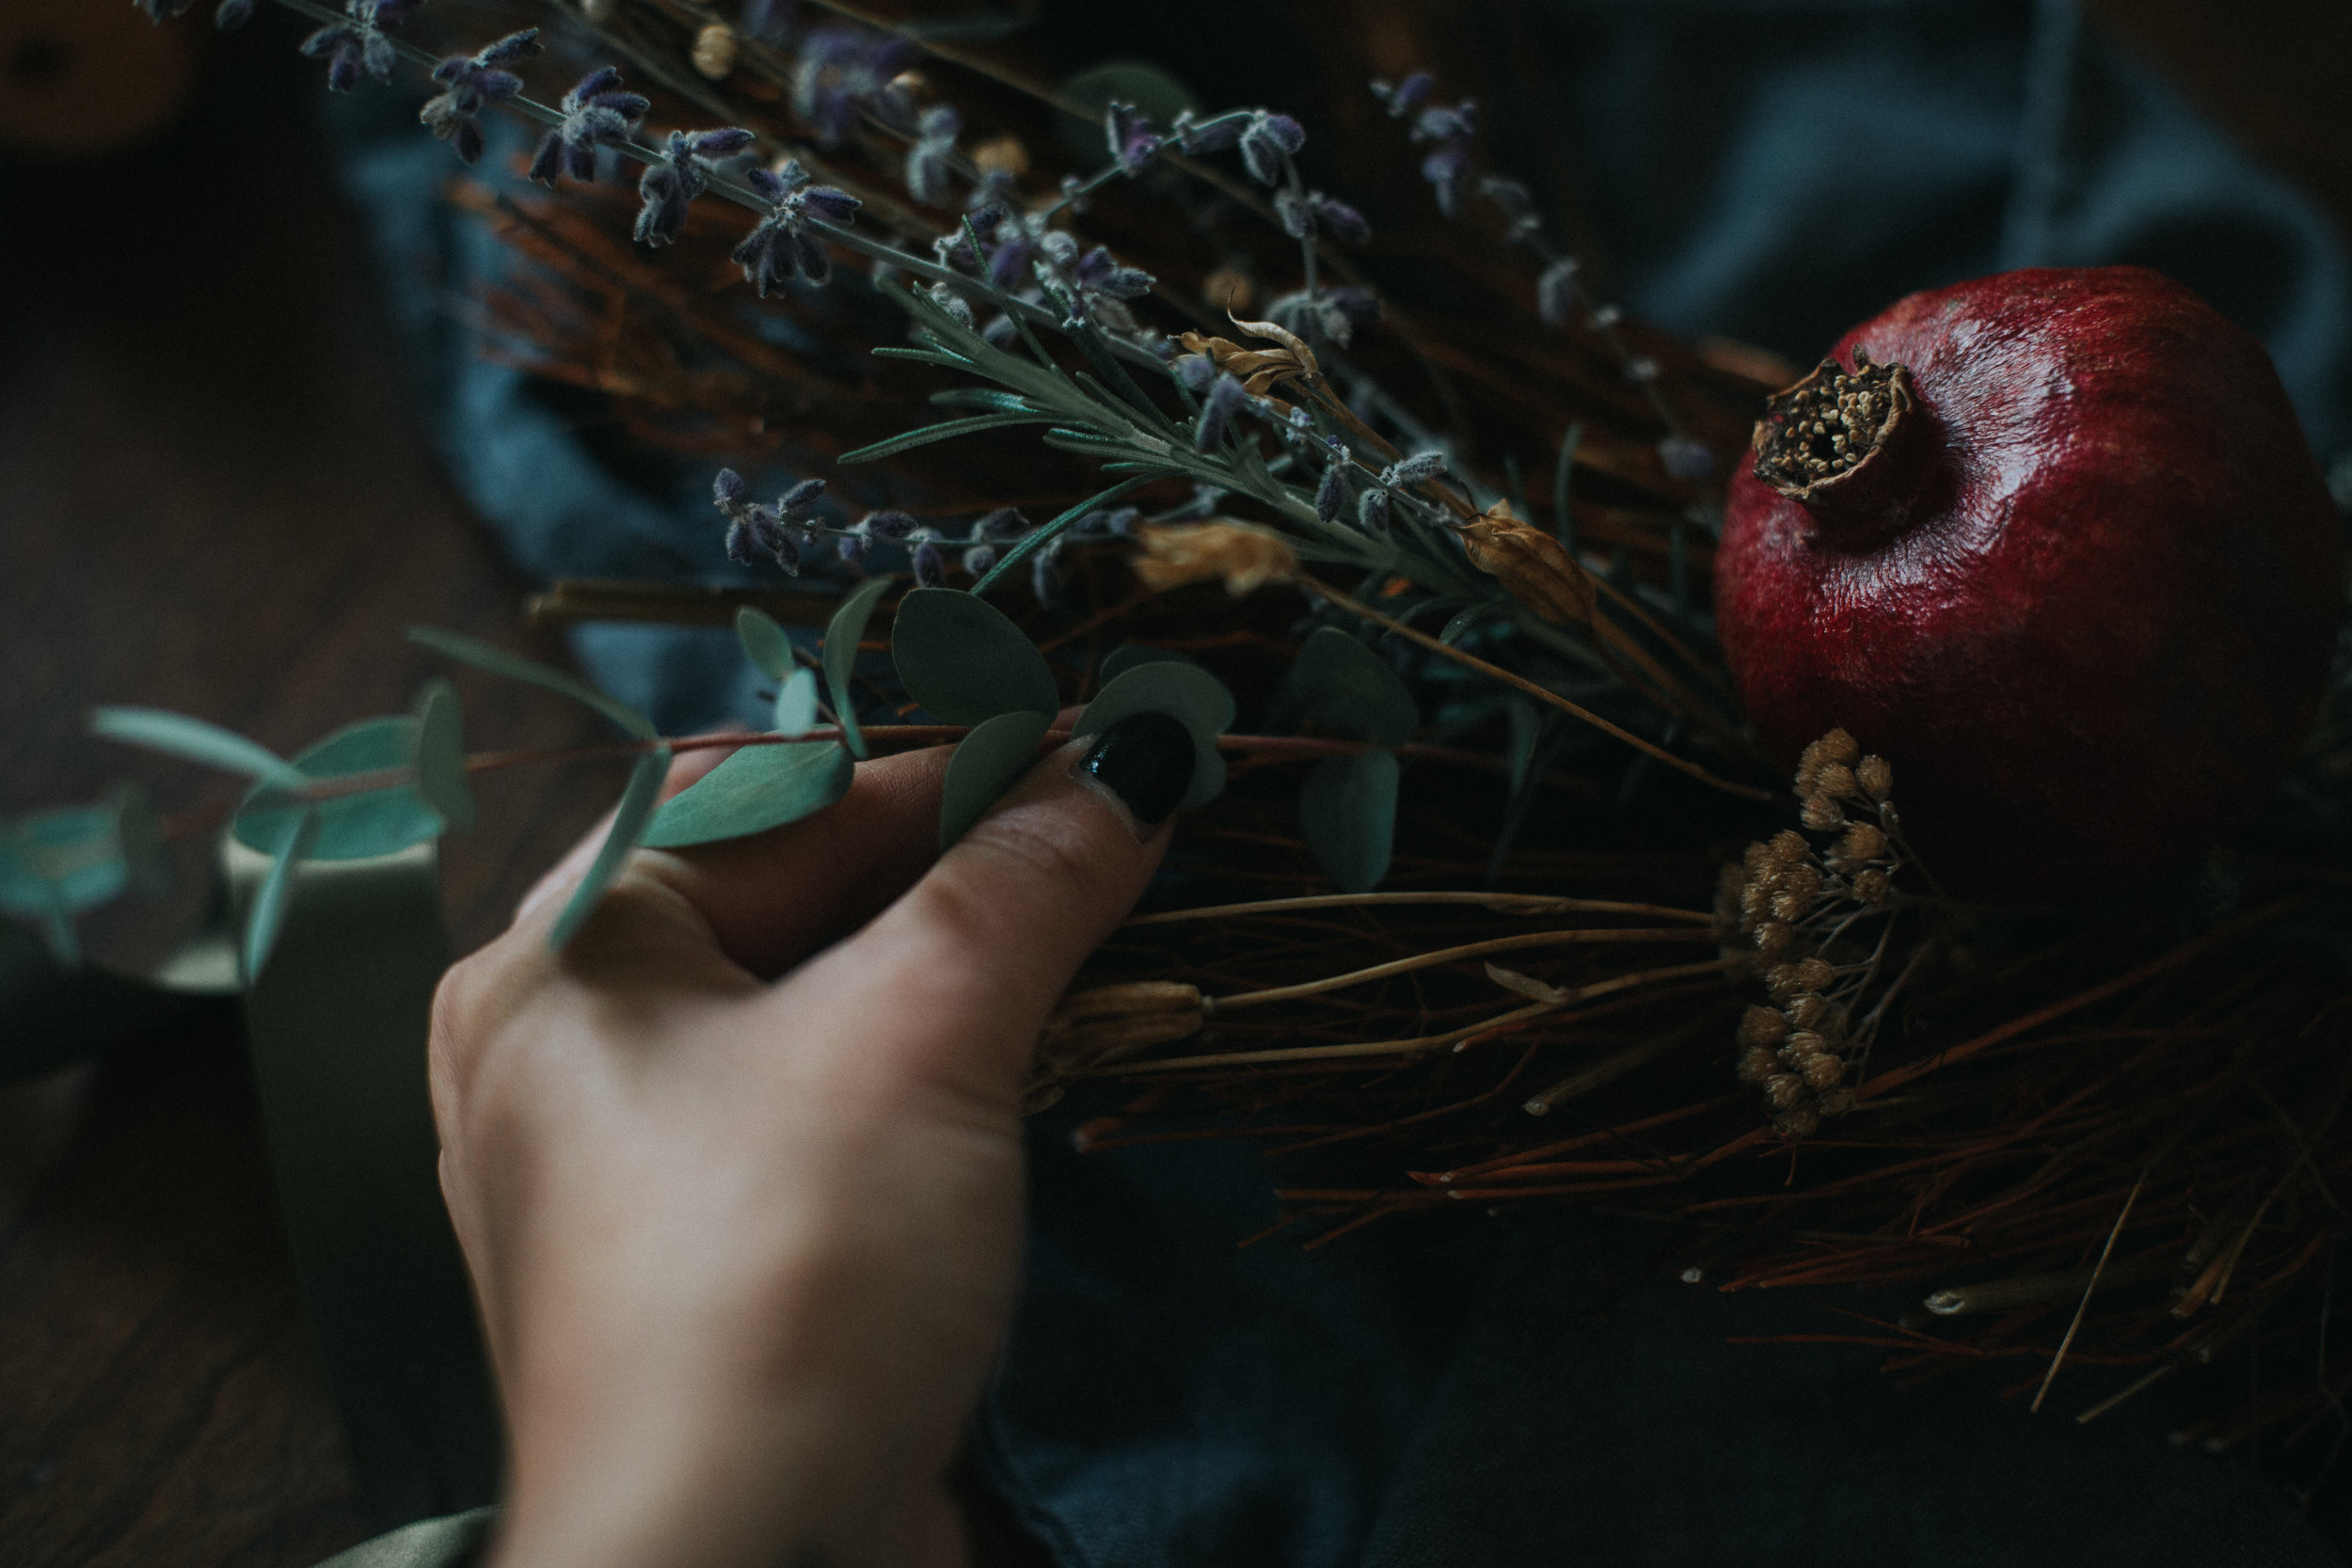
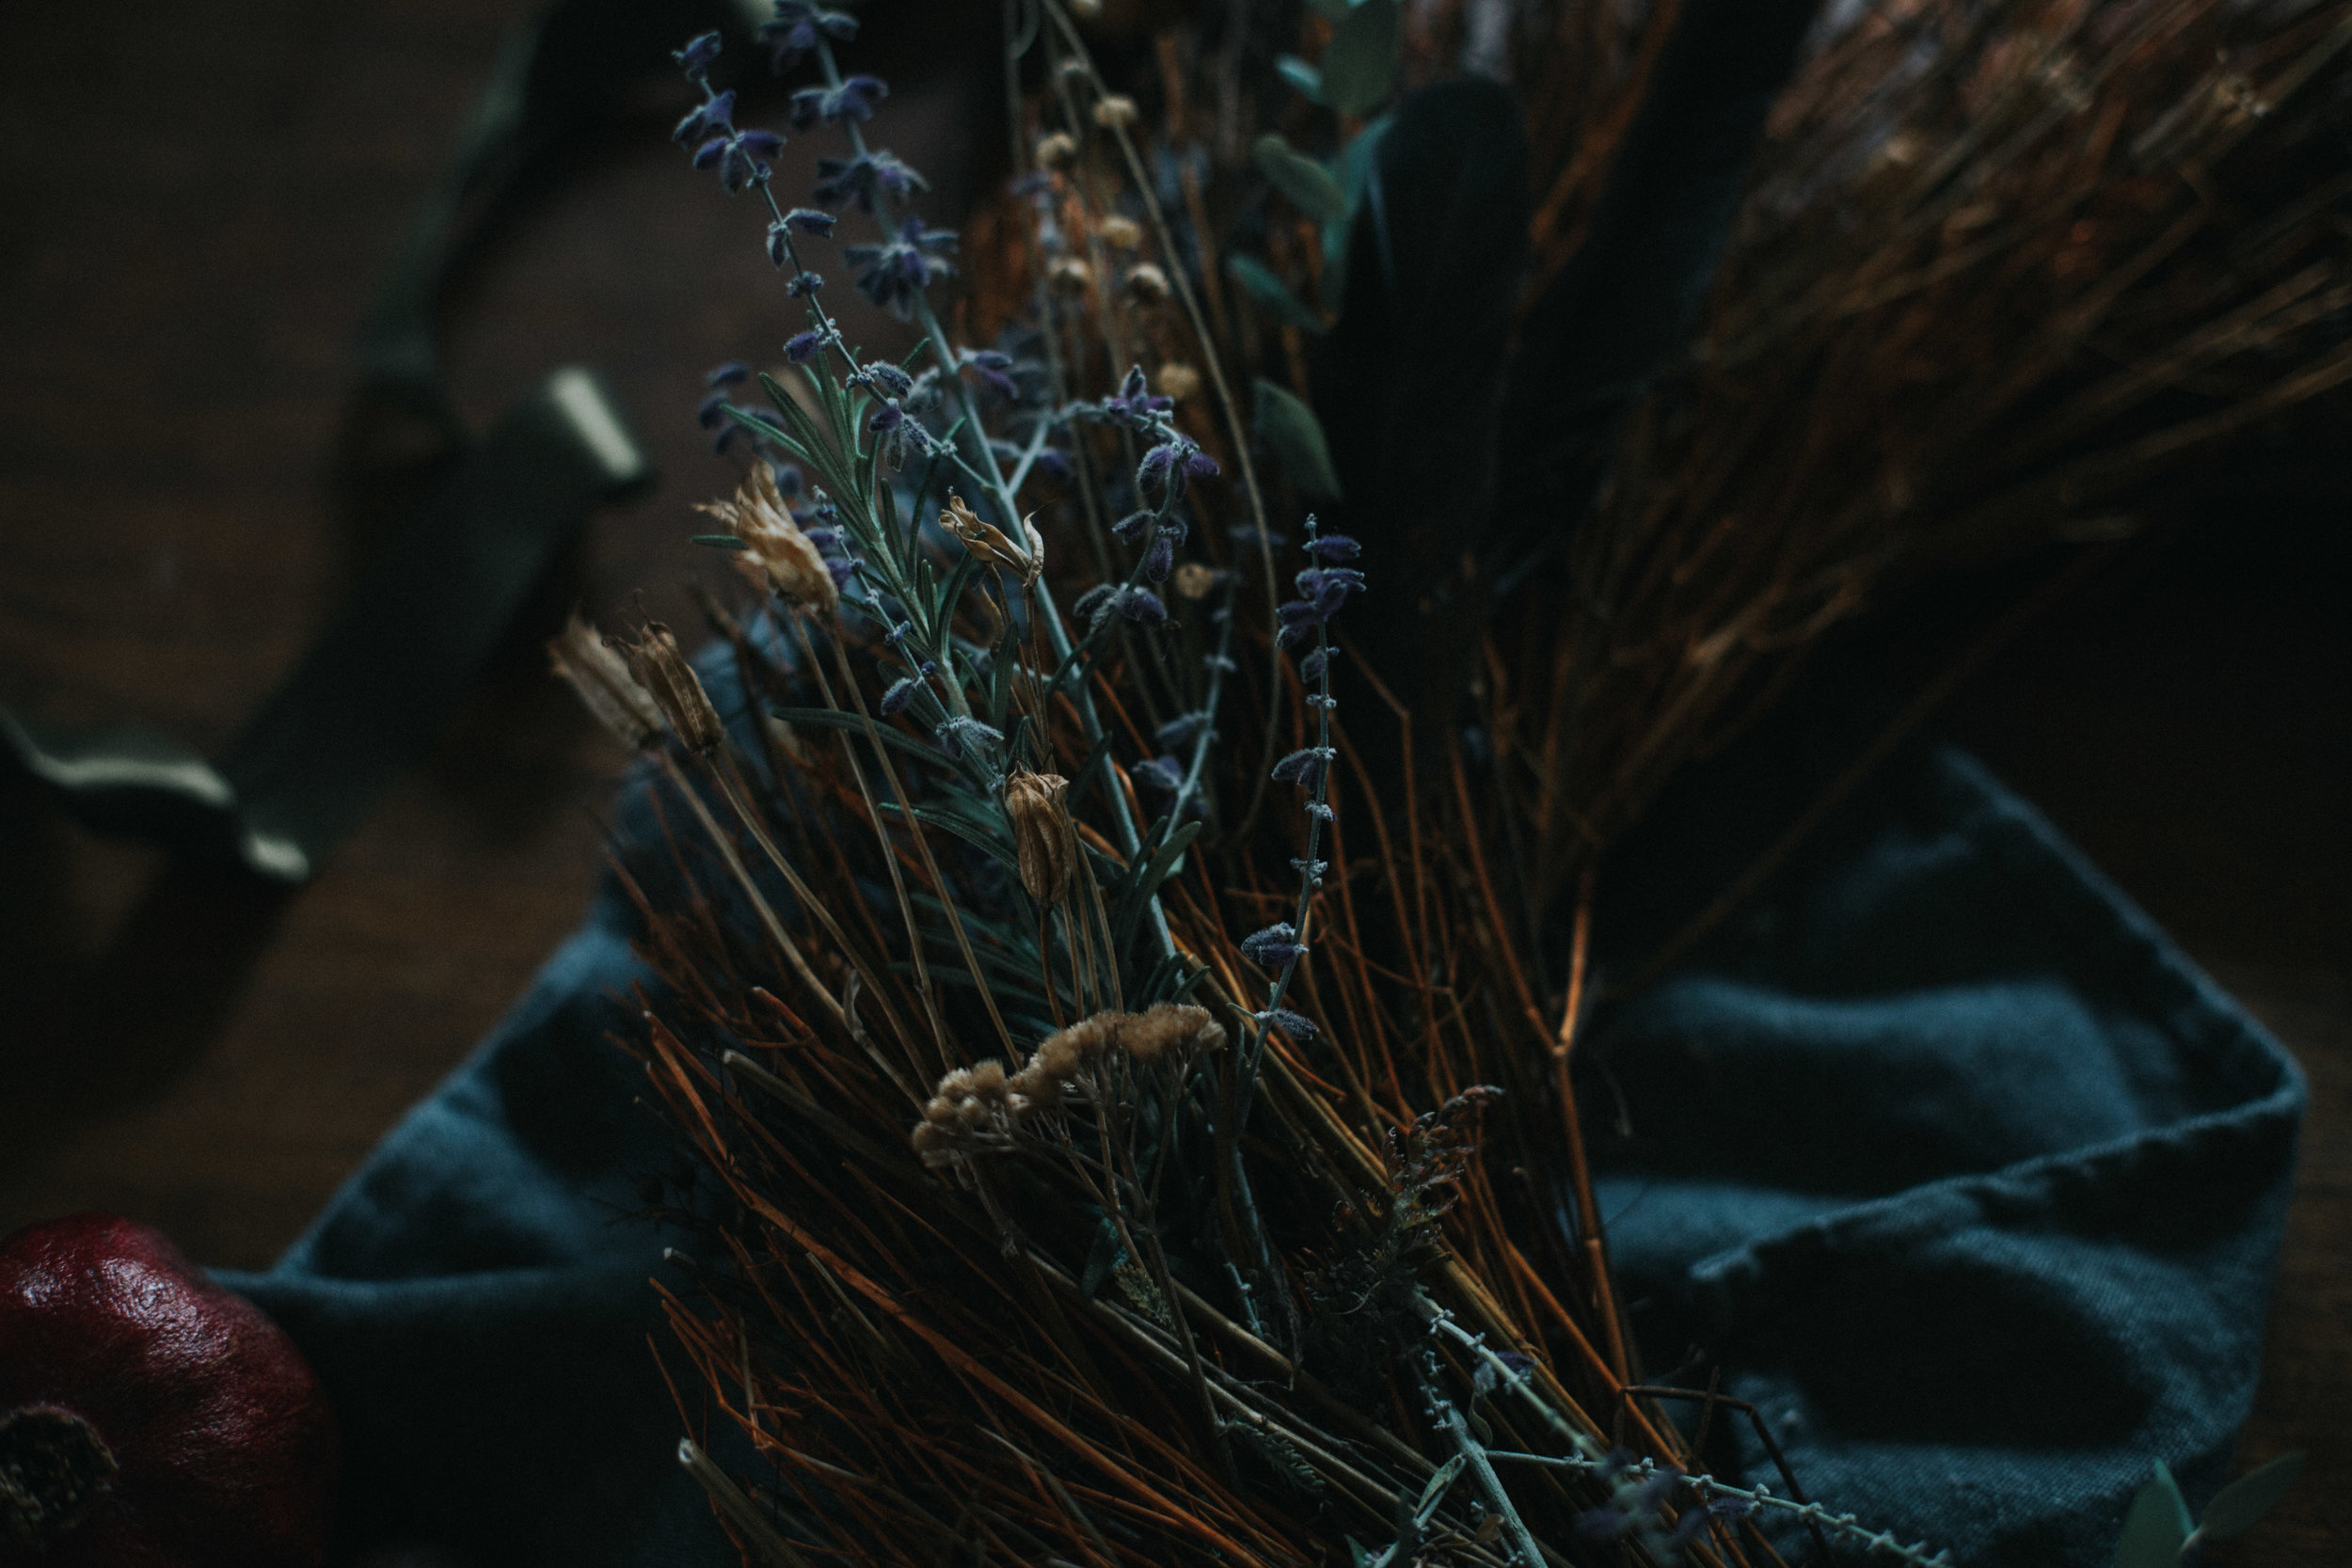
I spent a few minutes wandering through the garden, clipping hearty herbs that had managed to escape the morning frosts, and departed flowers that had dried on their stalks. I used whatever called out to me. Rosemary for remembrance and protection. Lavender for a restful hibernation. Yarrow to shield against melancholy. Eucalyptus to remove negativity. Black feathers because they just kept appearing in my path. I highly recommend wandering through your own yard or neighborhood and taking small clippings of whatever catches your eye. Let your intuition guide you. Don’t worry if they are dead or faded, they will look beautiful. I also had a few pomegranates rolling around our kitchen fruit bowl, which I included to honor Persephone’s decent into the Underworld.

This quiet ritual takes just a few minutes and is best performed with a steaming pot of tea and a few glowing candles. There are no rules or complicated steps. No incantations to recite. Just plants and herbs and a few moments of quiet intention.

Wishing you all a magical, mystical Samhain, dear ones.

fallwreath-7200.jpg
Posttitle-Samhainblessingwreath.png
 

Supplies:

  • Wreath base (I picked this one up years ago for just a few dollars at a craft store. Every few months I change out the flowers and herbs to honor the changing seasons.)

  • Foraged herbs and flowers

  • Pomegranate + small kabob dowel (optional)

  • Wire (whatever you have laying around.)

flowers-7192.jpg

Step 1:

Once you have gathered your clippings, start by playing around with the overall layout for your design. At this point you can just loosely stick them into your wreath base (not securing them yet) so you can easily experiment with what looks good where. Trim the clippings to size if needed, leaving enough stem to secure them to the base later. I find it’s easiest to start with the larger elements, and then weave in the smaller clippings to fill in the gaps. Like I said, there are no rules here. Just play with combining colors and textures until it starts to feel right. As you are working, see if you can tap into the energy of each plant. Notice the beauty of weaving together the natural cycles of life and death.

fallwreath-7257.jpg
fallwreath-7230.jpg

Step 2:

Once you have settled on the placement of your clippings, begin securing with wire as needed. With this particular style of wreath, I was able to secure most of the stems simply by pushing them firmly into the base as far as they would go. During this stage, I like to visualize the intentions and feelings I am calling in and weave them into my wreath. If you are calling in protection and abundance, for example, visualize yourself in your cozy home, safe from the wind and rain, with a cup of tea and everything you need.

fallwreath-7242-2.jpg

Step 3:

If you are attaching larger fruit like pomegranates or apples, insert the sharp side of the kabob dowel firmly into the bottom of the fruit. This gives the fruit a nice long stem to securely stick into the base of your wreath. Watch out for the few drops of pomegranate juice that may escape…they stain big time.

fallwreath-7253.jpg

Step 4:

Stick the doweled fruit into the base of your wreath. Cut about an arms length of wire and begin wrapping it around the dowel and the wreath base to secure it.

fallwreath-7260.jpg

Step 5:

As you are working, hold your wreath up from the top center point (where it will hang) every few minutes to make sure the weight and balance are evenly distributed. You may find as you do this that certain elements need to be additionally secured or moved to keep from falling out. I found that 2 pomegranites was simply too heavy and ended up removing one. Perhaps you use these moments to reflect on the balance in your own life. Does anything need to be adjusted or redistributed?

fallwreath-7289.jpg
fallwreath-7273.jpg

Step 6:

Once everything is safely secured, you are ready to hang your wreath. I like to visualize a shield of protection as I hang the wreath on my front door. Maybe ring a bell or blow out your candle to complete the ritual. Whatever feels right.

fallwreath-7268.jpg
fallwreath-7304.jpg

xo,

Haileysignature.png
 
fallwreath-7300.jpg
October 30, 2018 /Hailey Faust
samhain, halloween, diy, witchy, witch, craft, wreath, fall, autumn
:: Celebrate, :: Make, :: DIY
1 Comment
edited (1 of 1).jpg

The Language of Flowers :: DIY Love Spell Bouquet

February 13, 2018 by Hailey Faust in :: Celebrate, :: DIY

I have always been fascinated by the Victorian language of flowers. By the idea that a bundle of fragrant Narcissus left surreptitiously on a doorstep meant unrequited love, while a single sprig of Oleander was a clear warning that the recipient should be very cautious. Acacias were for friendship, Melianthus for secrets, Hyacinths to beg forgiveness. Red Roses only if you were really serious about someone.

In an era when courtship was largely relegated to calling cards and chaperoned dances, flowers provided a covert way for lovers to make their true feelings known. And though the Victorian's obsession with floriography played a major role in it's popularity, they were by no means the first to attribute symbolic meanings to different plants. Many ancient cultures, including the Greeks and Egyptians, documented complex systems and symbols associated with the flora around them. Even Shakespeare was fluent in the language of flowers, as we see time and time again, most notably in Ophelia's famous speech, "There’s rosemary, that’s for remembrance. Pray you, love, remember. And there is pansies, that’s for thoughts...There’s fennel for you, and columbines..." (if you haven't read it, she goes on to slowly unravel while dancing with flowers and it's pretty much my favorite scene in all of Shakespeare.)

So for this year for Valentines, I teamed up with the wonderful Melissa Emily of Earth Within Flowers to create a conscious and intentional love token. Melissa sources all of her flowers from local farmers in the summer months, then dries them by hand for winter bouquets. What a lovely and earth-friendly alternative to the standard cellophane wrapped blooms we so often see piled into supermarkets this time of year. 

We wanted to create an arrangement that held layered messages and deep symbolism. Something that was thoughtful and seasonal. A floral love spell, of sorts. Each of these plants was chosen for it's heart opening and protective properties. A secret message of love and protection for your parter / mom / lover / kids / sister / bestie / self. ❤

flowers-3970-2.jpg
flowers-3889.jpg
flowers-3937.jpg
Posttitle-Recovered.png
 

Please note that even though we used dried blooms, you could easily create a similar arrangement with live flowers if that's more your speed. Just look up the traditional meaning and symbolism behind each stem to create your own secret love spell. 

flowers-3914.jpg

Step 1 ::  Start by creating a horizontal, rounded shape with branching foliage. Here we used eucalyptus and locally foraged juniper, which are both believed to provide protection.

flowers-3944.jpg
flowers-3904.jpg

Step 2 :: Next, add in your filler flowers. Anything that has sprays of multiple buds on the same stem works beautifully for this. Try to fill in the gaps between your foliage.  We incorporated local yarrow for courage, lavender for serenity + devotion, and white larkspur for lightness + laughter.

flowers-3841.jpg

Step 3 :: Next, pop in your focal flowers. We chose these sweet little peach and pink spray roses for love + desire.

flowers-3888-2.jpg

Step 4 :: The final step is to add in your "sparkle" flowers. These are pointed or uniquely shaped blooms that add interest and texture to your piece. Here we chose tulip pods, traditionally associated with declarations of love, and poppy pods for magical dreams. And that's it, dear ones! All that's left is to bundle up your floral love spell with a simple ribbon and handwritten note with the symbolism of each bloom.

flowers-3881.jpg
flowers-3955.jpg
flowers-3932.jpg

So much love and gratitude to Melissa of Earth Within Flowers for sharing her magic with us. Be sure to visit earthwithin.com to order something lovely and learn more about her eco-friendly-flower mission. 

Wishing you all my love today and every day.
xoxo,

Haileysignature.png
 
flowers-3860.jpg
February 13, 2018 /Hailey Faust
valentines, diy, valentines diy, flowers, slow live, the art of slow living, bouquet, language of flowers, last minue, last minute, holiday, dried bouquet, earth within flowers, eucalyptus, secret message, victorian, flower language
:: Celebrate, :: DIY
2 Comments
9holidaygifts copy.jpg

9 Simple and Intentional DIY Holiday Gifts

December 18, 2017 by Hailey Faust in :: DIY, :: Celebrate, :: Apothecary

There's still time, dear ones! We have scoured the Lovely Wild archives for a few of our favorite DIYs this holiday season. From herbal beard oil to hand-painted moon phase flags, each of these simple and intentional gifts can be made in a single afternoon. A lovely excuse to slow down and breathe deep and work with your hands. All you need is a few supplies and a fresh cup of peppermint tea. Oh, and a few inches of fresh snow if you have it. 

Featured
Apothecary :: New Moon Herbal Dream Pillows
DIY :: Sandlewood Beard Oil with Rosemary and Cedarwood
steam_20170129-_85B8307.jpg
Apothecary :: Mood-Lifting Lemon + Rose Winter Tea
Apothecary :: Elderberry + Echinacea Syrup & Golden Turmeric Milk
DIY :: Hand Stamped Brass Bracelets
Apothecary :: DIY Lemon + Rosemary Sugar Scrub
Easy Homemade Maple Pecan Granola
DIY :: Watercolor Moon Phase Flags
Dark Chocolate Cherry Almond Biscotti

Sending all my love to you and yours, sweet friends. 

xo,

Haileysignature.png
 
December 18, 2017 /Hailey Faust
DIY, holiday gifts, diy christmas gifts, christmas, herbal, apothecary, the art of slow living, slow living, holiday decorations, easy, last minute, the lovely wild, moon phase
:: DIY, :: Celebrate, :: Apothecary
Comment
20171122-_85B1765.jpg

Setting the Table :: the Art of Everyday Ritual

November 23, 2017 by Hailey Faust in :: Celebrate, :: DIY

As we retreat into the darker days of winter, I find myself deeply drawn to daily rituals. To simple acts like steeping and sweeping and setting the table. Making the bed. Stirring a pot of simmering soup. Perhaps it's the long dark nights, or the primal need to cozy in and hibernate. To turn inward. To retreat into our little burrows. Whatever it is, my homebody tendencies are off the charts right now. 

It's a little ironic that in this season of rest and retreat, it's so easy to get swept up in the cult of busy. To rush from place to place, laptop and presents and to-do lists in tow. To convince ourselves we don't have the time or space for slow living. I'm constantly reminding myself that all it takes is a little intention to transform daily chores into personal rituals. It doesn't need to be anything fancy. Quietly meditate while your tea steeps. Focus on clearing negativity as you sweep the kitchen floor. Light some candles on a weeknight. Start a gratitude journal. It can literally be anything. Whatever it looks like for you, finding ways to incorporate a little intention and ritual into daily habits can be a lovely way to stay nourished and grounded during the holiday bustle. 

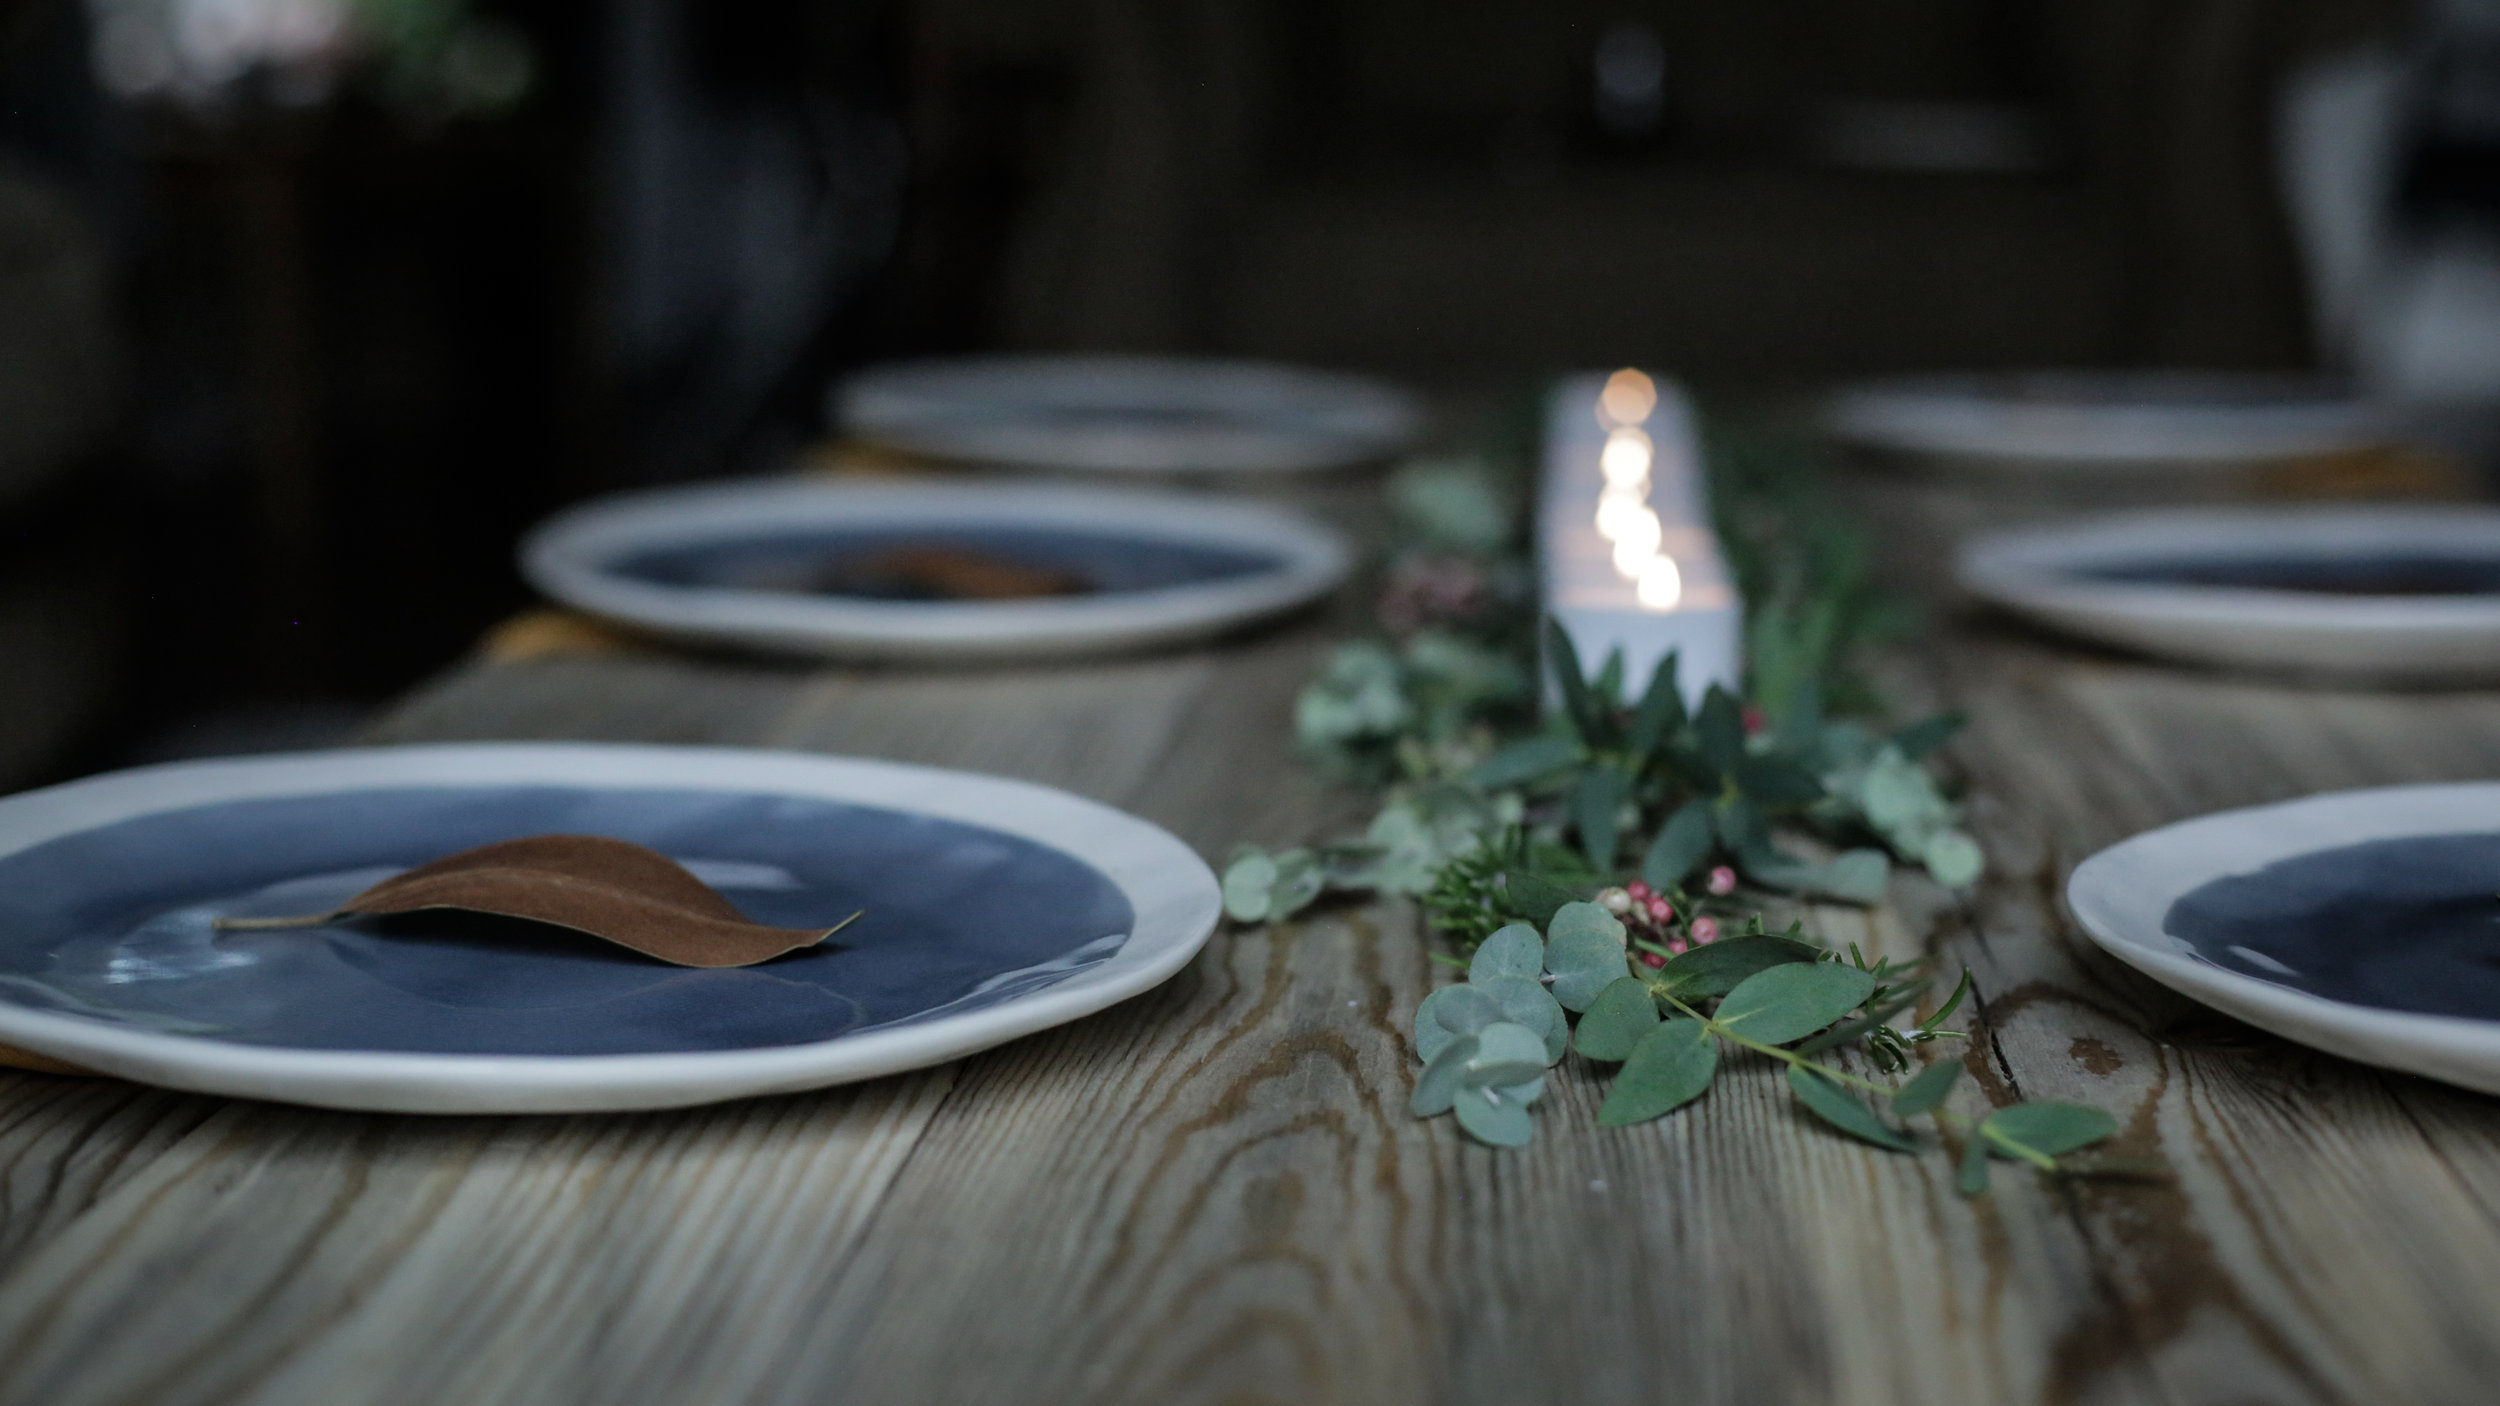
One of my favorite personal rituals is setting the table. I love to weave in a little symbolism. To play with herbs. Light a few candles. Maybe break out the nice napkins. It's my way of creating sacred space for dear ones to gather. An altar to honor togetherness. This winter pomegranate and eucalyptus tablescape is admittedly much fancier than I would normally attempt on a weeknight, but hey, it's the holidays. Pomegranates have long symbolized the decent of Persephone into the underworld and the seasonal transition into winter. They are associated with abundance and prosperity. Eucalyptus is believed to ward off arguments and clear any negative energy. Grey candles promote balance. Magnolia leaves for relaxation. A secret spell to bless our table.

Sending you all love and light and lots of hygge today (and everyday.) I am so grateful for each and every one of you. 

20171122-_85B1773.jpg
20171122-_85B1662.jpg
20171122-_85B1588.jpg
20171122-_85B1669.jpg
20171122-_85B1739.jpg
20171122-_85B1544.jpg
20171122-_85B1761.jpg
20171122-_85B1731.jpg

xo,

Haileysignature.png
 
20171122-_85B1836.jpg
November 23, 2017 /Hailey Faust
the art of slow living, holiday, decoration, decor, Diy, tablescape, natural, organic, eucalyptus, christmas, table, thanksgiving, ritual, slow living, hygge
:: Celebrate, :: DIY
Comment

Apothecary :: New Moon Herbal Dream Pillows

July 19, 2017 by Hailey Faust in :: Apothecary, :: DIY, Gifts

I've been having the strangest dreams lately. Dreams of stones and bones and old forest women. Of moons and mountains and ancient skeleton keys. Dreams heavy with a symbolism I can never seem to untangle. Songs that slip through my fingers the moment after I wake. Perhaps it's the lulling hum of our old ceiling fan. Or the warm breeze fluttering in the bedroom curtains. Or the late summer lightning flashing over the mountains. Whatever it is, it has been pretty magical.

There is something undeniably intriguing about the etherial nature of dreams. Perhaps that's why humans have always tried to decode them. To find meaning and symbols amid the bizarre and tangled plot lines. To interpret the images like runes spread upon a table. It makes sense when you think about it...dreams take us to the delicate space between our conscious mind and unconscious spirit. They allow us to peek below the veil. To see what might be lurking in the quiet corners of our psyche. To remember things our soul knows, but minds have forgotten.

This Sunday's New Moon in Leo is a particularly auspicious moment to look for the messages hidden in our dreams. The New Moon asks us to set intentions. To turn our gaze inward. To get very quiet and very clear about what it is we are trying to manifest. These simple Herbal Dream Pillows come together in just a few minutes and are a lovely personal ritual to honor the lunar cycle and connect to our subconscious. The herbs listed have been long prescribed by folklore for deep sleep and vivid dreams. To quiet the mind and soothe the spirit. To peek into the space between.

Wishing you a dreamy New Moon, dear ones. 


***Disclaimer: I’m not a doctor, nurse, or licensed healthcare practitioner. Some herbs and botanicals are not safe for pregnant or nursing mothers and may not be suitable to take with certain medications or conditions. This information is not meant to diagnose, treat, cure, or prevent any disease. Always consult your doctor before beginning any kind of new vitamin, herbal, diet, or exercise regime. Make sure to research all of the ingredients to make sure they are safe for you and your family. 

Supplies:

- Small linen draw string bag

- Lavender (for relaxation)

- Rose Petals (for love)

- Chamomile (for deep sleep)

- 1 bay leaf (for prophetic dreams)

- Lemon Verbena (for light and happy dreams)

- Sage (for cleansing and protection)

Instructions:

1. Start by dip-dying your muslin bag. I used some lovely indigo dye I had rolling around in the back of my craft closet. Follow dye instructions and allow bag to dry. Once dry, I used a small glass to trace the new moon with gold ink. 

2. Add your dried herbs to your moon pillow. There is really no precise formula here. Just add small amounts of each herb, smelling as you go until you reach your desired mixture. Follow your nose on this one. Don't forget to toss in a bay leaf or two to inspire prophetic dreams.

3. Place dream pillow beneath your pillow and breathe deep.

xo,

 
July 19, 2017 /Hailey Faust
New Moon, apothecary, diy, dream pillow, herbal, slow living, the lovely wild, the art of slow living
:: Apothecary, :: DIY, Gifts
1 Comment

DIY :: Sandlewood Beard Oil with Rosemary and Cedarwood

February 14, 2017 by Hailey Faust in :: Apothecary, :: DIY, Gifts

A fast and furious post for you today lovelies!

This little elixir comes to us from one of my very favorite souls - the lovely Kendra Potter of Sistermoon Wellness. Kendra whips up a batch of this fragrant oil for the bearded men in her life every holiday season. My husband has gotten so addicted to the stuff that come November he starts to drop her a series not-so-subtle hints that his supply is running low. It smells warm and earthy and woodsy and romantic all at once.  A subtle fragrance for the man who loves the mountains. 

And if you are a procrastinator like myself, you're in luck! This little gem only takes 5 minutes to mix up. Package it up in a vintage tin with a beard brush or comb and you have a unique and personal handmade gift he will actually use. 

Happy love day, dear ones!


***Disclaimer: I’m not a doctor, nurse, or licensed healthcare practitioner. Some herbs, botanicals, and essential oils are not safe for pregnant or nursing mothers or children and may not be suitable to take with certain medications or conditions. This information is not meant to diagnose, treat, cure, or prevent any disease. Always consult your doctor before beginning any kind of new vitamin, herbal, diet, or exercise regime. Make sure to research all of the ingredients to make sure they are safe for you and your family. 

Recipe by Kendra Potter. I used organic oils wherever possible. If you are looking for high quality essential oils, I highly recommend our friends at White Stone Essentials. 

Ingredients

  • 2 oz organic Jojoba Oil

  • 7 - 9 drops Cedarwood essential oil

  • 7 - 9 drops Rosemary essential oil

  • 7 - 9 drops Lavender essential oil

  • 4 - 5 drops Sandlewood essential oil

  • 4 - 5 drops Cypress essential oil

  • 4 - 5 drops Rose essential oil

Instructions

1. Add jojoba oil to a small vial. I found that the metal tip of a pastry bag makes a perfect little funnel.

2. Add all oils, feeling free to modify amounts to preference.

3. Close vial and shake well. Use a few drops in beard after bathing.

xo,

 
February 14, 2017 /Hailey Faust
diy, christmas, diy christmas gifts, homemade, beard, oil, recipe, diy gifts for him, holiday, beard oil, slow living, the art of slow living, Holiday, apothecary, gifts, presents, winter
:: Apothecary, :: DIY, Gifts
Comment
20161211-_85B7405-2.jpg

DIY :: Dried Orange Garland and Cloved Pomanders

December 13, 2016 by Hailey Faust in :: DIY, :: Celebrate

When I think back on childhood holidays, my earliest memories are wrapped in the warm glow of white candles. I see baskets of apples and hot waffles with jam and garlands of happy gingerbread men in the window. My father teaching me to ski in our driveway. Making salt dough ornaments in a cozy mountain hytte with my mom and siblings. Long nights and endless snow. We left Norway when I was only seven, but the quiet simplicity of a Scandinavian Christmas planted deep seeds I still carry. 

The Norwegian concept of koselig, similar to the Danish hygge, is one that has no direct translation. It can be used as both a noun and a verb and essentially captures the cozy contentedness you feel when you warm chilly feet by the fire or gather with dear ones over a candlelit dinner at home. Koselig is simple and handmade and nurturing. It values the little things. The important things. Like fresh coffee and good friends and cozy slippers. In many ways, koselig is the original art of slow living.

When it comes to the holidays, I love to make our home feel warm and welcoming and koselig. I tend to keep decorations simple and handmade. Foraged juniper boughs. Straw ornaments. Endless white candles....you get the idea. I always make a few batches of these dried orange garlands to hang in windows and gift to friends. The winter light shines through them like little stained glass windows and makes me smile. Little drops of sunshine to brighten the dark winter days.

This year I also took a stab at making simple orange pomander balls to bring in the scents of winter. You guys - I don't know how I have never tried these before! First off, they smell incredible. Warm and spicy and Christmasy. And the super complicated DIY instructions? Stick some cloves in an orange. That's it. Done. They look lovely hanging on the tree or in a happy bowl on the kitchen table (where I may or may not have grabbed one as I rushed out the door for a last minute hostess gift.) Everybody wins. 

Some years it's all too easy to get lost in the hustle of the holidays. To get overwhelmed by the commercialization and travel itineraries and endless to-do lists. To lose sight of the quiet moments that make this season magical. I think we could all benefit from slowing down and cozying in and lighting a few more candles. It's the most koselig time of the year.

Happy Holidays, lovelies. Hope your week is warm and fuzzy. 


Supplies

- Oranges or mandarins

- Wooden or metal dowel

- Twine or ribbon

Instructions

1. Cut the oranges into very thin slices (about 1/4" if you can). Some will be thicker than others. Just remember, the thinner the slices, the less time they will take to dry.

2.  If you don't have a food dehydrator, I can't recommend them enough. It has quickly become my favorite kitchen tool. I purchased this one on Amazon a few years ago and we get a ton of use out of it for everything from kale chips and fruit leather, to dried herbs and sun-dried tomatoes. This thing pays for itself in time and deliciousness. 

Dehydrator: Place the orange slices on the drying racks of your dehydrator. Set the temperature to 135° F and leave to dry for 12 - 14 hours. Flip after about 8 hours. You'll know they are done when you press your fingernail into the slices and they crack or crunch a bit. Make sure they are fully dry and not sticky or soft. 

Oven: Preheat the oven to 170° F or as low temp as it will go. Place the oranges on a parchment lined baking sheet and place in the oven, leaving the door propped open a few inches. Bake for 3 hours, then flip oranges. Continue to bake until they fully dry out (usually about 8 hours.) I would recommend checking in every hour near the end until they reach the desired texture and lose their stickiness.
Note: I haven't used the oven method in years since we purchased our dehydrator. You may need to add or decrease baking time depending on the size of your slices and your oven. It goes without saying, but always babysit the oven when it is on for extended periods like this. 

3. Once the oranges are fully dry, use a wooden or metal dowel to poke one hole on the left and right side of the orange. Make sure they are parallel, as you will be threading the twine through them later. I like to place mine in the top third of the orange.  

4. Weave your twine through the holes to string the orange slices together. I like to hide my stitch on the back side of the orange.

5. Hang in a window where the winter light can shine through. I also hang any extra slices on the tree or use them to spruce up my wrapping!


Supplies

- Orange or mandarin

- Whole cloves

- Ribbon to hang (optional)

Instructions

1. Push the sharp end of the cloves through the skin of the orange or mandarin. Create a simple design by studding the cloves around the orange.

2. Hang to dry with ribbon. As the orange dries out, it will fill the house with a spicy, wintery aroma.

xo,

 
December 13, 2016 /Hailey Faust
orange, orange garland, christmas, diy, the lovely wild, the art of slow living, lifestyle blog, holiday, decoration, organic, pomander
:: DIY, :: Celebrate
1 Comment

DIY :: Bay Laurel Eucalyptus Wreath & the Dark Days of Winter

December 01, 2016 by Hailey Faust in :: DIY, :: Celebrate, :: Make

For thousands of years, the approach of winter was a dire, fearful time for humans. It meant famine and illness and death were on the horizon. That the world would be plunged into relentless cold and darkness and that not everyone would survive. It was a time to huddle together. To batten down the hatches. To hide away and hold on till spring.

December (and the winter solstice specifically), marked the pinnacle of this desolate season. But many cultures also used this as a time to celebrate life and light in the face of the encroaching darkness. To gather with loved ones around the fire. To feast and sing and share what little we had squirreled away. To celebrate the simple fact that we were still alive. Now don't get me wrong, humans have plenty of flaws, but I think there is something deeply beautiful about that. That on the longest, coldest nights of the year, when all was quiet and frozen and bleak, we shined our flickering lights into the vast darkness and found joy. 

I love that you can still find remnants of these ancient rituals in our modern holiday traditions. Little echoes of forgotten customs. We still hang lights in dark windows. We feast and sing. We bring in evergreens that don't mind the cold. Perhaps one of the most ubiquitous of these symbols is the humble wreath. There are many theories on the origin of this tradition, but my personal favorite is that the hearty evergreens and circular shape represent eternal life in the face of winter. We hang them in our doors and windows to remind our neighbors, "It's alright, friends. Even on the darkest days of the year, something green remains." What a lovely thought.

I made this simple wreath with bay laurel and eucalyptus and an old embroidery hoop. Nothing too fancy. Just simple supplies, a little time and a cup of peppermint tea. It felt good to slow down and breathe deep and play with plants for a while. A nice slow segue into the bustle of the holiday season. 

Happy December, dear ones. Here's to sharing and celebrating and shining our little lights. So much love to you. 


Supplies

- Hearty greens (I used branches of bay laurel as my base. They hold up nicely and smell amazing)

- Smaller greens & berries for texture (I used gunny, blue and seeded eucalyptus as well as a few dried pepper berries)

- Embroidery hoop of any size

- Floral wire

- Ribbon

Instructions

1. Start by cutting your bay laurel branches into more manageable lengths. I cut mine into roughly 1 foot sections. The size of these will depend on the size of your embroidery hoop. I set aside a few small sprigs to fill in any sparse spots later.

2. Play with the natural curve of the branches to find where they want to lay on the hoop. Word to the wise: don't try to fight the natural curve of the branches. Let them lay how they want to lay and work around their natural shape. Bay laurel lends itself beautifully to a circular wreath. Using segments of floral wire, begin wrapping the branches in segments around the hoop. It's okay if the wire is visible or there are some bare spots. You can cover these will smaller greens later. Use small lengths of wire to attach each branch in 2 - 3 spots.

3. Once you have your base greenery secured around the hoop you can start playing with the smaller greens. I wove in blue and seeded eucalyptus to fill in bare spots and cover any exposed wire. I also added a few more sprigs of bay laurel here and there. Even some pheasant feathers would be cool. There is no right answer here! Have fun and play with finding the right balance. I tend to like things a little more organic and unfussy so I left mine a bit wild. You can easily tame it with some additional floral wire if thats more your style. It helps to hold the wreath up to the wall now and then to get perspective and make sure the weight is balanced.

4. Tie a pretty ribbon or twine around the top of the wreath. You can either use this to hang it, or if you have a wreath hanger you could opt for the traditional bow. As a finishing touch, I wove in a few dried pepper berries left over from our Thanksgiving table. Those little guys last forever. 

5. Hang and enjoy! You can definitely hang these little loves outside, but I couldn't bare to be parted with the spicy, earthy aroma of the bay leaves. I opted to display ours in our front window so it can be seen from the street, but we can still smell it in the house. Everybody wins.

xo,

 
Follow my blog with Bloglovin
December 01, 2016 /Hailey Faust
wreath, christmas, celebrate, the lovely wild, slow living, lifestyle, craft, holiday, decoration, diy, eucalyptus, homemade, organic, natural, apothecary, the art of slow living, handmade, simple christmas decorations
:: DIY, :: Celebrate, :: Make
3 Comments

A Foraged Thanksgiving Table & Frost Kissed Cranberries

November 22, 2016 by Hailey Faust in :: Celebrate, :: DIY

There is one spot in our home we always seem to gravitate to. A warm little corner perfectly suited for morning coffees and late night cribbage and quiet moments alone. For simple evenings spent with good friends, sharing food and stories. Laughing. Being together. They say the kitchen is the heart of the home, but I have a sneaking suspicion it's actually the table. 

For years we all crammed around our tiny kitchen table, bumping elbows and balancing toddlers on laps. It was close and cozy, but often left someone standing at the counter or retreating to the couch in search of a seat. So my ever-talented husband built this gorgeous blue spruce coffee / dining / everything table, which has quickly become the centerpiece of our household. He made this in like an afternoon, you guys. He's like a little wood gnome, that one. And I am totally smitten with the result. There is something so grounding about sitting on the floor. Down-to-earth in the most literal sense. And lord knows I love to set a pretty table.

Setting a table can feel like something of a lost art these days. A relic of a bygone era of stuffy place cards and pickle forks. But I think there's something deeply satisfying about creating a lovely space for dear ones to gather. To set the vibe. To make things a little special. So this Thanksgiving, I wanted to create a table that felt simple and balanced and seasonal. Pretty and inviting and unfussy. 

I started by foraging through the garden and chilly neighborhood alleys for the heartiest herbs. The ones that have managed to survive early morning frosts and howling November winds. I returned with pink ears and cheeks and a fragrant bouquet of rosemary, sage, thyme, and eucalyptus. I supplemented with aromatic pepper berries and magnolia leaves from Habitat, my favorite little neighborhood flower shop, and mixed them in with this simple candle train I found for pennies at the flea market. The whole display cost less than a bag of coffee and smelled amazing.

I also whipped up this classic pumpkin pie with frost kissed cranberries (because c'mon, what's Thanksgiving without pumpkin pie?) I thought about writing a whole DIY on the sugared cranberries, but they are so embarrassingly easy it seemed like overkill. Simply dissolve 1 cup sugar with 2 cups water on the stovetop. Pour the mixture over a bowl of cranberries and refrigerate overnight. In the morning, drain the cranberries and lay them out on parchment paper. Roll them in fresh sugar and let dry for 2 hours. They taste delicious and look sparkly and festive on the table. Easy. Peasy. 

Hope you all have a lovely, restful holiday weekend filled with love and food and gratitude. I am thankful for each and every one of you. Happy Thanksgiving, dear ones! 

20161120-_85B0539.jpg
20161120-_85B0269.jpg

xo,

 
November 22, 2016 /Hailey Faust
thanksgiving, table, tablescape, the art of slow living, christmas, holiday, diy, natural, hygge, organic
:: Celebrate, :: DIY
Comment

Apothecary :: DIY Rose Water

August 15, 2016 by Hailey Faust in :: DIY, :: Pamper, :: Make, :: Apothecary

And just like that, it was August.

Slowly but surely, summer is slipping quietly out the back door, leaving only a few precious weeks of bursting gardens and heirloom tomatoes and sun-drenched afternoons trailing behind her. I love how everything becomes a little wild this time of year. A little overgrown. Untended. Abundant. Exploding with life. Maybe it's the heat, or the heady scent of jasmine, but these final weeks of summer always makes me a little dreamy. Nostalgic. Less bound to reality. 

I'm always looking for ways to preserve the last few golden drops of sunshine and squirrel them away for the coming season. A steaming cup of lemon verbena tea and a jar of wild huckleberry jam can go a long way in the cold dark days of winter. January Hailey is always elated, and a little surprised, that August Hailey had a few fleeting moments of foresight.

Distilling a batch of rose water is one of my favorite late-summer rituals. An ancient remedy, rose water can be used in everything from facial toner to teacakes. Cleopatra swore by rose water for supple skin and, according to legend, Michelangelo drank it every morning with his tea. There is old magic in this stuff. I personally like to sprits a little on clean sheets and laundry, or add a tablespoons to bath water if I'm feeling extra fancy. It can even be used in the kitchen to add a delicate floral note to aromatic dishes and sweets, or as a cooling body mist on hot days. The possibilities are endless. A few minutes of time invested now will pay itself back ten-fold when you have this lovely tincture waiting in your apothecary.  

The key to high quality rose water is (surprise, surprise) high quality roses. Be sure to use only fresh organic roses that have never been sprayed with anything. The more fragrant, the better. This is the perfect project for the rose bush out back that has started to shower her petals. There is something deeply satisfying about finding a second life for fading blooms. 


You Will Need: 

- Fresh, fragrent organic rose petals

- 1 tray of ice cubes

- Large stock pot

- 2 oven safe jars or ramekins 

- Distilled water

Instructions:

1. Separate the petals from the roses and rinse with fresh water to remove any dirt or insects. 

2. Place petals in a large stock pot. 

3. Place a wide-mouth jar or ramekin upside down in the center of the pot. This is essentially just used as a base to lift the second jar off the bottom of the pot. Place the second jar right-side up on the ramekin. This jar will collect the rose water.

4. Fill the pot with water until it just covers the rose petals. The collection jar should be above the water line. Place the lid upside down on the pot and heat on medium until the water begins to boil. 

5. As soon as the water boils, place ice cubes on top of the upside-down lid. This will help bring the rose-filled condensation to the center of the lid where it will slowly drip into the waiting collection jar. 

6. Gently simmer for 15 - 20 mins or until the petals start to lose their color. Be sure not to over-cook, as this will dilute your rose water and change the fragrance. 

7. Turn off the heat and let cool for a minute. Using pot holders, carefully remove the lid which will now be filled with water from the melted ice cubes. Gently remove the jar filled with rose water (careful: it's hot!) and quickly transfer it to a waiting receptacle (or just put a lid on the jar.) The lovely rose oil you have just distilled can slip away as vapors so it's important to contain it quickly. 

8. Store in a cool dark place until you need a little splash of summer in your life. 

Have a lovely week dear ones.

xo, 

 
August 15, 2016 /Hailey Faust
DIY, apothecary, rose water, lovely wild
:: DIY, :: Pamper, :: Make, :: Apothecary
Comment

Apothecary :: New Moon Herb Bath

May 05, 2016 by Hailey Faust in :: DIY, :: Make, :: Pamper, :: Apothecary

The new moon asks us to set intentions. To turn inward and greet the part of ourselves we have maybe been neglecting. To take careful inventory and plant the seeds we want to grow. This Friday, May 6th, marks the new moon in Taurus. And this isn't just any new moon, dear ones.

It's got a special magic.

A knack for manifesting abundance and bringing things into the physical realm. It invites us to take the first step. To write it down. To get really specific about what it is we want. This is fertile ground, lovelies. 

And for those of us in the Northern Rockies, this new moon ALSO just so happens to hit right smack dab in the middle of our stunning-but-fleeting lilac bloom. Which is pretty much my favorite week of the year. Abundance abounds.

moonbath5.jpg

Since the new year, I have been marking every new and full moon with a moon bath and I am now totally addicted to the practice. Our deep, century-old porcelain bathtub has become a very sacred spot in our house. A quiet respite to soak and think and meditate and release. To sing and stretch and practice self care. To steep in all the luna love.

My moon bath recipe changes from month to month depending on what is in season and what's happening astrologically. Many of the herbs used in this recipe are prescribed by folklore for purification, release of negative energy and/or manifesting and were chosen specially for the new moon in Taurus. Feel free to substitute or amend this recipe, but make sure to research each herb or flower you wish to add to confirm it is safe to be used in a bath. 

So tonight, channel your inner Cleopatra and bathe yourself in herbs and petals by candlelight. It's a nourishing way to stay connected with the natural cycles of the moon and to make space to reflect on what you want to manifest in the coming month. Oh, and it smells amazing. Win-win-win.


Ingredients: 

Note: I don't use any specific measurements for the herbs. Just a handful of this and a pinch of that. Feel free to adjust amounts as you go. A little lavender goes a long way. :)

  • Lavender - for relaxation, release & higher consciousness
  • Sage - for cleansing energy
  • Rose petals - to manifest love & happiness
  • Rosemary - to enhance concentration - it is also full of anti-inflammatory & antioxidant compounds
  • Bay Leaves- for purification & protection
  • Lilac blooms - for their gorgeous scent and to honor the abundance of spring
  • Epsom salt - to detoxify the body
  • Pink Himalayan salt- to reduce inflammation and provide mental balance
  • Cheesecloth

Instructions:

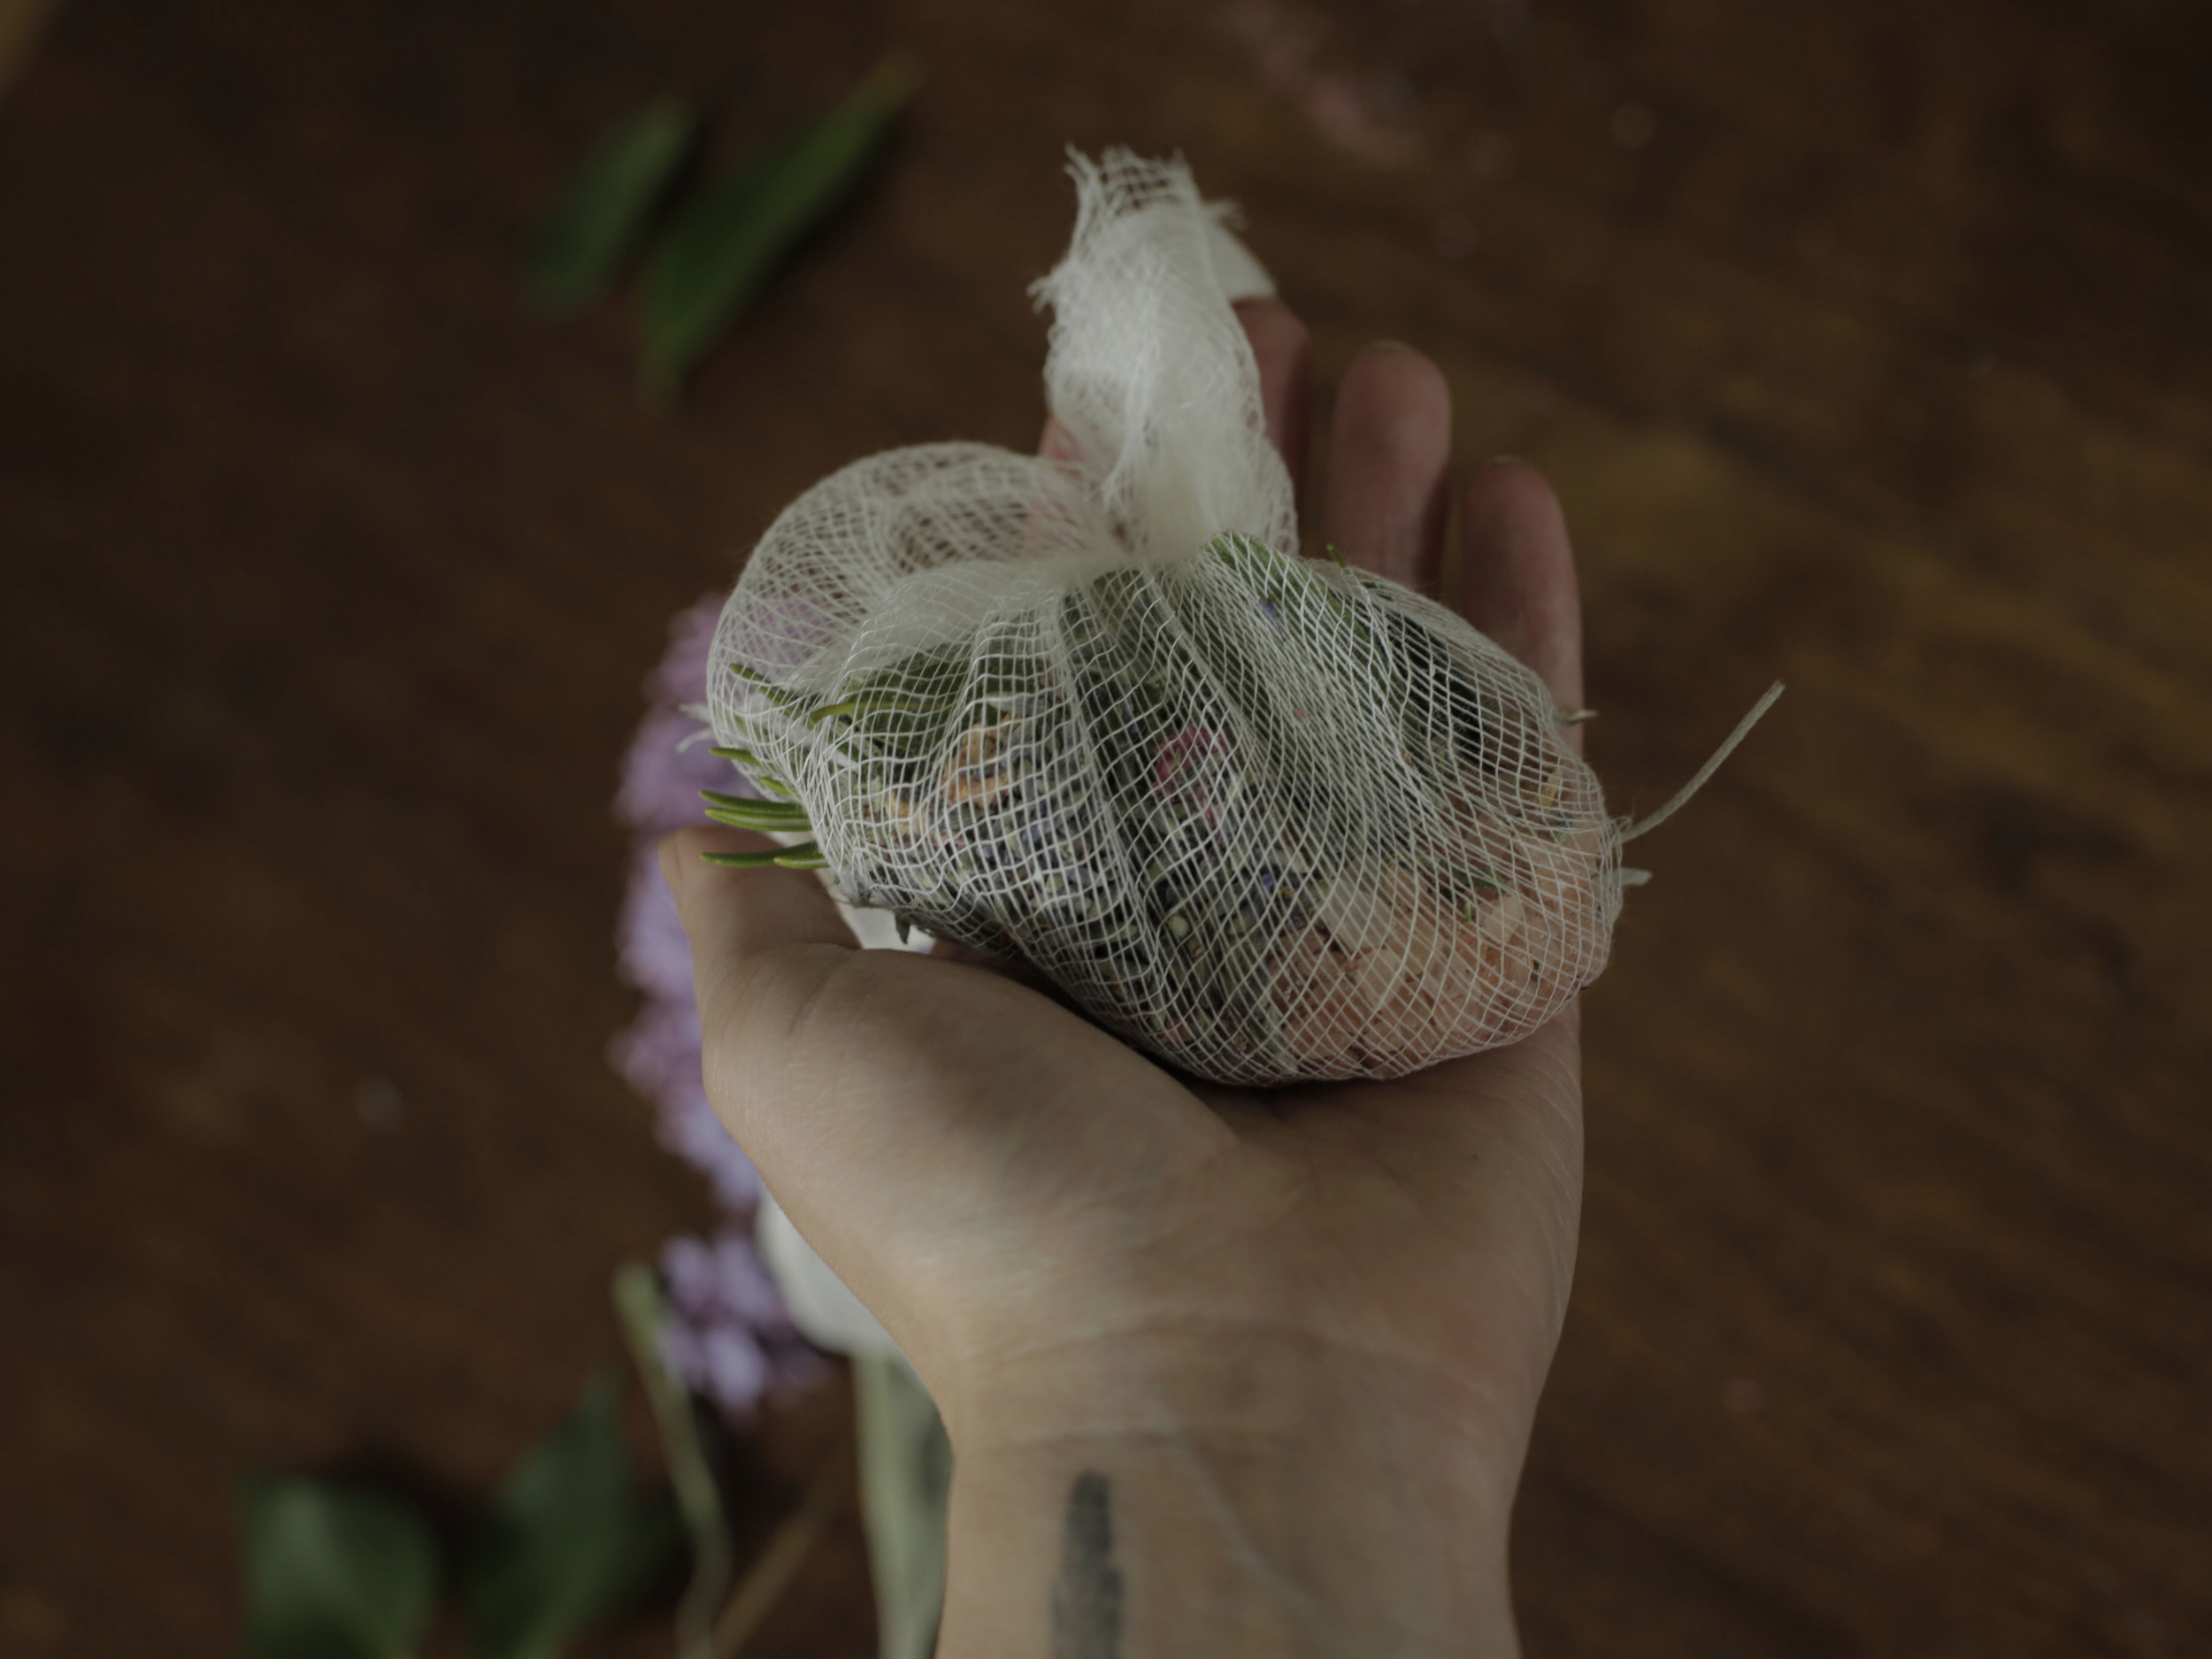
1. Start by crushing any larger dried herbs with a mortar and pestle. Then tie the sage, lavender, rosemary and bay leaves in a square of cheesecloth. I also added the pink salt to my cheesecloth but it ended up falling out so I wouldn't recommend it. You will use this bundle like a tea bag in the bath.  

moonbath9.jpg

2. Tie the bundle below the faucet so the hot water passes through it as the tub fills. This will wake the herbs up and infuse the bath water as it fills.

3.  As the tub is filling, add 1 to 2 cups epsom salts and 1/2 cup Pink Himalayan Salt directly to the bathwater. 

4. Throw in a handful of lilac blooms and bay leaves. You can also add rose petals or eucalyptus leaves.

5. After you have filled the tub, untie the bundle from the faucet and let it continue to steep in the bath water. 

6. Light a few candles and turn the lights out. Maybe dry brush your skin if you feel so inclined.

7. Focus on what you would like to manifest. On what you would like to release. Get specific. Breathe deep. Soak in the new moon energy.

Pro tip: After you have drained the bath, just let any remaining herbs or petals dry in the tub so you can easily sweep them out the next morning. Much easier than trying to clean them out while they are wet. 

Looking for last minute Mother's Day ideas? Simply use dried herbs instead of fresh and package your custom new moon bath blend in a pretty jar or tube. An easy, thoughtful gift for the lunar goddess in your life. 

xo, 

 
May 05, 2016 /Hailey Faust
Diy, gift, mother's day
:: DIY, :: Make, :: Pamper, :: Apothecary
1 Comment

DIY :: Red Cabbage Dyed Robin Eggs for Spring

March 26, 2016 by Hailey Faust in :: DIY, :: Celebrate

Hello lovelies!

How is it Saturday already? This week went by in a blur of meetings and deadlines and taxes and paperwork and left me daydreaming about running away into the forest or throwing my phone into the river. Or both.

Do you ever have times when you just feel completely overwhelmed with being "plugged-in" every second of every day? That is totally where I am at right now. So this morning I decided to gift myself the time and space to step away from my inbox and get my hands a little dirty. That always seems to help.

One of my nearest and dearest, Kendra Potter of Brooklyn Light, introduced me to the wonders of using red cabbage to dye eggs. You guys, this is crazy. Who would have thought the humble red cabbage would create such a gorgeous deep cyan dye? It feels a little bit like magic. 

These little guys can be hidden by your resident bunny or gifted to a friend or placed in a nest as a lovely spring centerpiece. Kendra and I even filled some with intentions for Tuesday's full moon. Who says Easter has a monopoly on eggs? I plan on keeping mine out long after the holiday to welcome the coming season.


Supplies:

- Eggs

- 1/2 of a red cabbage

- 3 TBS white vinegar

- Flower petals 

- Black / White paint (I used watercolors)

- Paper 

- Blue tissue paper

- Glue

Step 1: Making the Dye

Start by chopping up about half of a red cabbage. 

Step 2: Making the Dye

Add the cabbage to a medium sized pot with about 5 cups of water. Bring to a boil then turn down the temperature and simmer for 45 minutes. Remove from heat and add in 3 TBS white vinegar. Let cool and strain cabbage out with a collendar, collecting the dye in a jar or bowl.

Step 3: Dying the Eggs

Add your uncooked eggs to the dye and let sit for at least 3 hours. Keep an eye on them and remove when you have reached your desired shade of blue. I left mine overnight in the fridge to get this lovely deep cyan color. 

Step 4: Blowing out the Eggs

Using a needle or metal skewer, poke a small hole in the top and a slightly larger hole in the bottom of the egg. Then put your lips to the smaller hole and gently blow out the inside of the egg into a bowl. This will leave you with an empty egg shell. Rinse the shell out and allow to dry on a clean towel.

Step 5: Painting the Speckles

To create the speckled Robin's egg effect, I used an old tooth brush and flicked black and white paint onto the hollowed egg shells. 

Step 6: Filling the Eggs

Next I filled the eggs with a natural confetti made of rose petals, lavender and dried lemon peel as well as little love notes and fortunes for spring. Gently push the flower petals through the larger hole in the bottom of the egg. To insert the note, simply roll it up as tightly as you can and slip it into the egg after the flower petals. 

Step 7: Sealing the Hole

I just happened to have a little bit of peacock blue tissue paper which worked perfectly to seal up the holes in the top and the bottom of the eggs. Serendipity! I just used a dot of Elmers glue on the tissue and smoothed it over the holes.

Step 8: Break the Eggs!

Make sure your recipient knows to break open the egg to find the surprises you have hidden inside!

Happy Easter everyone! Wishing you a happy, restful weekend.

xo, 

 
March 26, 2016 /Hailey Faust
:: DIY, :: Celebrate
Comment

DIY :: Hand Stamped Brass Bracelets

March 14, 2016 by Hailey Faust in :: DIY, Gifts

March blew in on a cold wind from the east and brought with it the smell of fresh rain and the promise of Spring. It's coming, you guys. Spring. Is. Coming. There may still be a few late snows standing between us and it, but the light at the end of the tunnel is growing brighter every day. In like a lion, out like a lamb...isn't that what they always say?

The first fluttering breaths of spring are some of my favorite moments of the whole year. There is something so lovely and cleansing about throwing open the long-sealed windows to welcome fresh air into the house. This season buzzes with new energy. It encourages us to venture out from our cramped dens to stretch our legs and feel the cool breeze against our skin. To let the smell of wet soil and new grass fill our nostrils and refresh our spirits. To plant seeds of both the vegetable and spiritual variety. To sweep out the old and create space for the new.

Spring cleaning. It's a thing for a reason. 

Rooster and I spent the weekend shaking off the dust of winter and embarking on our own mini spring clean. We moved into this nearly century-old house on the first blizzard of winter (literally - 10" of snow the day we moved in), so we are happily unearthing little surprises that were hidden by the snow until now. Yesterday, R discovered a secret bed of irises sprouting triumphantly near his wood shop. They had been completely covered by a pile of old wood and were yellowed from lack of sunlight, but still they grew. Plants are magic like that. 

After cleansing the house, I was feeling refreshed and wanted to take the opportunity to plant some seeds of a different nature. I had a few brass bracelet blanks rolling around the back of my craft drawer that seemed to be just the ticket. I brewed a cup of strong tea and stamped each bracelet with a phrase or intention that reminded me of it's recipient, then popped them in some pretty envelopes heading for far away friends. I'm hoping these little lovelies work as gentle, pretty reminders to slow down, make space and smell the rain in the hustle and bustle of the coming months. 

stamped1b.jpg
 

Supplies

- Brass Bracelet Blanks 

- Hammer

- Steel block

- Metal Stamping Alphabet

- Masking Tape

- Permanent Marker

- Rubbing Alcohol

Instructions

1. Start by using masking tape to attach your bracelet blank to the steel block. Make sure the tape is straight, as you will use this as a guide for your letters. Next, take a marker and evenly mark a dot on the tape for each letter in the phrase you are stamping. This should help you keep the letters even and at least kind of straight.

2. You may want to place your steel block with the taped blank on a book to dampen the noise a bit. Take your first letter stamp and line it up with the first dot you marked on the tape. I gave mine about 5 - 8 good whacks with a stamping hammer and it made a nice impression. Repeat the process with the rest of your letters, using the tape as a guide to keeping them straight and even. If you miss a part of a letter, you can try to slip the stamp back in the impression and give it a few more whacks. As you can see, my letters are far from perfect, but I think the imperfections just make it that much more "handmade."

3. Once you have stamped out your phrase, take a permanent marker and draw over each letter. Don't worry about being careful where you mark as you will wipe off the excess ink. Focus on getting the ink deep in the grooves of each letter. Then take a little rubbing alcohol on a cotton ball and rub off the extra ink on the rest of the bracelet. This will help darken the letters a bit to make them more visible.

4. Bend the bracelet around something round to get the basic shape (I used the top of a mason jar) and then form it to the shape of your wrist. This brass is really flexible, so even if you are making this as a gift, the recipient should be able to reshape to fit their own wrist as needed. 

Have a great week, dear ones!

xo, 

 
March 14, 2016 /Hailey Faust
DIY, Metal Stamping, Bracelets, Gifts, Handmade
:: DIY, Gifts
2 Comments

Valentines Day :: Golden Eggs and Sweet Nothings

February 14, 2016 by Hailey Faust in :: Celebrate, :: DIY

A quiet morning spent exchanging sweet nothings over coffee. 

Whether you are spending today with your partner, mom, lover, kids, sister, bestie or on a marathon of self-care, I wish you so much love. 

Happy Valentines Day, dear ones. 

For Rooster this year, I made this gold leaf egg filled with flower petals and a secret love note. Full DIY on these lovelies coming soon. 

R brought me back a collection of natural baubles from his recent desert journey. This man knows me so well. 

Have a lovely Sunday darlings. 

xo, 

 
February 14, 2016 /Hailey Faust
DIY, Gifts, Valentines, eggs, love
:: Celebrate, :: DIY
Comment

Apothecary :: DIY Lemon + Rosemary Sugar Scrub

February 03, 2016 by Hailey Faust in :: Pamper, :: DIY, :: Apothecary, Gifts

We are still restlessly hibernating here in the mountains of Montana. A fresh six inches of snow over the past few days has dashed any hopes of an early spring and forced us to retreat back to our blankets and books and baths with a general harrumph. For someone who strives to live seasonally and embrace the beauty of each phase, late winter has always been the hardest to love for me.  One of my favorite littles recently asked her Mama, "Can we at least pretend it's spring?" I hear you, sister.  And yes. Yes we can. 

But if we can see past the grey, there is also a lovely energy buzzing beneath the surface this time of year. Days are slowly getting longer. Seeds are stirring in the ground, preparing to launch triumphant green shoots when given the word. Animals and humans are rolling over in their dens. It reminds me of that final hour of sleep in the early morning, when you are subtly aware the sun is rising, but still lost in a dream world. 

I'm using these last moments of rest to indulge in some serious self care. At home spa days have become a weekend staple over here. This Lemon Rosemary Sugar Scrub takes about 5 minutes to make and feels super pampery. I love using lemons in beauty rituals because they are bright and cheerful as well as highly beneficial. They have antibacterial and immune-boosting properties and also reduce the sight of blemishes. Win-win-win. Rosemary is an inflammatory and improves circulation. Also, it smells awesome. Sugar is a great exfoliator and moisturizer. Coconut oil has approximately one million beneficial properties. You are killing like 15 birds with one sugar scrub. 

Take a few moments to slow down and pamper yourself. You deserve it. 


Ingredients

2 cups organic raw sugar

1 organic lemon 

1 - 2 sprigs of rosemary

3 - 4 tablespoons coconut oil (olive or jojoba oil work great too)

10 - 15 drops lemon essential oil

Instructions

1. Add sugar to medium bowl and squeeze in the juice of one lemon.

2. Coarsely chop the rosemary leaves and add as much or as little as you'd like. 

3. Melt coconut oil and add a little at a time until you reach your desired constancy. I like my scrubs to be a little grittier so I used about 3 tablespoons. Mix in chopped rosemary leaves and essential oil.*

4. Store in mason jars or other airtight container for up to one month. 

* Tips: Add a few drops of essential oil at a time to make sure you don't create an aroma that's overpowering. There is no right way to do this, just keep adding ingredients until it feels finished. I like to use this in the shower so that there is no cleanup and the sugar goes right down the drain. My skin has been so so soft. I used 1/2 pint jam jars (recipe makes 5) and delivered to some of my girl friends as an early Galentines day treat. (Yep. Galentines. I went there.) 

xo,

 
February 03, 2016 /Hailey Faust
self care, the art of slow living, slow living, apothecary, Diy, sugar scrub, bath, homemade, organic, beauty, ritual, holiday gifts
:: Pamper, :: DIY, :: Apothecary, Gifts
2 Comments

DIY :: Watercolor Moon Phase Flags

January 22, 2016 by Hailey Faust in :: DIY, Gifts

I am in the midst of a deep love affair with the moon. Can you tell?

She and I have always been close, but recently we have taken things to the next level. It's serious, you guys. Every time I put pen to paper, a moon seems to find it's way to the page. I have moon magic on the mind. 

moonflag3.jpg

I think, as a species, we are hard-wired to love the moon. She and the stars were our first calendar after all. Our first discernible method for knowing when to plant seeds or hunt or harvest or get married or baton down the hatches. Ruler of the tides. Our companion in the darkest hours of the night. The thing every-single-human-who-ever-lived-in-all-of-history has in common. Our nightlight. Our sister moon.  

Tracking the ebbs and flows of the lunar calendar is a lovely way to stay connected to the rhythms of the natural world during the long dark days of winter. It also helps set clear times each month to start and finish projects, give thanks, check in with ourselves and manifest intentions. If this resonates with you, and you haven't checked her out yet, run (don't walk) over to Chani Nicholas's amazing blog. This woman is a mystic moon mama / lunar guru who has changed the way I connect to the night sky. 

I am a big fan of marking occasions, and pretty much any excuse to use gold leaf, so to honor this Saturday's full moon, I pillaged my craft drawer and created these delicate paper moon phase flags. This is one of those projects that is very forgiving and soothing to work on. A creative meditation of sorts. Light a candle, put the kettle on and curl up with the moon for a spell. 

Supplies

- Watercolor paper (at least 7 sheets)

- Watercolors

- 2 paintbrushes ( I used one soft round brush and a shader with a hard edge for details..but whatever you have on hand will work.) 

- Adhesive size for metal leafing

- Gold leaf sheets (Just a bit. I used less than a sheet on the whole project.) 

- Hole punch

- Roughly 6 ft of hemp or ribbon


Instructions

1. Start by tracing something circular very lightly with a pencil to get the shape of your moon on one of your pages of watercolor paper. I used a roll of masking tape as a guide and chose square paper so that I wouldn't have to worry about cutting the flags to an even size. 

2. Start filling in the circle with water with a wet brush. Slowly add little blooms of watered down color (I used grey) around the edges of the circle. Let dry. Repeat, allowing the layers to instersect and flow into one another. 

3. Now you can start adding some darker splotches of color for depth. Play with using less water and more paint on your brush to create craters. Layering is key. Let dry between layers. Experiment and play. My only advice would be to only add a little paint at a time and know when to stop...it's easy to go too far. I found that I liked mine best when I left a little white space within the moon. What I love about this project is that it is very forgiving. If you make a mistake, just add a little water. Easy peasy. You can also use a dry brush to brighten areas if they start to feel too dark. I haven't used watercolors in ages but I could see how they could be very addictive. So calming. 

4. Repeat process with the rest of your moon phases, using a pencil to shape out the area you will be painting for each phase. I only created 7 phases (including 2 new moons) but you could easily add as many phases as you'd like. To create the new moon, I simply splotched* (technical term) my brush around the outside of my masking tape to get this effect. 

6. Once all your phases are totally dry, get a clean brush and apply a small amount of the adhesive size to the areas of the moon you want to gold leaf. I found that asymmetrical brush strokes looked the most "moon-like" when the leaf was applied. Let size dry for 10 - 15 minutes or until clear. 

7. Apply gold leaf to the clear adhesive size. The leaf should stick only to where the adhesive was painted. I just used my fingers to apply it, taking little scraps from here and there to make interesting crater shapes. Use a soft paintbrush to gently brush away the extra gold leaf. Again, work in layers as a little gold goes a long way. 

8. Punch holes in the top 2 corners of your moon phases. I used a jewelry hole punch to get teeny tiny holes, but a regular hole punch would also work. 

9. Carefully string your phrases together with twine or ribbon. Be delicate as you work, it would be easy to rip the paper. I used a little bit of candle wax on the end of my hemp to help make threading it through the holes a bit easier. Worked like a charm. Feel free to add beads or tassels or feathers to the end of your flags if you are feeling extra fancy. 

When I finished my flags I realized how easy it would be to slip them into a pretty envelope and send to a far away friend. Spread that luna love.  

Thanks for stopping by lovelies. Have a lovely cozy lazy wonderful weekend.  

xo, 

 
January 22, 2016 /Hailey Faust
DIY, gold leaf, handmade, prayer flags, watercolor, moon
:: DIY, Gifts
1 Comment
_85B2890.jpg

DIY :: New Year Moon Intention Wall Hanging

January 04, 2016 by Hailey Faust in :: DIY

I am a firm believer in the power of setting intentions. There has always been something magical for me about writing/drawing/stating goals that sets the universal wheels in motion and brings big dreams into the physical realm. The new year provides us with the perfect opportunity to meditate on what we want to bring more of into our life, what we want to release, and the concrete steps we can take to manifest our goals.

This year my goals are to finally bring the lovely wild into existence (yay!), meditate for at least 15 minutes every day, and practice photography by shooting every day until I have at least one image I sorta-kinda-almost like. What are your goals for 2016? What do you want to attract to your life?

It's easy to make resolutions, but often difficult to keep them in the forefront of our minds once the newness of the new year has worn off. What better way to gently remind of us these goals throughout the year than with a handmade piece of art hung lovingly in our home? And it's pretty! So there's that. 

This simple DIY is the perfect way to spend a lazy afternoon with a cup of tea and can likely be made with whatever bobs and ends are rolling around the back of your craft drawer. If you don't have metal stamping supplies, no worries! You can write your intentions on craft paper, ribbons or wooden beads and attach them that way. Even if noone else can read them, you will know they are there and that's the whole point. 

Materials:

*Please note these are merely suggestions. Feel free to improvise and use whatever you have to hand. Embroidery hoops can easily be replaced with wire bent to form a circle, ribbons can be used instead of yarn, etc.

- 2 embroidery hoops of different sizes

- Natural wool yarn (about 1/2 a skein)

- 1.5 ft of wire 

Optional:

- Metal stamping alphabet

- Steel block

- Metal blanks

- Hammer

Step 1: Making the moon

Start by removing the inside hoops (the ones without the metal clasps) of both embroidery hoops. These will be the hoops to form your moon. Hold the smaller hoop against the inside of the larger hoop (shown above) and play with it until you find the crescent moon shape you want. The bigger the difference in size between the hoops, the larger your crescent will be. These were the only hoops I had on hand so my crescent is more of a sliver.

Once you have a shape you like, tightly wrap the wire around both hoops to hold them together. You can use a drop of hot glue between the hoops to help it hold if necessary, but the wire seemed to do the trick for me. 

Step 2: Cutting lengths of yarn

Decide what length you would like the yarn tassels to be and multiply it by 2. I wanted my tassels to hang about 2 ft down from the moon, so I cut my yarn into roughly 4 ft length so they would be 2 ft when doubled. I wasn't sure how many lengths I would need, so I worked in chunks by cutting about 10 lengths of yarn at a time, attaching them, and then cutting again until it felt finished. 

Step 3: Attaching tassels

_85B2748.jpg

Attaching the lengths of yarn is super simple. Fold your piece of yarn in half. Pull the halfway point (or loop side) through the inside of the bottom of the moon. Now bring the tail ends up, through the loop and pull tight so that tail ends trail down below. Thats it! Now push this tassel to the right and repeat the process with the rest of your yarn lengths. The best part of this project is that you can keep adjusting the spacing between loops as you go, and keep adding tassels until you reach your desired thickness/density. 

Step 4: Adding texture

Once you have completed all your tassels, now we can add some texture. I braided a few strands and tied knots in strands here and there to add depth. Feel free to add beads, feathers, ribbons, whatever calls out to the raven in you. 

Step 5: Preparing to stamp

Metal stamping! One of my most cherished gifts this holiday was a metal stamping alphabet from my ever-crafty mother and I have been looking for any excuse to try it out...can you tell?

Start by using masking tape to attach your metal blank to the steel block. Make sure the tape is straight, as you will use this as a guide for your letters. Next, take a marker and evenly mark a dot on the tape for each letter in the phrase you are stamping. If you are feeling really fancy, you can measure these out, but I'm more of a "wing-it" kinda gal and actually like the look of imperfections. 

Step 6: Metal stamping

This was my first time stamping so I am by no means an expert, but it was definitely one of those instant gratification crafts! You may want to place your steel block with the taped blank on a book to dampen the noise a bit. Take your first letter stamp and line it up with the first dot you marked on the tape. I gave mine about 5 - 8 good whacks with a stamping hammer and it made a nice impression. Repeat the process with the rest of your letters, using the tape as a guide to keeping them straight and even. If you miss a part of a letter, you can try to slip the stamp back in the impression and give it a few more whacks. I just love the imperfect handmade feel of these!

Step 7: Attaching intentions

My blanks came with holes pre-drilled, but it would be easy enough to drill a small hole if yours did not. I attached my stamped intentions with a little leftover wire wrapped around the bottom of the moon, in between the yarn tassels. I played with pushing the tassels around until they mostly hid the wire. 

Step 8: Hang and manifest

That's it! Now hang your lovely New Year Moon Intention hanging somewhere you will see it daily and smile. Here's to good luck and good health in 2016!

Thanks so much for stopping by.

xo,


January 04, 2016 /Hailey Faust
DIY, moon, wall hanging, manifest, intention
:: DIY
1 Comment

Subscribe

Subscribe below to keep up on all the lovely!
We promise to never send spam or share your info with anyone else. For realzies. xo

We respect your privacy and will not share your information with any third parties. 

Thank you!

© 2016 HAILEY FAUST LLC. ALL RIGHTS RESERVED.