the Lovely Wild

  • Blog
  • Archive
    • :: Archive
    • :: Apothecary
    • :: Celebrate
    • :: DIY
    • :: Eat
    • :: Wander
  • About
  • Design
  • Contact
fallwreath-7271.jpg

House Spells :: DIY Samhain Blessing Wreath

October 30, 2018 by Hailey Faust in :: Celebrate, :: Make, :: DIY

And now we step into the darker side of the wheel. Into the days of roots and stones and antlers and bones. A time to shed what we no longer need to carry, and to squirrel away what will carry us through the cold months ahead.

Samhain, Hallowe’en, Witches New Year…there are many names for this liminal time. For these in-between days when the veils are thinnest. We are now exactly half-way between the Fall Equinox and the Winter Solstice. This is a potent time of magic and transformation. A time that asks us to send our energy downward. Into our roots. Into the Underworld.

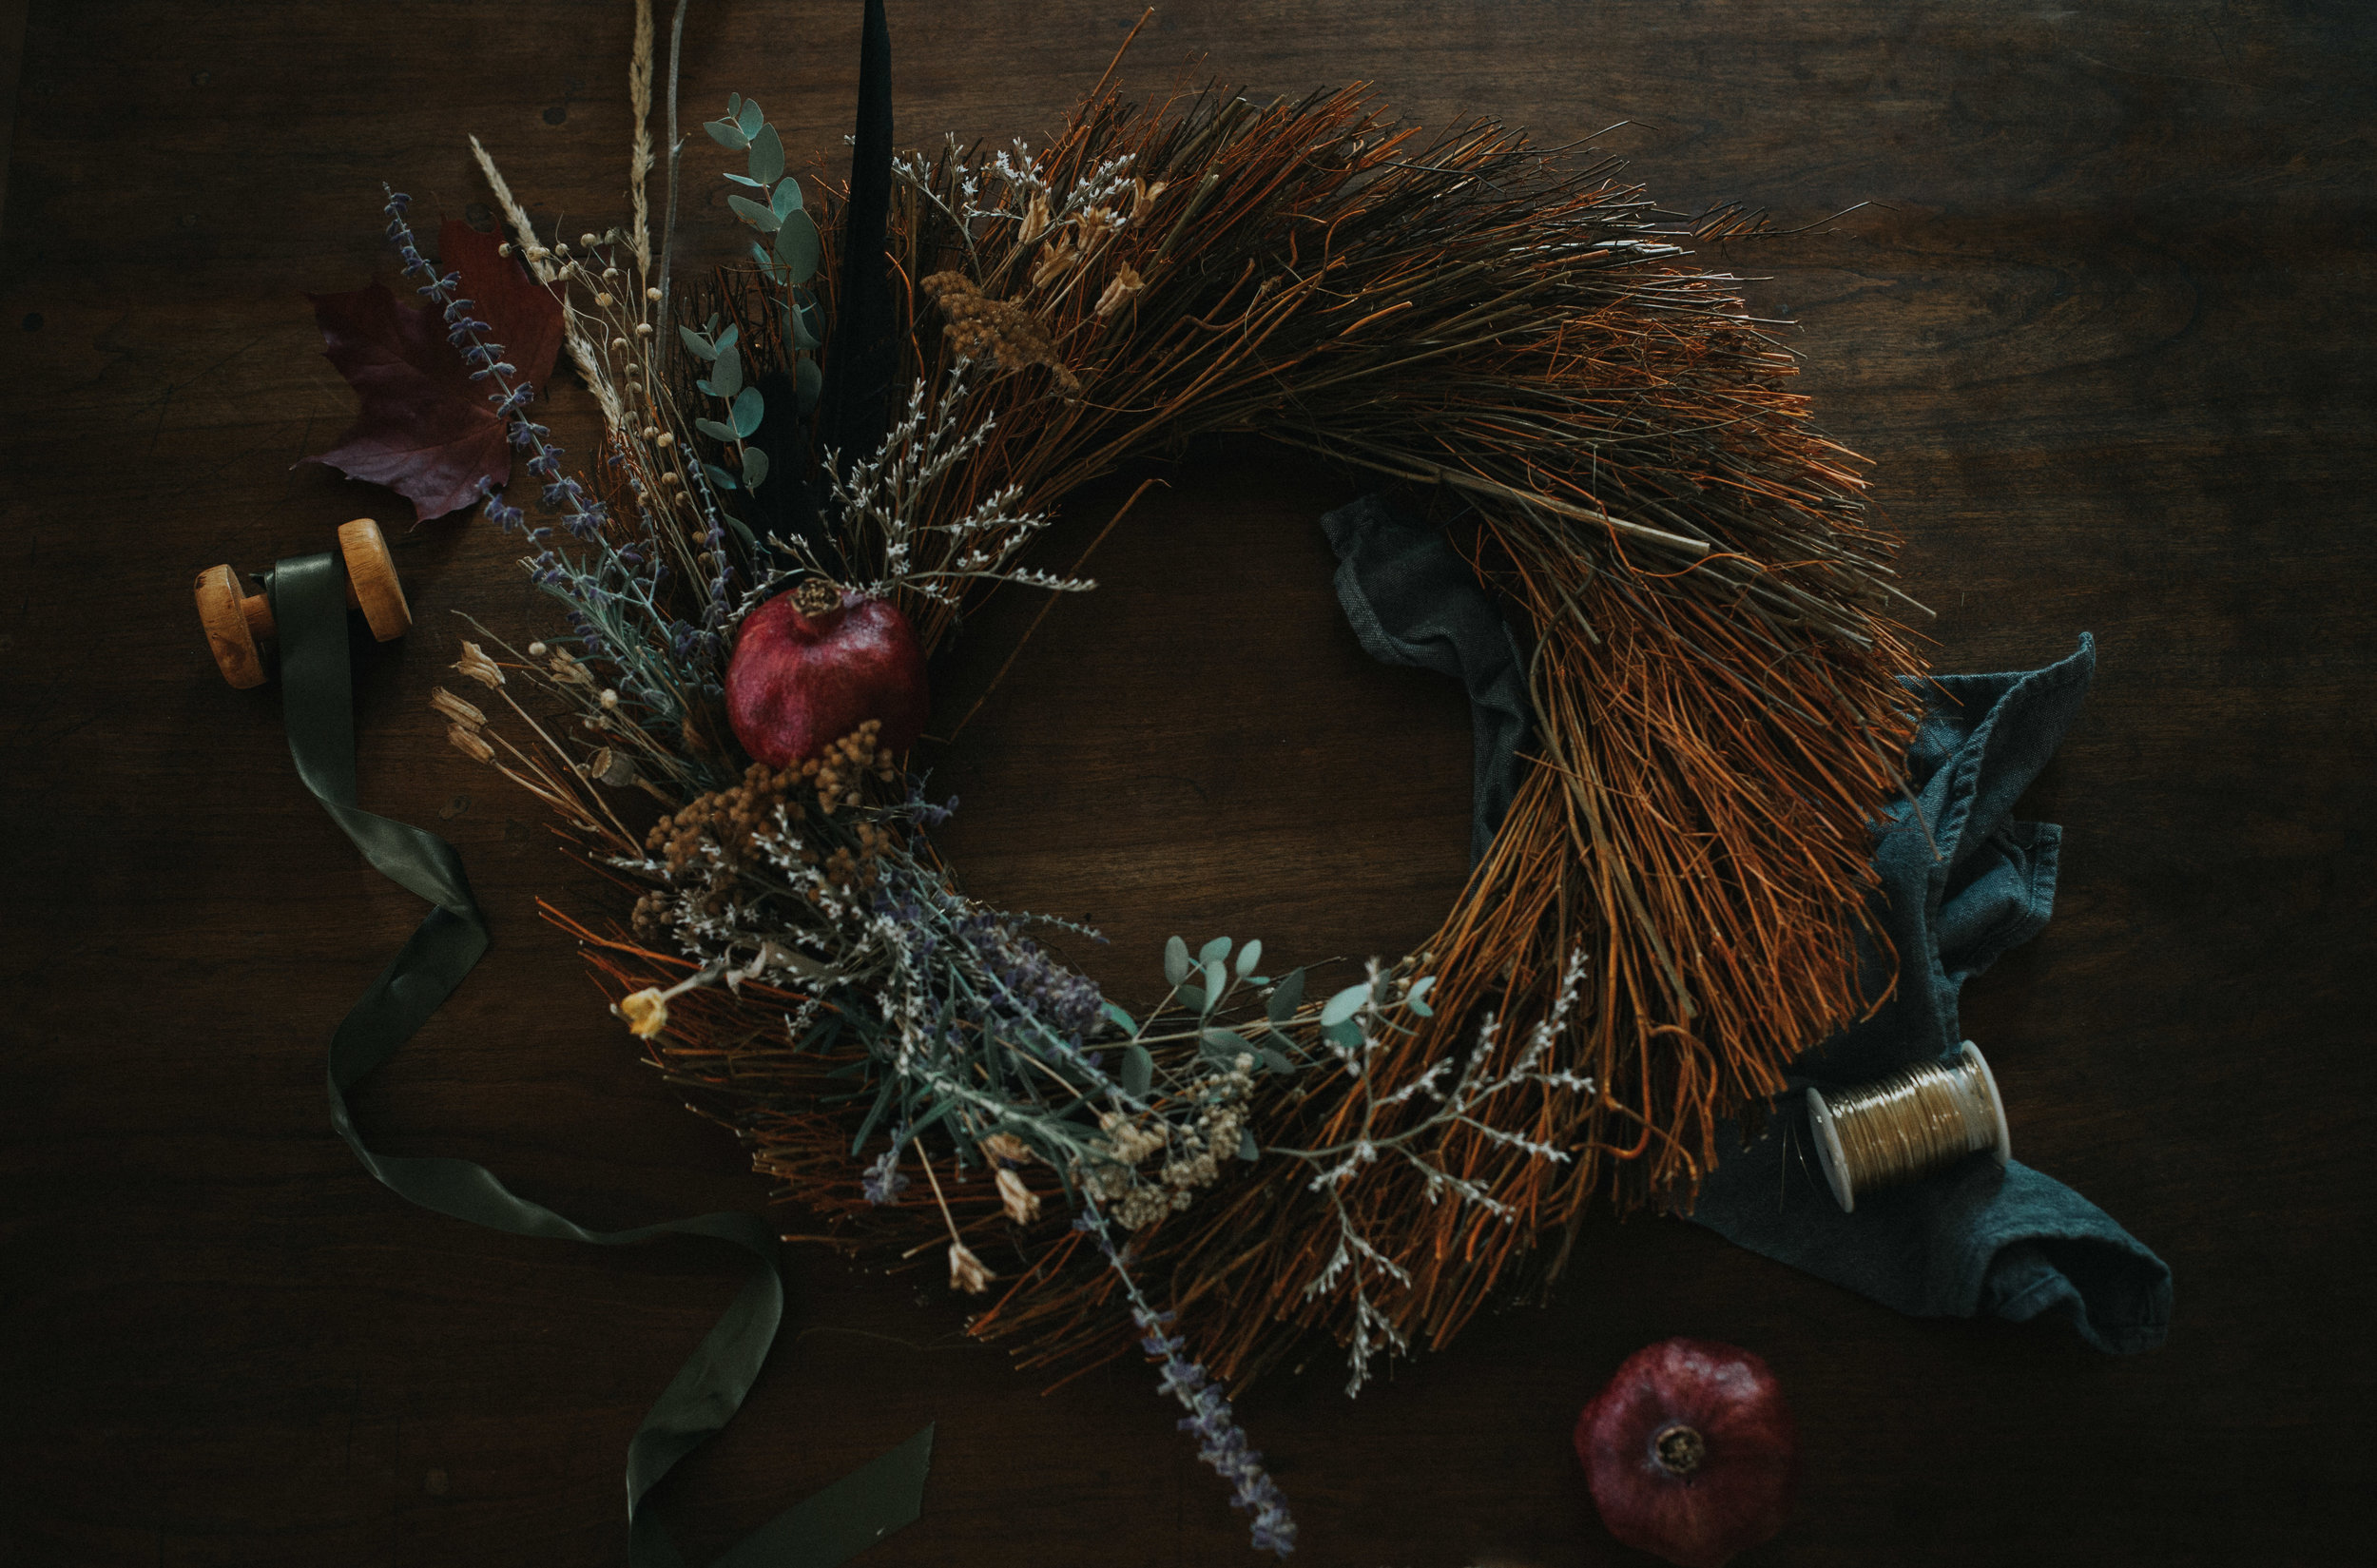
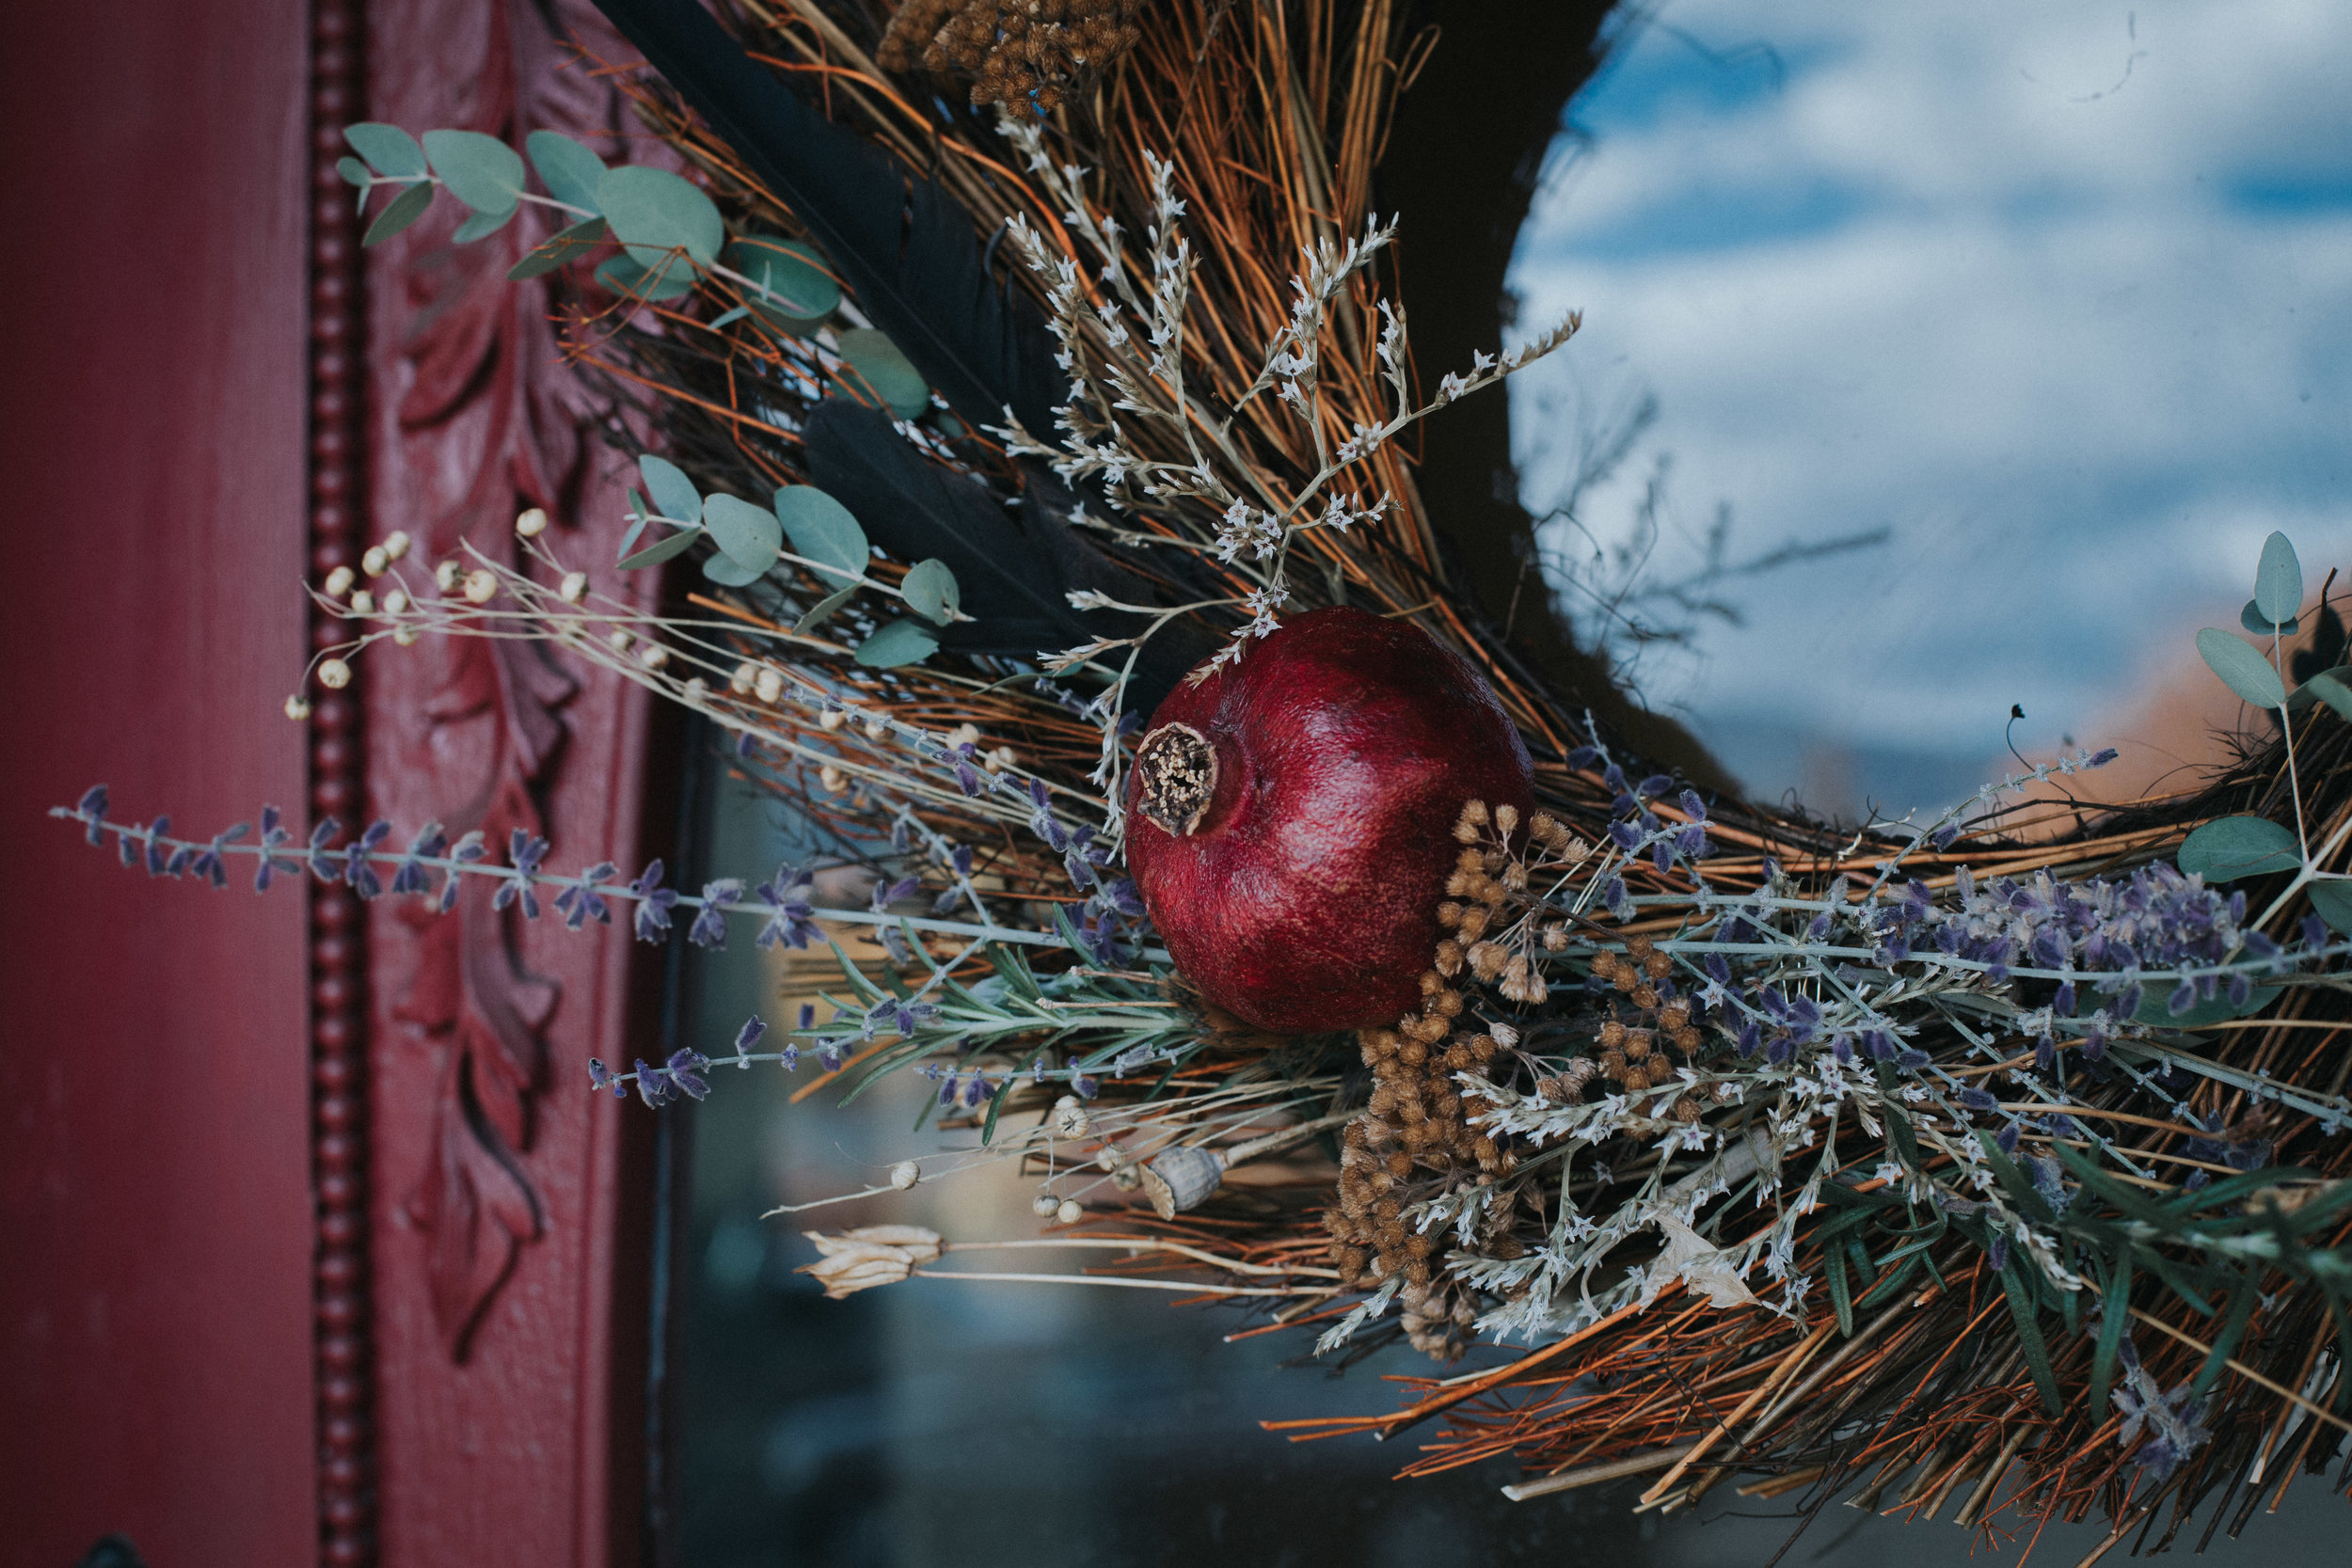
Homemade wreaths and swags have long been prescribed by folklore as talismans to protect the thresholds our homes. This simple wreath is a lovely way to enchant your space with protection and abundance for the darker days ahead, and to quietly honor the natural cycles of life and death.

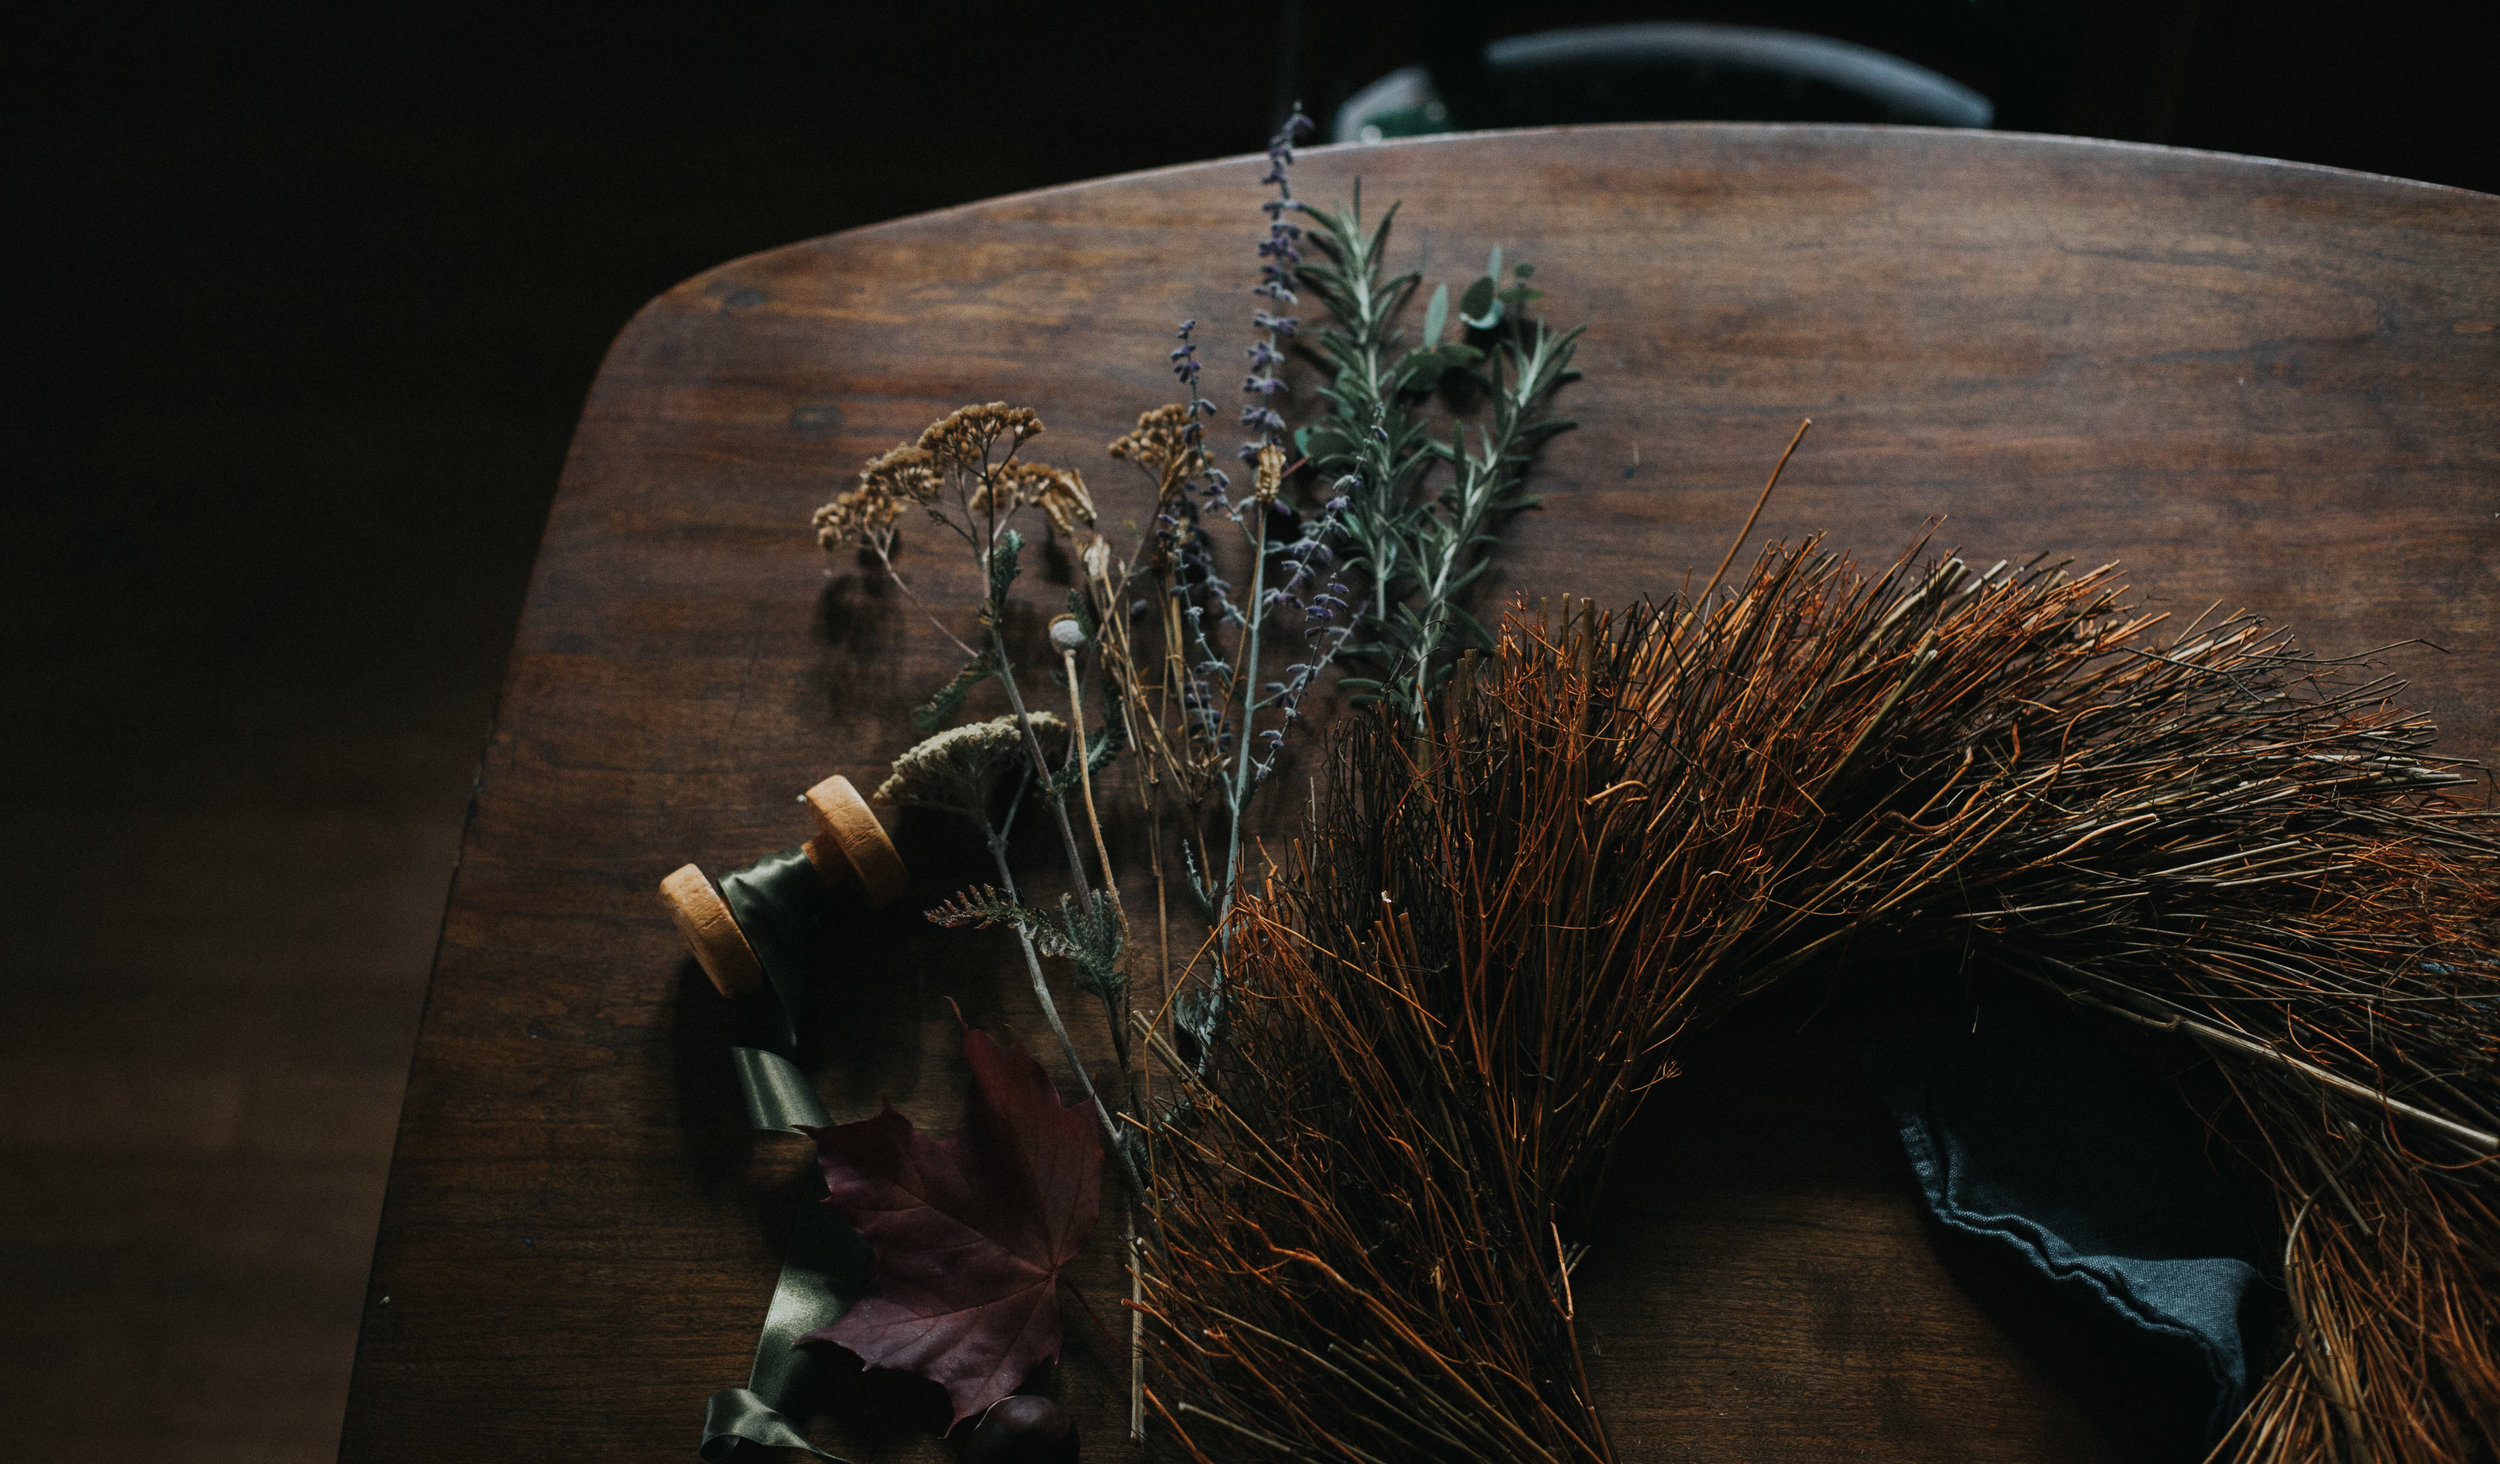
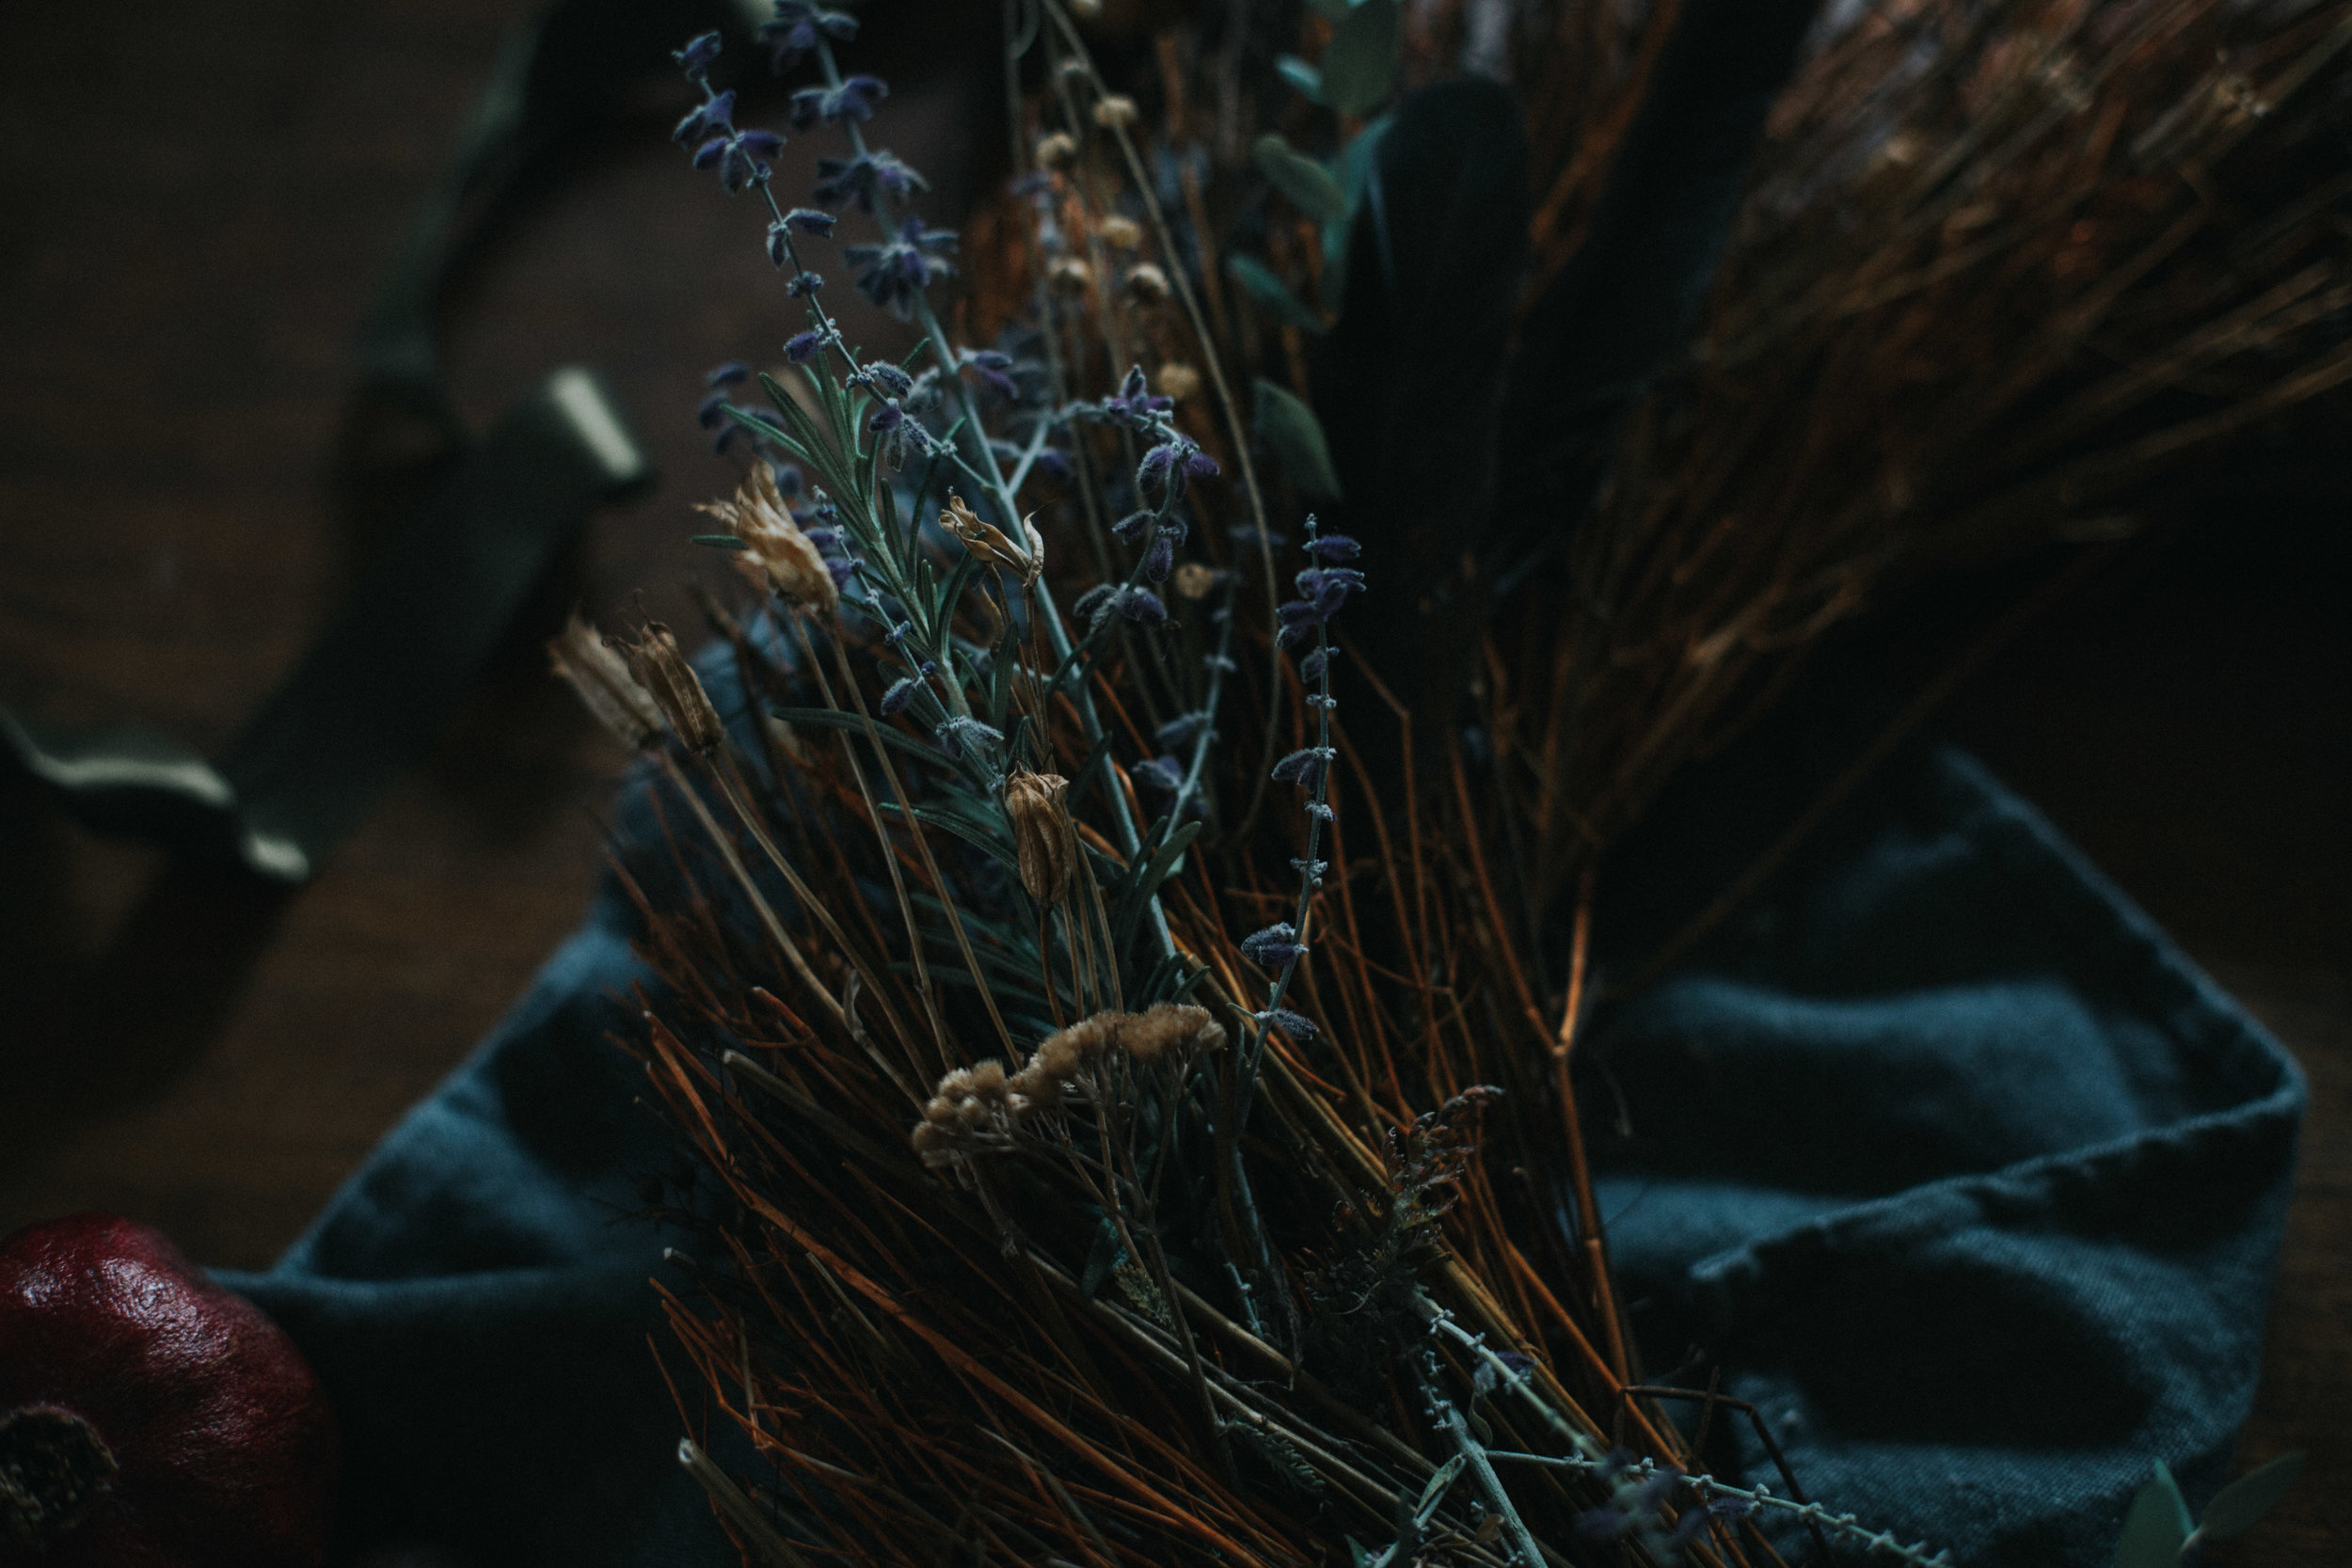
I spent a few minutes wandering through the garden, clipping hearty herbs that had managed to escape the morning frosts, and departed flowers that had dried on their stalks. I used whatever called out to me. Rosemary for remembrance and protection. Lavender for a restful hibernation. Yarrow to shield against melancholy. Eucalyptus to remove negativity. Black feathers because they just kept appearing in my path. I highly recommend wandering through your own yard or neighborhood and taking small clippings of whatever catches your eye. Let your intuition guide you. Don’t worry if they are dead or faded, they will look beautiful. I also had a few pomegranates rolling around our kitchen fruit bowl, which I included to honor Persephone’s decent into the Underworld.

This quiet ritual takes just a few minutes and is best performed with a steaming pot of tea and a few glowing candles. There are no rules or complicated steps. No incantations to recite. Just plants and herbs and a few moments of quiet intention.

Wishing you all a magical, mystical Samhain, dear ones.

fallwreath-7200.jpg
Posttitle-Samhainblessingwreath.png
 

Supplies:

  • Wreath base (I picked this one up years ago for just a few dollars at a craft store. Every few months I change out the flowers and herbs to honor the changing seasons.)

  • Foraged herbs and flowers

  • Pomegranate + small kabob dowel (optional)

  • Wire (whatever you have laying around.)

flowers-7192.jpg

Step 1:

Once you have gathered your clippings, start by playing around with the overall layout for your design. At this point you can just loosely stick them into your wreath base (not securing them yet) so you can easily experiment with what looks good where. Trim the clippings to size if needed, leaving enough stem to secure them to the base later. I find it’s easiest to start with the larger elements, and then weave in the smaller clippings to fill in the gaps. Like I said, there are no rules here. Just play with combining colors and textures until it starts to feel right. As you are working, see if you can tap into the energy of each plant. Notice the beauty of weaving together the natural cycles of life and death.

fallwreath-7257.jpg
fallwreath-7230.jpg

Step 2:

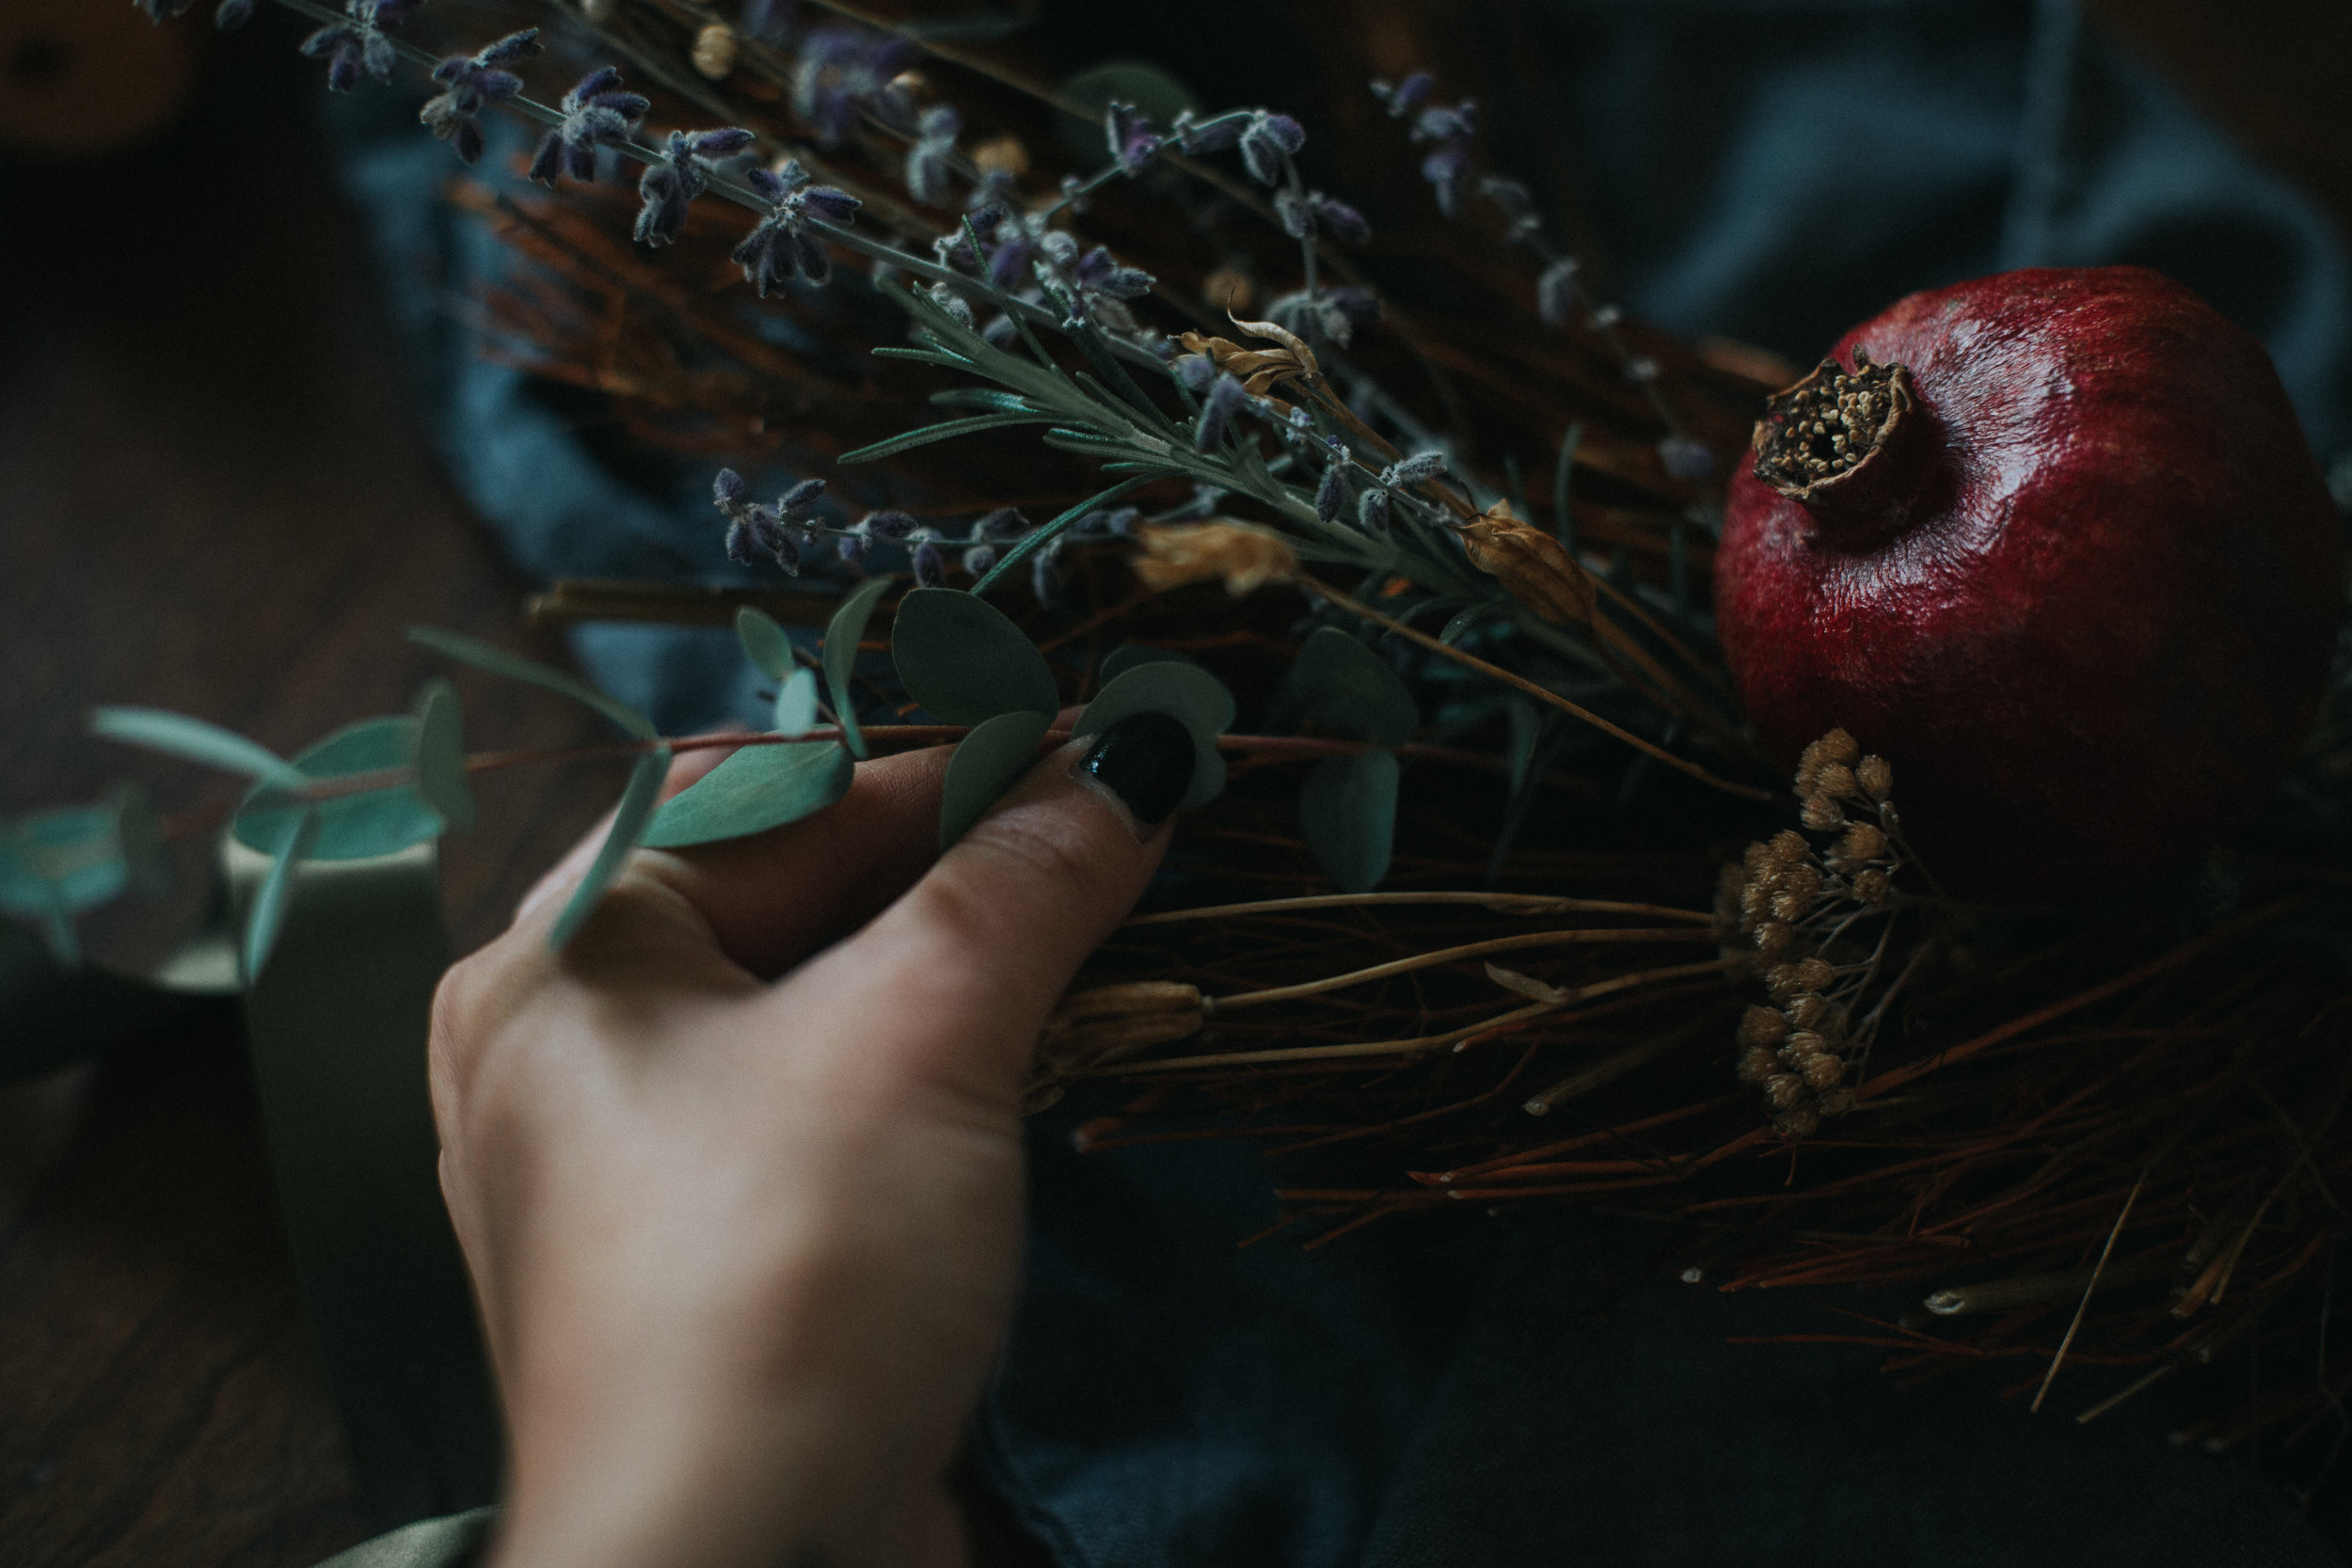
Once you have settled on the placement of your clippings, begin securing with wire as needed. With this particular style of wreath, I was able to secure most of the stems simply by pushing them firmly into the base as far as they would go. During this stage, I like to visualize the intentions and feelings I am calling in and weave them into my wreath. If you are calling in protection and abundance, for example, visualize yourself in your cozy home, safe from the wind and rain, with a cup of tea and everything you need.

fallwreath-7242-2.jpg

Step 3:

If you are attaching larger fruit like pomegranates or apples, insert the sharp side of the kabob dowel firmly into the bottom of the fruit. This gives the fruit a nice long stem to securely stick into the base of your wreath. Watch out for the few drops of pomegranate juice that may escape…they stain big time.

fallwreath-7253.jpg

Step 4:

Stick the doweled fruit into the base of your wreath. Cut about an arms length of wire and begin wrapping it around the dowel and the wreath base to secure it.

fallwreath-7260.jpg

Step 5:

As you are working, hold your wreath up from the top center point (where it will hang) every few minutes to make sure the weight and balance are evenly distributed. You may find as you do this that certain elements need to be additionally secured or moved to keep from falling out. I found that 2 pomegranites was simply too heavy and ended up removing one. Perhaps you use these moments to reflect on the balance in your own life. Does anything need to be adjusted or redistributed?

fallwreath-7289.jpg
fallwreath-7273.jpg

Step 6:

Once everything is safely secured, you are ready to hang your wreath. I like to visualize a shield of protection as I hang the wreath on my front door. Maybe ring a bell or blow out your candle to complete the ritual. Whatever feels right.

fallwreath-7268.jpg
fallwreath-7304.jpg

xo,

Haileysignature.png
 
fallwreath-7300.jpg
October 30, 2018 /Hailey Faust
samhain, halloween, diy, witchy, witch, craft, wreath, fall, autumn
:: Celebrate, :: Make, :: DIY
1 Comment

DIY :: Bay Laurel Eucalyptus Wreath & the Dark Days of Winter

December 01, 2016 by Hailey Faust in :: DIY, :: Celebrate, :: Make

For thousands of years, the approach of winter was a dire, fearful time for humans. It meant famine and illness and death were on the horizon. That the world would be plunged into relentless cold and darkness and that not everyone would survive. It was a time to huddle together. To batten down the hatches. To hide away and hold on till spring.

December (and the winter solstice specifically), marked the pinnacle of this desolate season. But many cultures also used this as a time to celebrate life and light in the face of the encroaching darkness. To gather with loved ones around the fire. To feast and sing and share what little we had squirreled away. To celebrate the simple fact that we were still alive. Now don't get me wrong, humans have plenty of flaws, but I think there is something deeply beautiful about that. That on the longest, coldest nights of the year, when all was quiet and frozen and bleak, we shined our flickering lights into the vast darkness and found joy. 

I love that you can still find remnants of these ancient rituals in our modern holiday traditions. Little echoes of forgotten customs. We still hang lights in dark windows. We feast and sing. We bring in evergreens that don't mind the cold. Perhaps one of the most ubiquitous of these symbols is the humble wreath. There are many theories on the origin of this tradition, but my personal favorite is that the hearty evergreens and circular shape represent eternal life in the face of winter. We hang them in our doors and windows to remind our neighbors, "It's alright, friends. Even on the darkest days of the year, something green remains." What a lovely thought.

I made this simple wreath with bay laurel and eucalyptus and an old embroidery hoop. Nothing too fancy. Just simple supplies, a little time and a cup of peppermint tea. It felt good to slow down and breathe deep and play with plants for a while. A nice slow segue into the bustle of the holiday season. 

Happy December, dear ones. Here's to sharing and celebrating and shining our little lights. So much love to you. 


Supplies

- Hearty greens (I used branches of bay laurel as my base. They hold up nicely and smell amazing)

- Smaller greens & berries for texture (I used gunny, blue and seeded eucalyptus as well as a few dried pepper berries)

- Embroidery hoop of any size

- Floral wire

- Ribbon

Instructions

1. Start by cutting your bay laurel branches into more manageable lengths. I cut mine into roughly 1 foot sections. The size of these will depend on the size of your embroidery hoop. I set aside a few small sprigs to fill in any sparse spots later.

2. Play with the natural curve of the branches to find where they want to lay on the hoop. Word to the wise: don't try to fight the natural curve of the branches. Let them lay how they want to lay and work around their natural shape. Bay laurel lends itself beautifully to a circular wreath. Using segments of floral wire, begin wrapping the branches in segments around the hoop. It's okay if the wire is visible or there are some bare spots. You can cover these will smaller greens later. Use small lengths of wire to attach each branch in 2 - 3 spots.

3. Once you have your base greenery secured around the hoop you can start playing with the smaller greens. I wove in blue and seeded eucalyptus to fill in bare spots and cover any exposed wire. I also added a few more sprigs of bay laurel here and there. Even some pheasant feathers would be cool. There is no right answer here! Have fun and play with finding the right balance. I tend to like things a little more organic and unfussy so I left mine a bit wild. You can easily tame it with some additional floral wire if thats more your style. It helps to hold the wreath up to the wall now and then to get perspective and make sure the weight is balanced.

4. Tie a pretty ribbon or twine around the top of the wreath. You can either use this to hang it, or if you have a wreath hanger you could opt for the traditional bow. As a finishing touch, I wove in a few dried pepper berries left over from our Thanksgiving table. Those little guys last forever. 

5. Hang and enjoy! You can definitely hang these little loves outside, but I couldn't bare to be parted with the spicy, earthy aroma of the bay leaves. I opted to display ours in our front window so it can be seen from the street, but we can still smell it in the house. Everybody wins.

xo,

 
Follow my blog with Bloglovin
December 01, 2016 /Hailey Faust
wreath, christmas, celebrate, the lovely wild, slow living, lifestyle, craft, holiday, decoration, diy, eucalyptus, homemade, organic, natural, apothecary, the art of slow living, handmade, simple christmas decorations
:: DIY, :: Celebrate, :: Make
3 Comments

Apothecary :: DIY Rose Water

August 15, 2016 by Hailey Faust in :: DIY, :: Pamper, :: Make, :: Apothecary

And just like that, it was August.

Slowly but surely, summer is slipping quietly out the back door, leaving only a few precious weeks of bursting gardens and heirloom tomatoes and sun-drenched afternoons trailing behind her. I love how everything becomes a little wild this time of year. A little overgrown. Untended. Abundant. Exploding with life. Maybe it's the heat, or the heady scent of jasmine, but these final weeks of summer always makes me a little dreamy. Nostalgic. Less bound to reality. 

I'm always looking for ways to preserve the last few golden drops of sunshine and squirrel them away for the coming season. A steaming cup of lemon verbena tea and a jar of wild huckleberry jam can go a long way in the cold dark days of winter. January Hailey is always elated, and a little surprised, that August Hailey had a few fleeting moments of foresight.

Distilling a batch of rose water is one of my favorite late-summer rituals. An ancient remedy, rose water can be used in everything from facial toner to teacakes. Cleopatra swore by rose water for supple skin and, according to legend, Michelangelo drank it every morning with his tea. There is old magic in this stuff. I personally like to sprits a little on clean sheets and laundry, or add a tablespoons to bath water if I'm feeling extra fancy. It can even be used in the kitchen to add a delicate floral note to aromatic dishes and sweets, or as a cooling body mist on hot days. The possibilities are endless. A few minutes of time invested now will pay itself back ten-fold when you have this lovely tincture waiting in your apothecary.  

The key to high quality rose water is (surprise, surprise) high quality roses. Be sure to use only fresh organic roses that have never been sprayed with anything. The more fragrant, the better. This is the perfect project for the rose bush out back that has started to shower her petals. There is something deeply satisfying about finding a second life for fading blooms. 


You Will Need: 

- Fresh, fragrent organic rose petals

- 1 tray of ice cubes

- Large stock pot

- 2 oven safe jars or ramekins 

- Distilled water

Instructions:

1. Separate the petals from the roses and rinse with fresh water to remove any dirt or insects. 

2. Place petals in a large stock pot. 

3. Place a wide-mouth jar or ramekin upside down in the center of the pot. This is essentially just used as a base to lift the second jar off the bottom of the pot. Place the second jar right-side up on the ramekin. This jar will collect the rose water.

4. Fill the pot with water until it just covers the rose petals. The collection jar should be above the water line. Place the lid upside down on the pot and heat on medium until the water begins to boil. 

5. As soon as the water boils, place ice cubes on top of the upside-down lid. This will help bring the rose-filled condensation to the center of the lid where it will slowly drip into the waiting collection jar. 

6. Gently simmer for 15 - 20 mins or until the petals start to lose their color. Be sure not to over-cook, as this will dilute your rose water and change the fragrance. 

7. Turn off the heat and let cool for a minute. Using pot holders, carefully remove the lid which will now be filled with water from the melted ice cubes. Gently remove the jar filled with rose water (careful: it's hot!) and quickly transfer it to a waiting receptacle (or just put a lid on the jar.) The lovely rose oil you have just distilled can slip away as vapors so it's important to contain it quickly. 

8. Store in a cool dark place until you need a little splash of summer in your life. 

Have a lovely week dear ones.

xo, 

 
August 15, 2016 /Hailey Faust
DIY, apothecary, rose water, lovely wild
:: DIY, :: Pamper, :: Make, :: Apothecary
Comment

Apothecary :: New Moon Herb Bath

May 05, 2016 by Hailey Faust in :: DIY, :: Make, :: Pamper, :: Apothecary

The new moon asks us to set intentions. To turn inward and greet the part of ourselves we have maybe been neglecting. To take careful inventory and plant the seeds we want to grow. This Friday, May 6th, marks the new moon in Taurus. And this isn't just any new moon, dear ones.

It's got a special magic.

A knack for manifesting abundance and bringing things into the physical realm. It invites us to take the first step. To write it down. To get really specific about what it is we want. This is fertile ground, lovelies. 

And for those of us in the Northern Rockies, this new moon ALSO just so happens to hit right smack dab in the middle of our stunning-but-fleeting lilac bloom. Which is pretty much my favorite week of the year. Abundance abounds.

moonbath5.jpg

Since the new year, I have been marking every new and full moon with a moon bath and I am now totally addicted to the practice. Our deep, century-old porcelain bathtub has become a very sacred spot in our house. A quiet respite to soak and think and meditate and release. To sing and stretch and practice self care. To steep in all the luna love.

My moon bath recipe changes from month to month depending on what is in season and what's happening astrologically. Many of the herbs used in this recipe are prescribed by folklore for purification, release of negative energy and/or manifesting and were chosen specially for the new moon in Taurus. Feel free to substitute or amend this recipe, but make sure to research each herb or flower you wish to add to confirm it is safe to be used in a bath. 

So tonight, channel your inner Cleopatra and bathe yourself in herbs and petals by candlelight. It's a nourishing way to stay connected with the natural cycles of the moon and to make space to reflect on what you want to manifest in the coming month. Oh, and it smells amazing. Win-win-win.


Ingredients: 

Note: I don't use any specific measurements for the herbs. Just a handful of this and a pinch of that. Feel free to adjust amounts as you go. A little lavender goes a long way. :)

  • Lavender - for relaxation, release & higher consciousness
  • Sage - for cleansing energy
  • Rose petals - to manifest love & happiness
  • Rosemary - to enhance concentration - it is also full of anti-inflammatory & antioxidant compounds
  • Bay Leaves- for purification & protection
  • Lilac blooms - for their gorgeous scent and to honor the abundance of spring
  • Epsom salt - to detoxify the body
  • Pink Himalayan salt- to reduce inflammation and provide mental balance
  • Cheesecloth

Instructions:

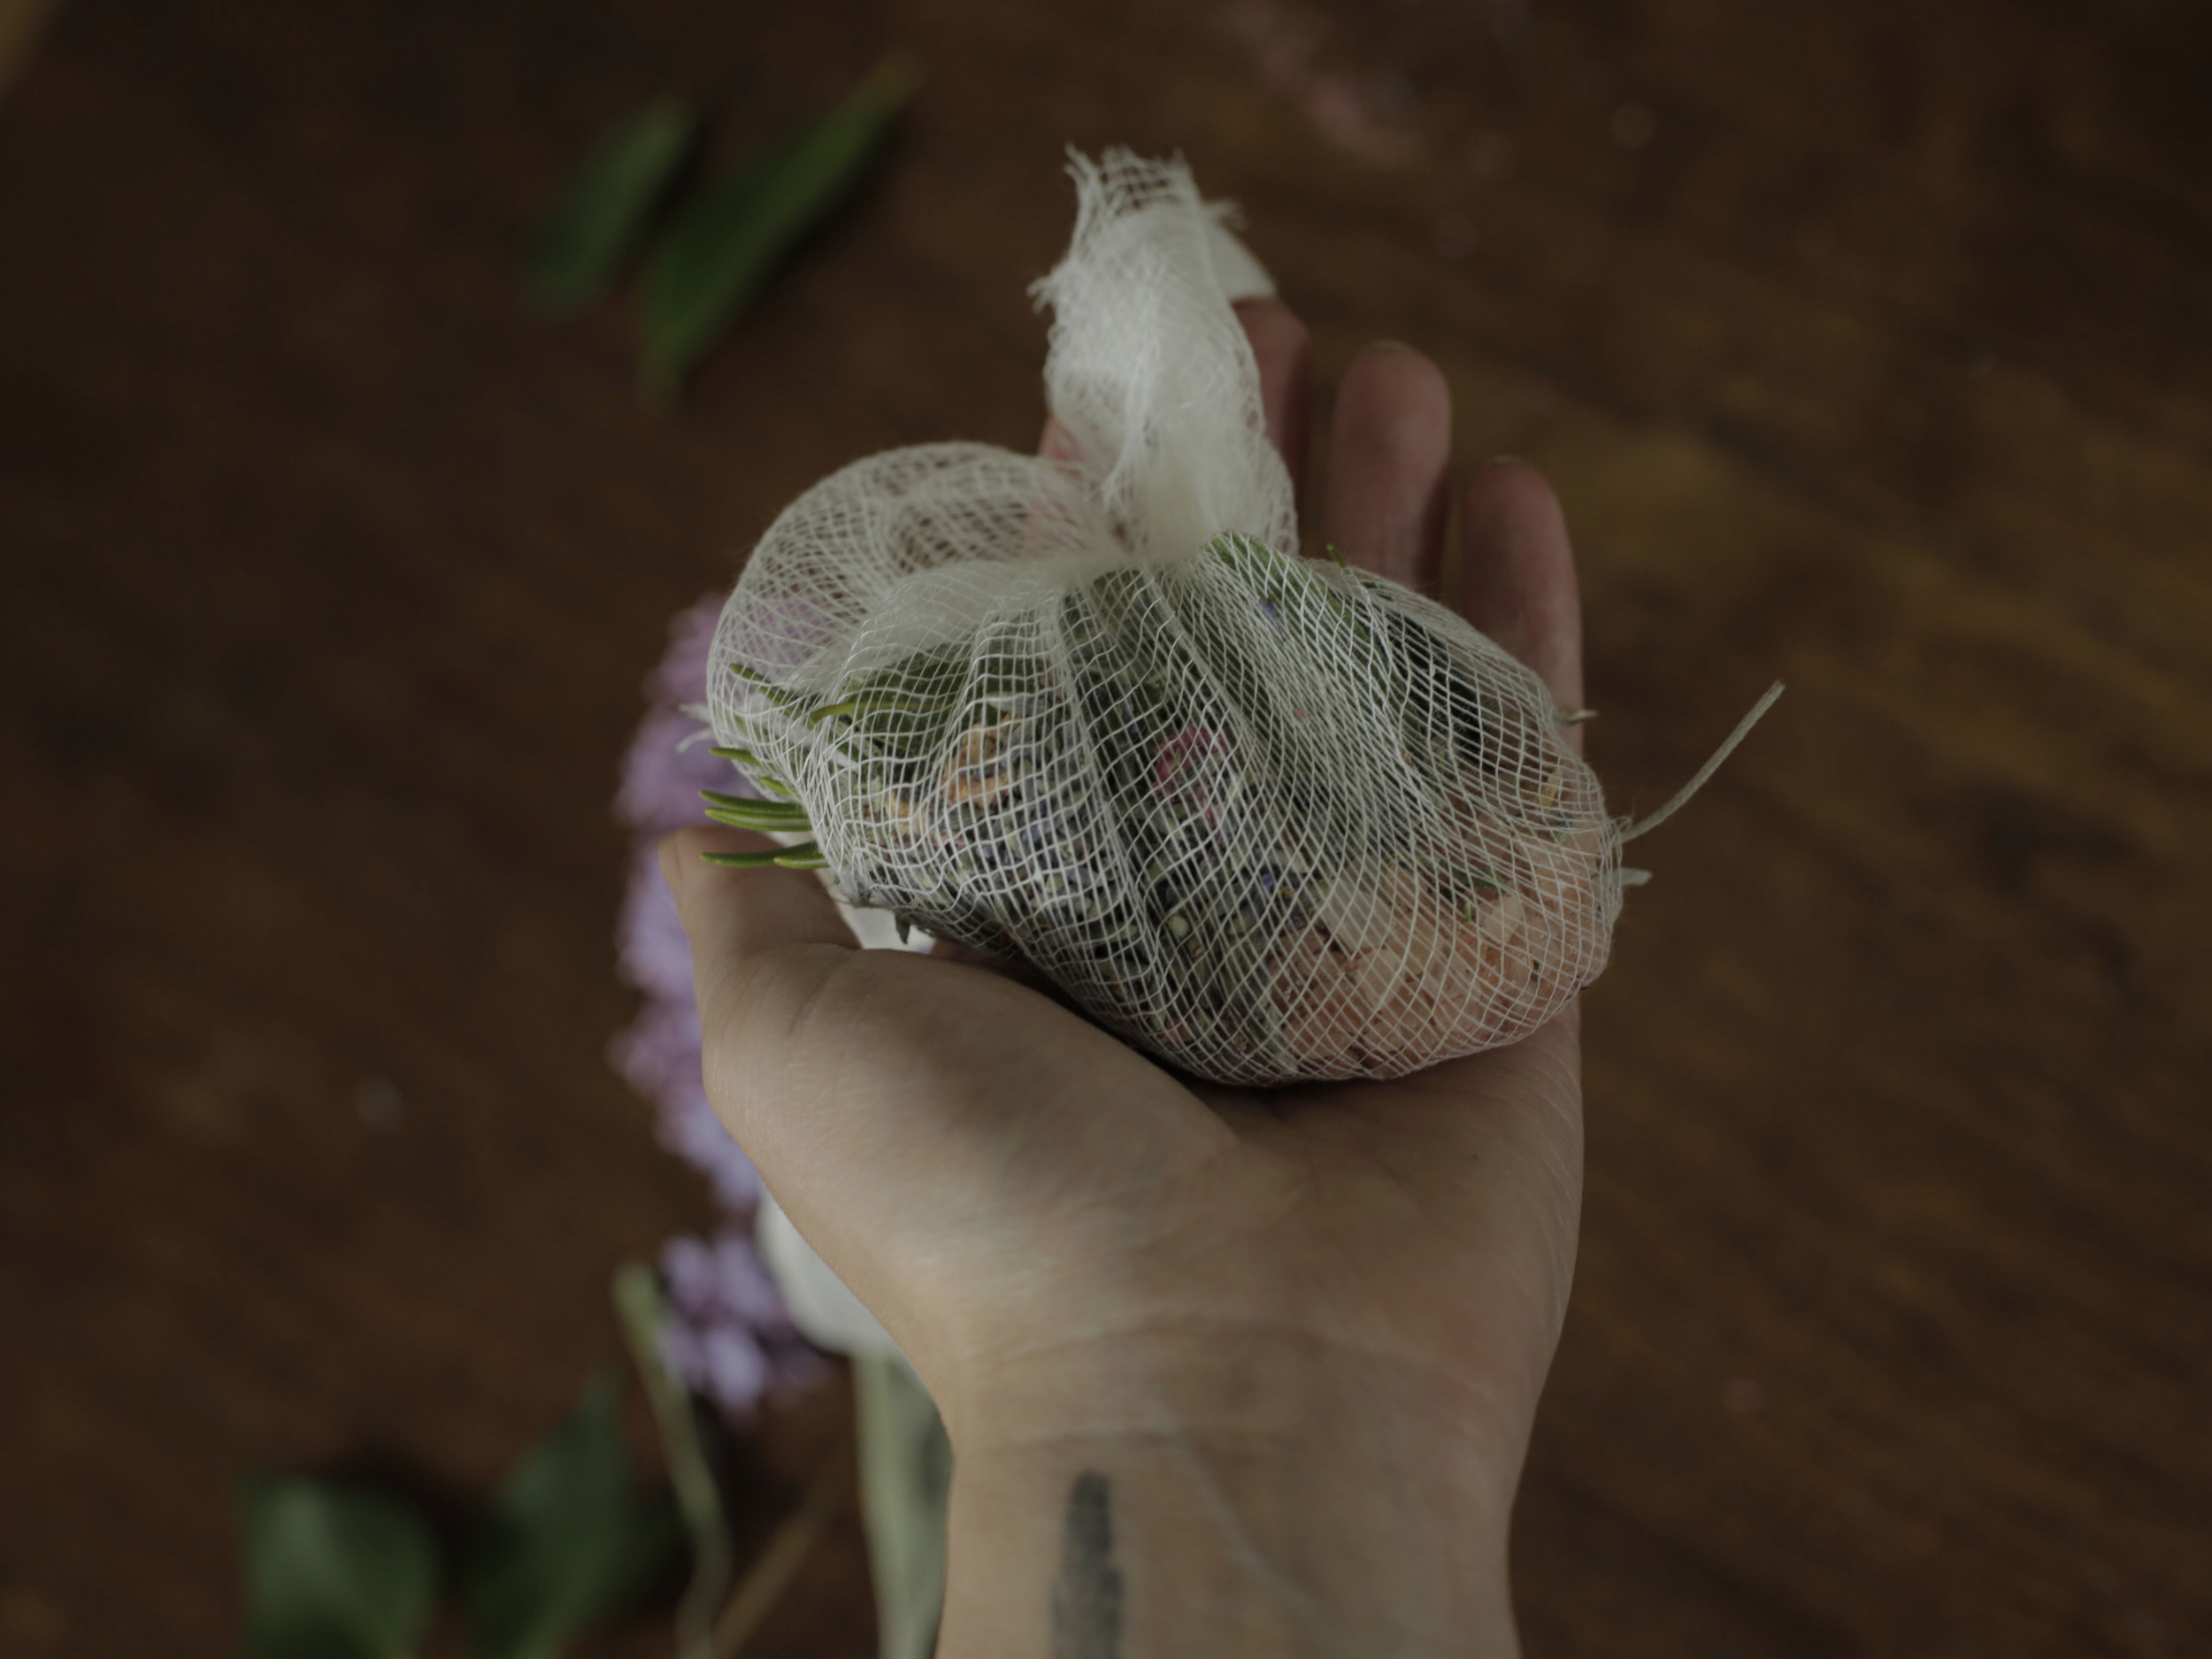
1. Start by crushing any larger dried herbs with a mortar and pestle. Then tie the sage, lavender, rosemary and bay leaves in a square of cheesecloth. I also added the pink salt to my cheesecloth but it ended up falling out so I wouldn't recommend it. You will use this bundle like a tea bag in the bath.  

moonbath9.jpg

2. Tie the bundle below the faucet so the hot water passes through it as the tub fills. This will wake the herbs up and infuse the bath water as it fills.

3.  As the tub is filling, add 1 to 2 cups epsom salts and 1/2 cup Pink Himalayan Salt directly to the bathwater. 

4. Throw in a handful of lilac blooms and bay leaves. You can also add rose petals or eucalyptus leaves.

5. After you have filled the tub, untie the bundle from the faucet and let it continue to steep in the bath water. 

6. Light a few candles and turn the lights out. Maybe dry brush your skin if you feel so inclined.

7. Focus on what you would like to manifest. On what you would like to release. Get specific. Breathe deep. Soak in the new moon energy.

Pro tip: After you have drained the bath, just let any remaining herbs or petals dry in the tub so you can easily sweep them out the next morning. Much easier than trying to clean them out while they are wet. 

Looking for last minute Mother's Day ideas? Simply use dried herbs instead of fresh and package your custom new moon bath blend in a pretty jar or tube. An easy, thoughtful gift for the lunar goddess in your life. 

xo, 

 
May 05, 2016 /Hailey Faust
Diy, gift, mother's day
:: DIY, :: Make, :: Pamper, :: Apothecary
1 Comment

Subscribe

Subscribe below to keep up on all the lovely!
We promise to never send spam or share your info with anyone else. For realzies. xo

We respect your privacy and will not share your information with any third parties. 

Thank you!

© 2016 HAILEY FAUST LLC. ALL RIGHTS RESERVED.