the Lovely Wild

  • Blog
  • Archive
    • :: Archive
    • :: Apothecary
    • :: Celebrate
    • :: DIY
    • :: Eat
    • :: Wander
  • About
  • Design
  • Contact
VanillaExtract2-8326.jpg

DIY :: Homemade Vanilla Extract

November 09, 2020 by Hailey Faust in :: Apothecary, :: DIY, :: Eat

As we step gently into the darker side of the year, I have been finding deep comfort in preparing our little den for hibernation. In frosted kitchen windows and folded flannels and pots simmering contentedly on the stove. Bell jars pinging on the counter. Dough rising and dishes stacked neatly in the cupboard. The quiet productivity that settles in as winter descends.

There is something deeply soothing about working gently with my hands and turning inward this time of year. One of my favorite autumn rituals is infusing a big batch of this simple homemade vanilla extract and dreaming of all the sweet things it will soon become. Cherry Almond Biscotti with hot coffee on a snowy evening. Homemade Maple Pecan Granola with our little family piled around the kitchen table. Grandma’s famous Christmas Tea Ring with cinnamon and maraschinos.

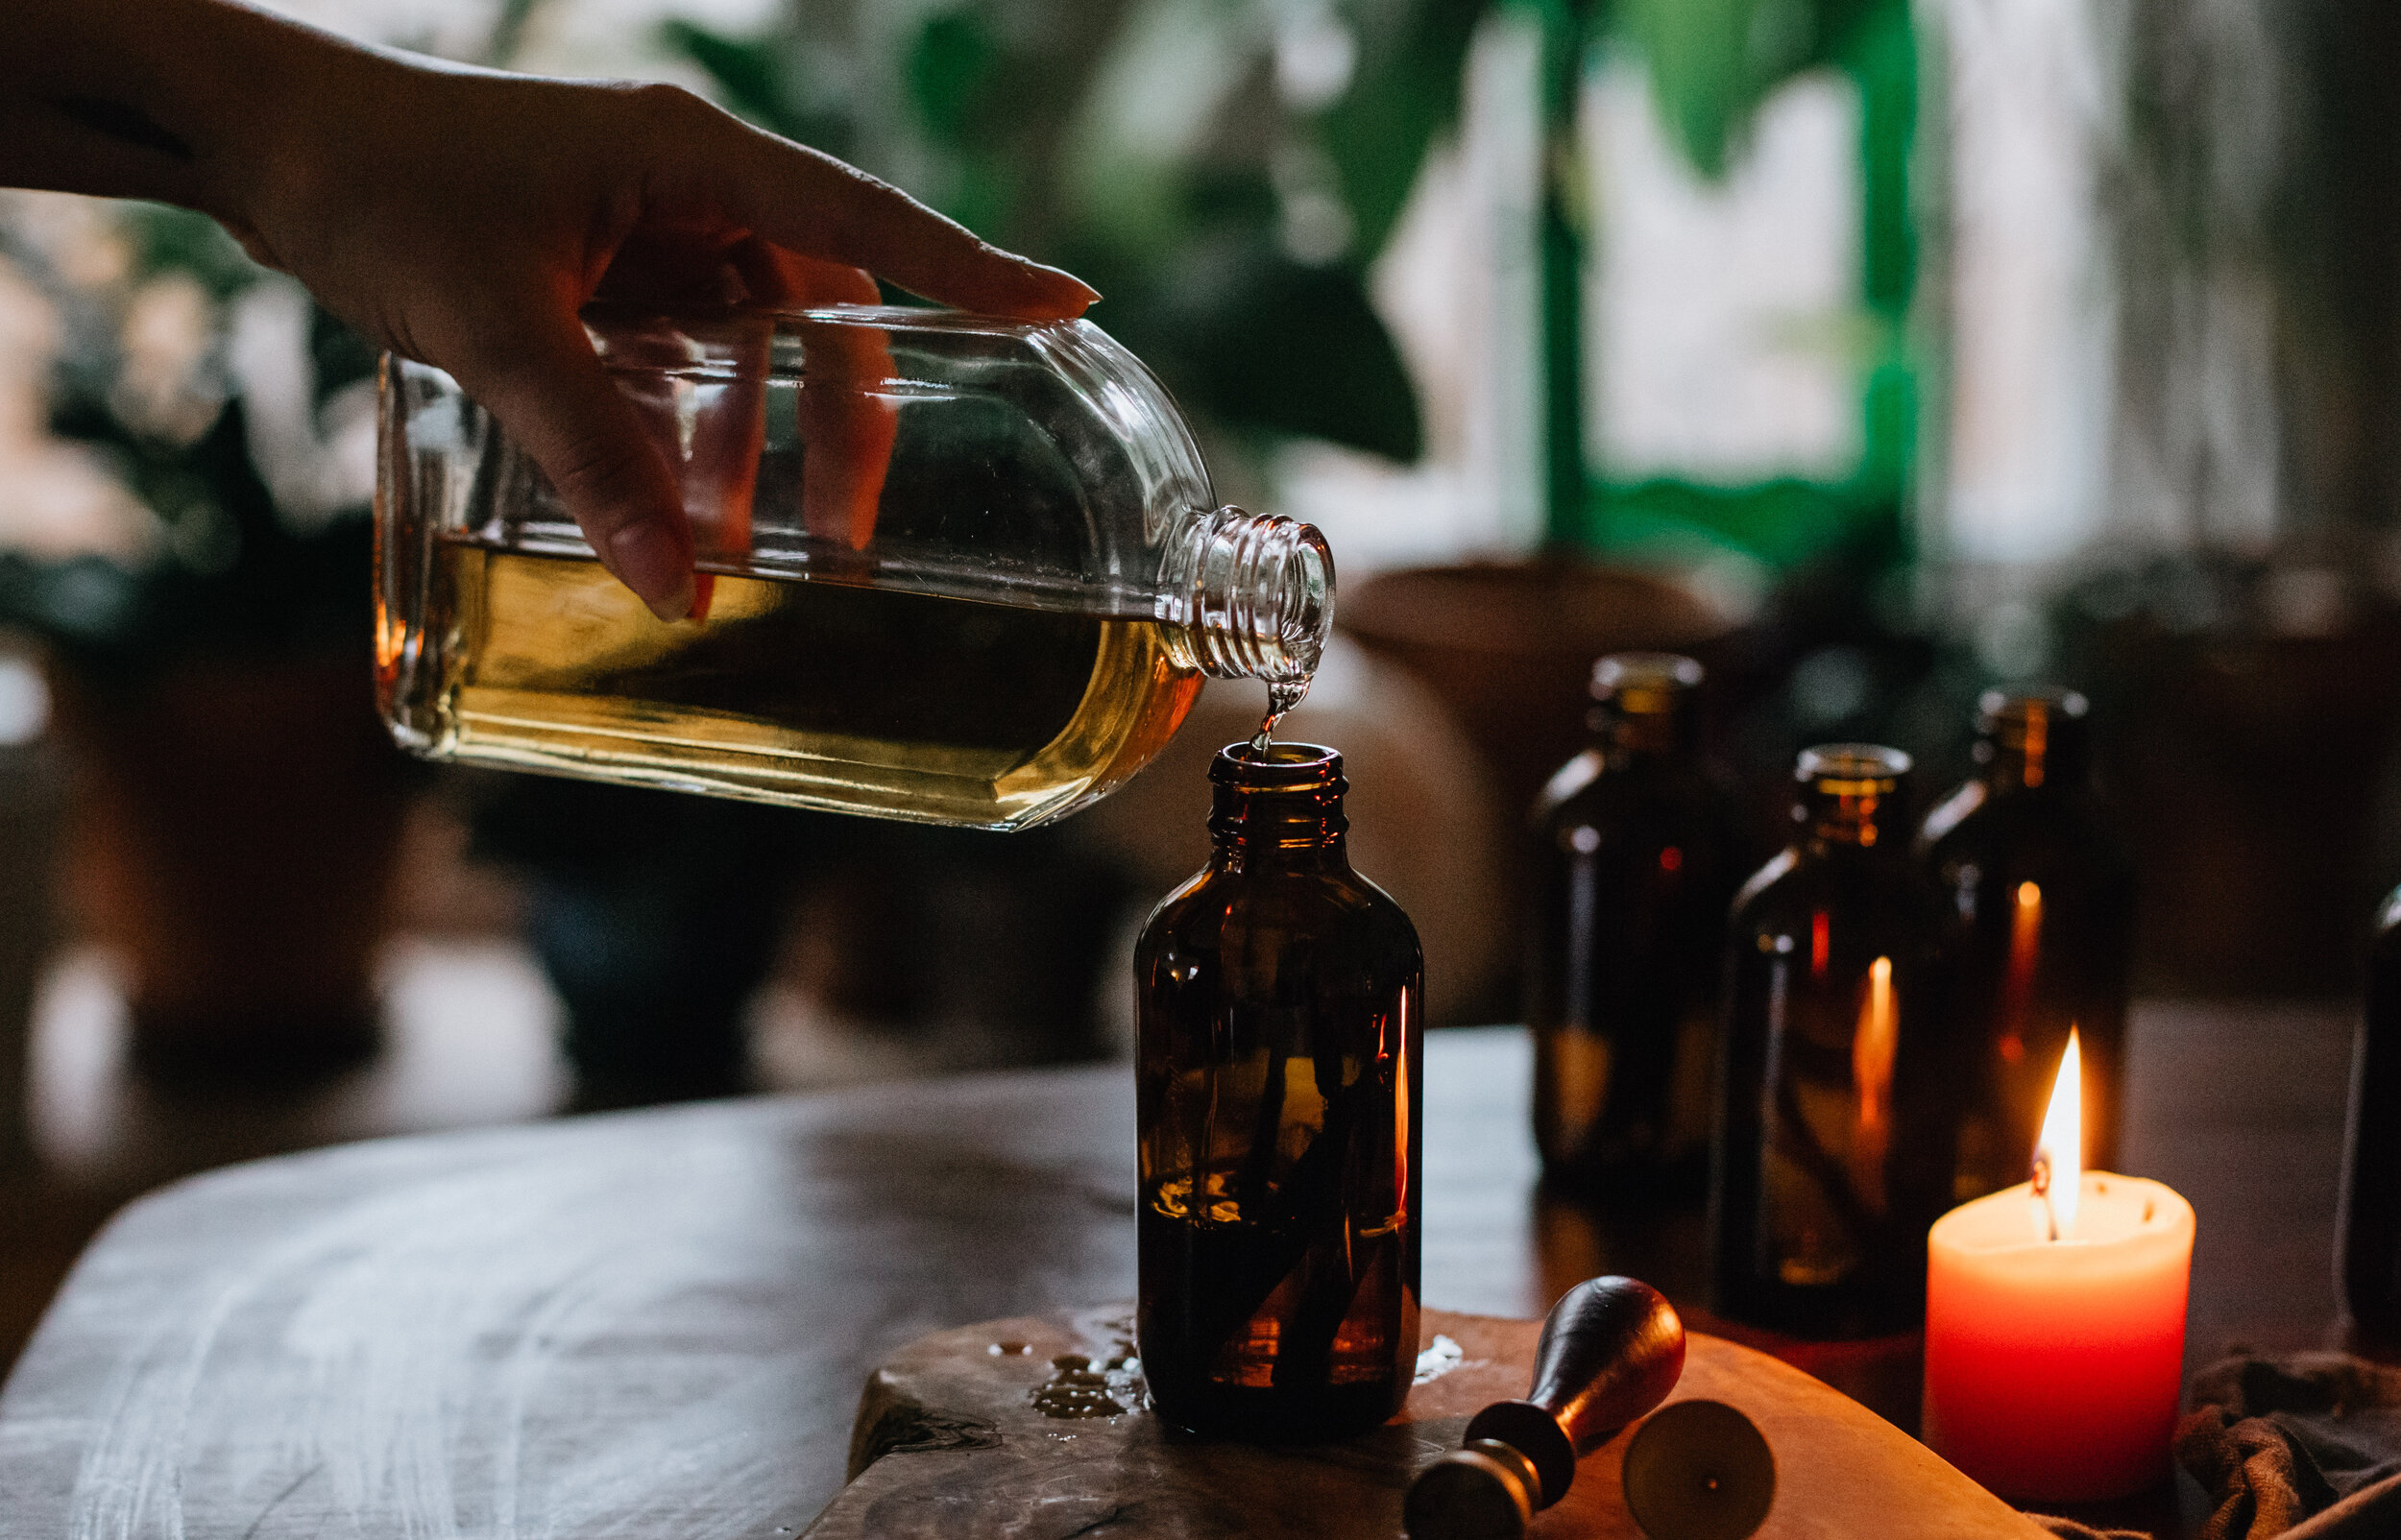
Extracts take time to infuse. Like all things, they need space to rest and integrate. So this is a lovely project to start now and have ready just in time for winter baking and gifting. It only takes about 15 minutes of hands-on time, and then a little darkness and a little patience. There are few things more magical than reaching for this sweet little amber bottle in the back of the cupboard when the time comes. Truly.

To say it’s been a strange year is a massive understatement. But when nothing seems certain, and every day brings new terrain to navigate, taking time to quietly prepare for the colder days ahead can be oddly comforting.

 Sending you warmth and love and peace of mind, dear friends.

VanillaExtract-8412.jpg
VanillaExtract-8348.jpg
VanillaExtract.png
 

Supplies:

  • Small amber jars (any size will do. I used 5oz.)

  • Organic vanilla beans (about 2 - 3 beans per small jar)

  • Bourbon - at least 80 proof (vodka also works well, but I prefer the sweet notes of bourbon)

  • Optional: Sealing wax and wax seal for packaging

VanillaExtract-8275.jpg

Step 1:

Begin by washing and sterilizing your jars and caps. You can do this with boiling water, or in a high temp dishwasher. After the jars are sterilized, allow them to air dry on a clean towel.

VanillaExtract-8281.jpg

Step 2:

Using a sharp knife, cut your vanilla beans lengthwise to expose the seeds inside. Then cut the beans in half vertically so they can easily fit into your jars with a little headspace left over.

VanillaExtract-8285.jpg

Step 3:

Place the equivalent of 2 - 3 whole vanilla beans (4 - 6 cut halves) in each clean bottle.

VanillaExtract-8308.jpg

Step 4:

Fill each bottle with bourbon or vodka, ensuring that the beans are completely submerged.

VanillaExtract-8331.jpg

Step 5:

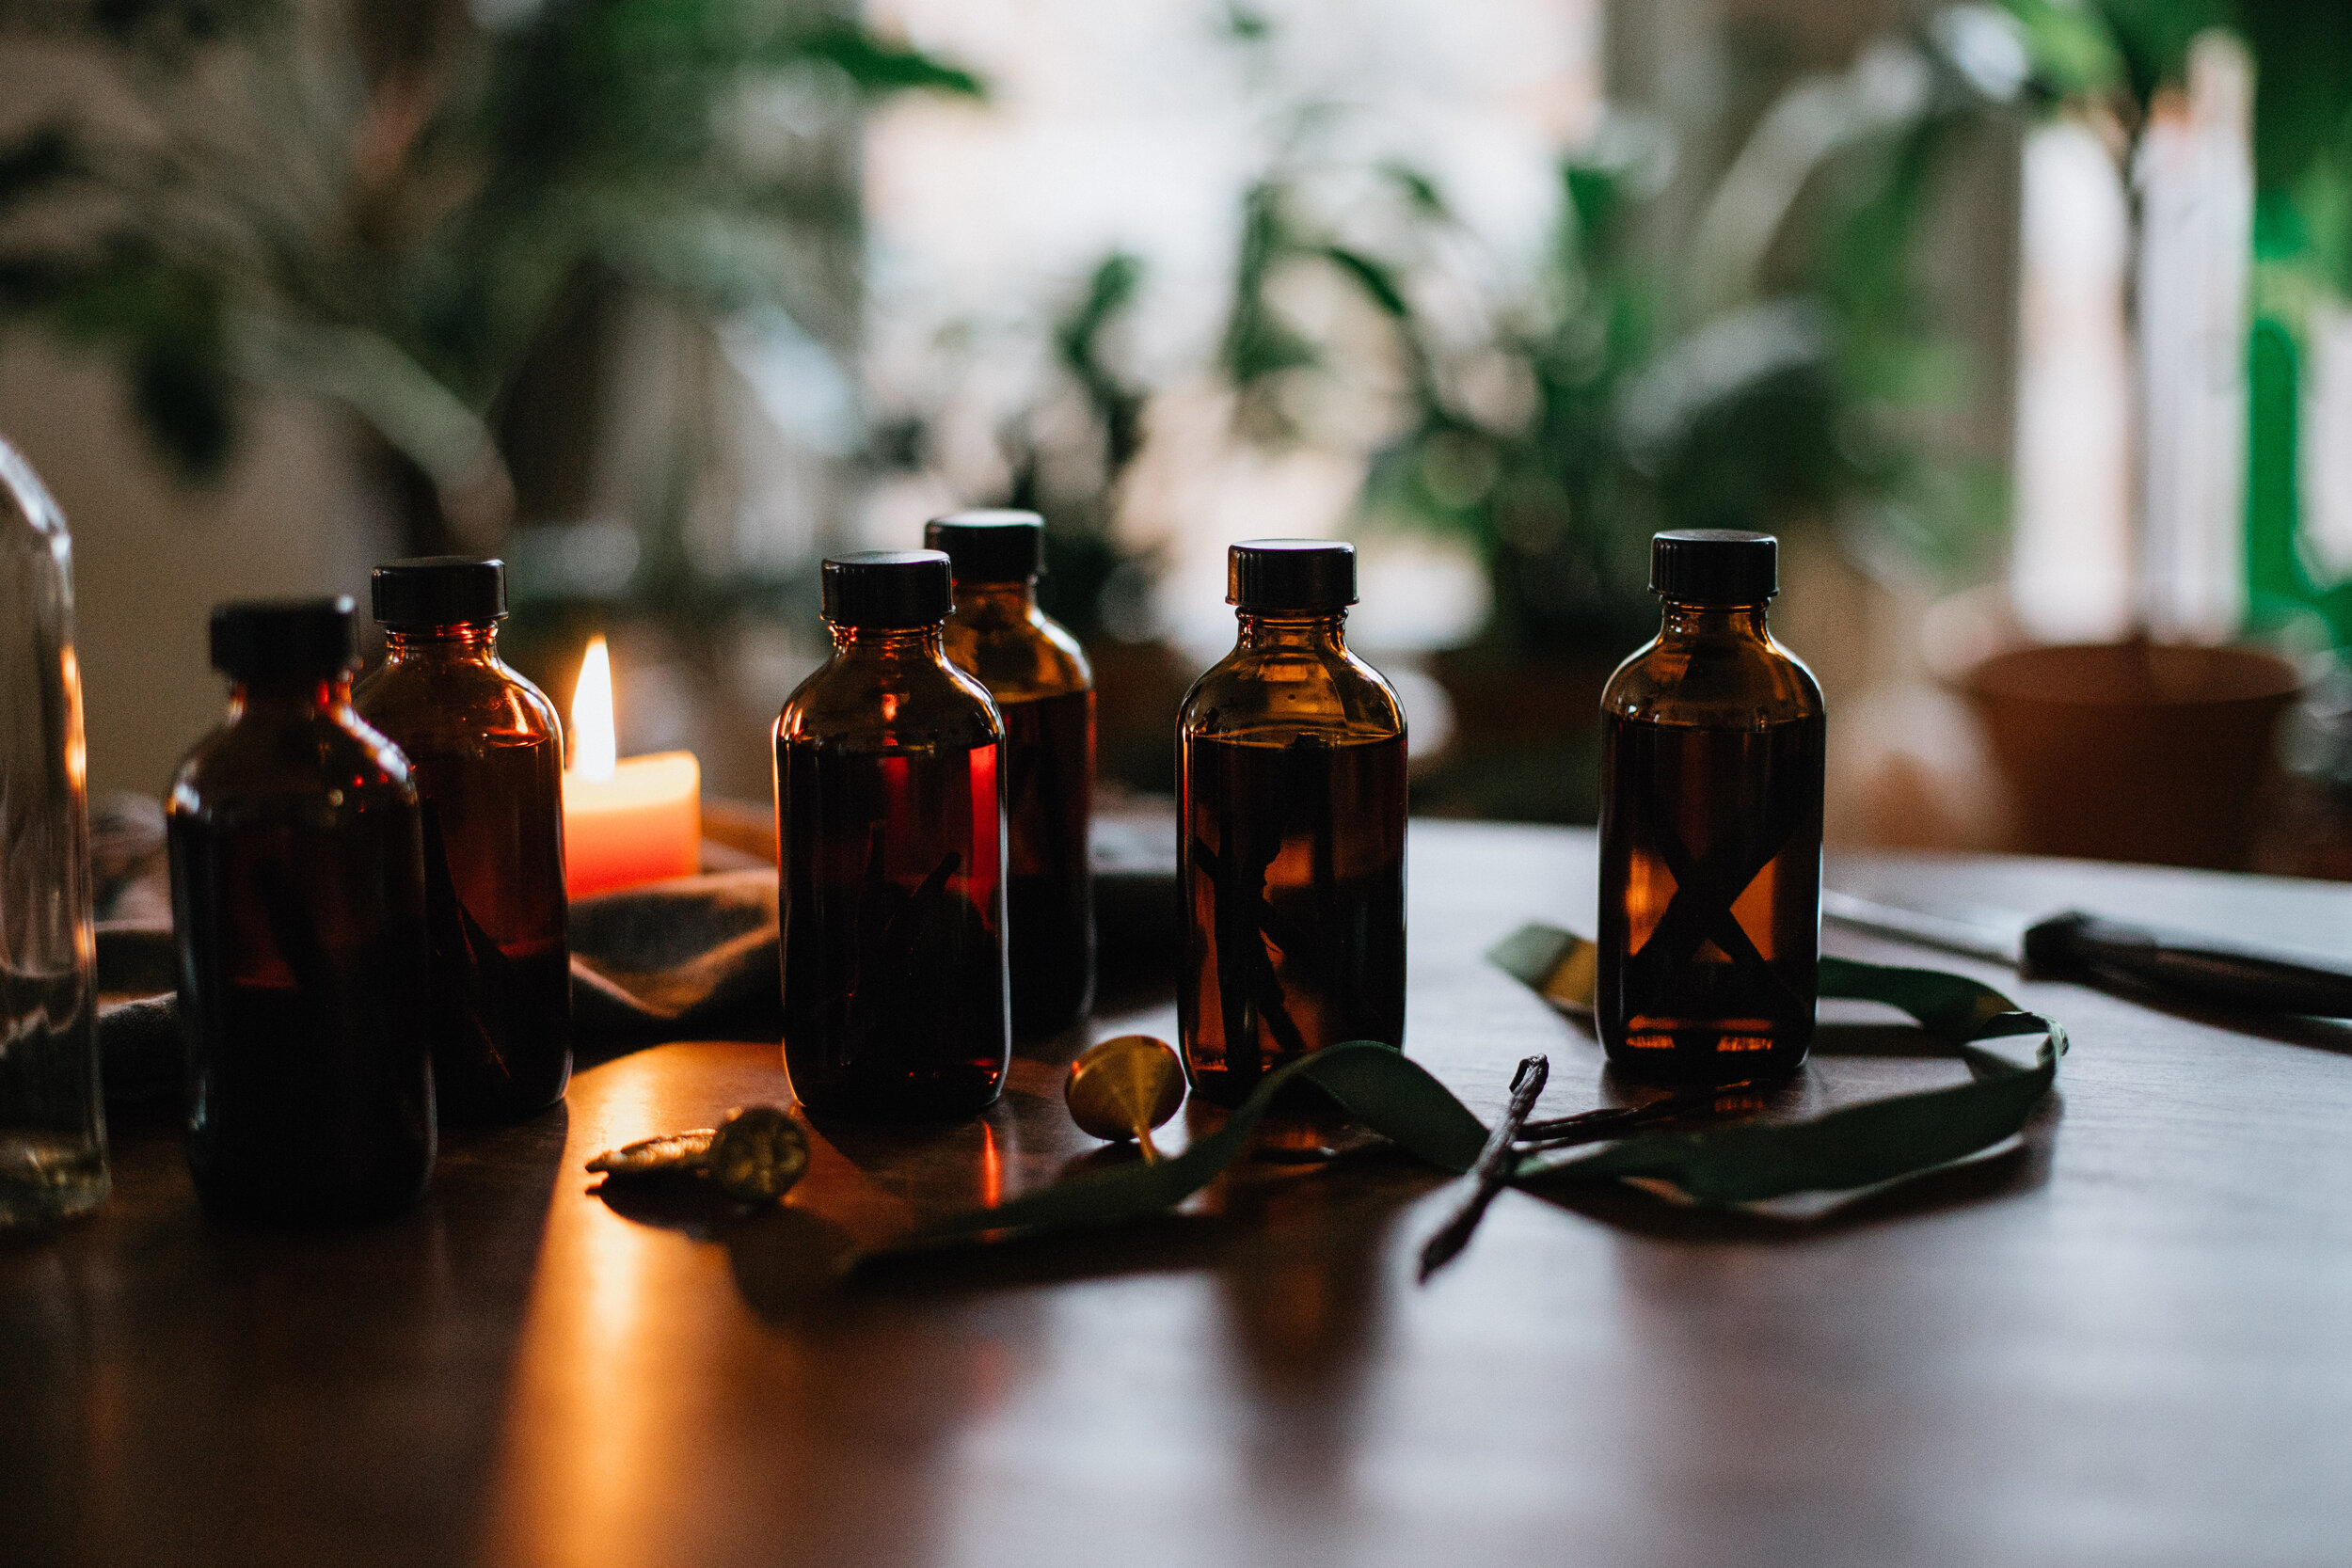
Cap bottles and place them in a dark cupboard for 5 - 8 weeks. I like to gently shake mine every day or two for the first few weeks to help the vanilla integrate.

Though you can start using the extract as soon as 5 weeks, the flavor will continue to deepen and improve with time. No need to remove the vanilla beans! You can continue to refresh the bourbon and add more beans to the jar as needed to ensure you have a perpetual supply of vanilla magic in the cupboard.

VanillaExtract-8361.jpg

Packaging:

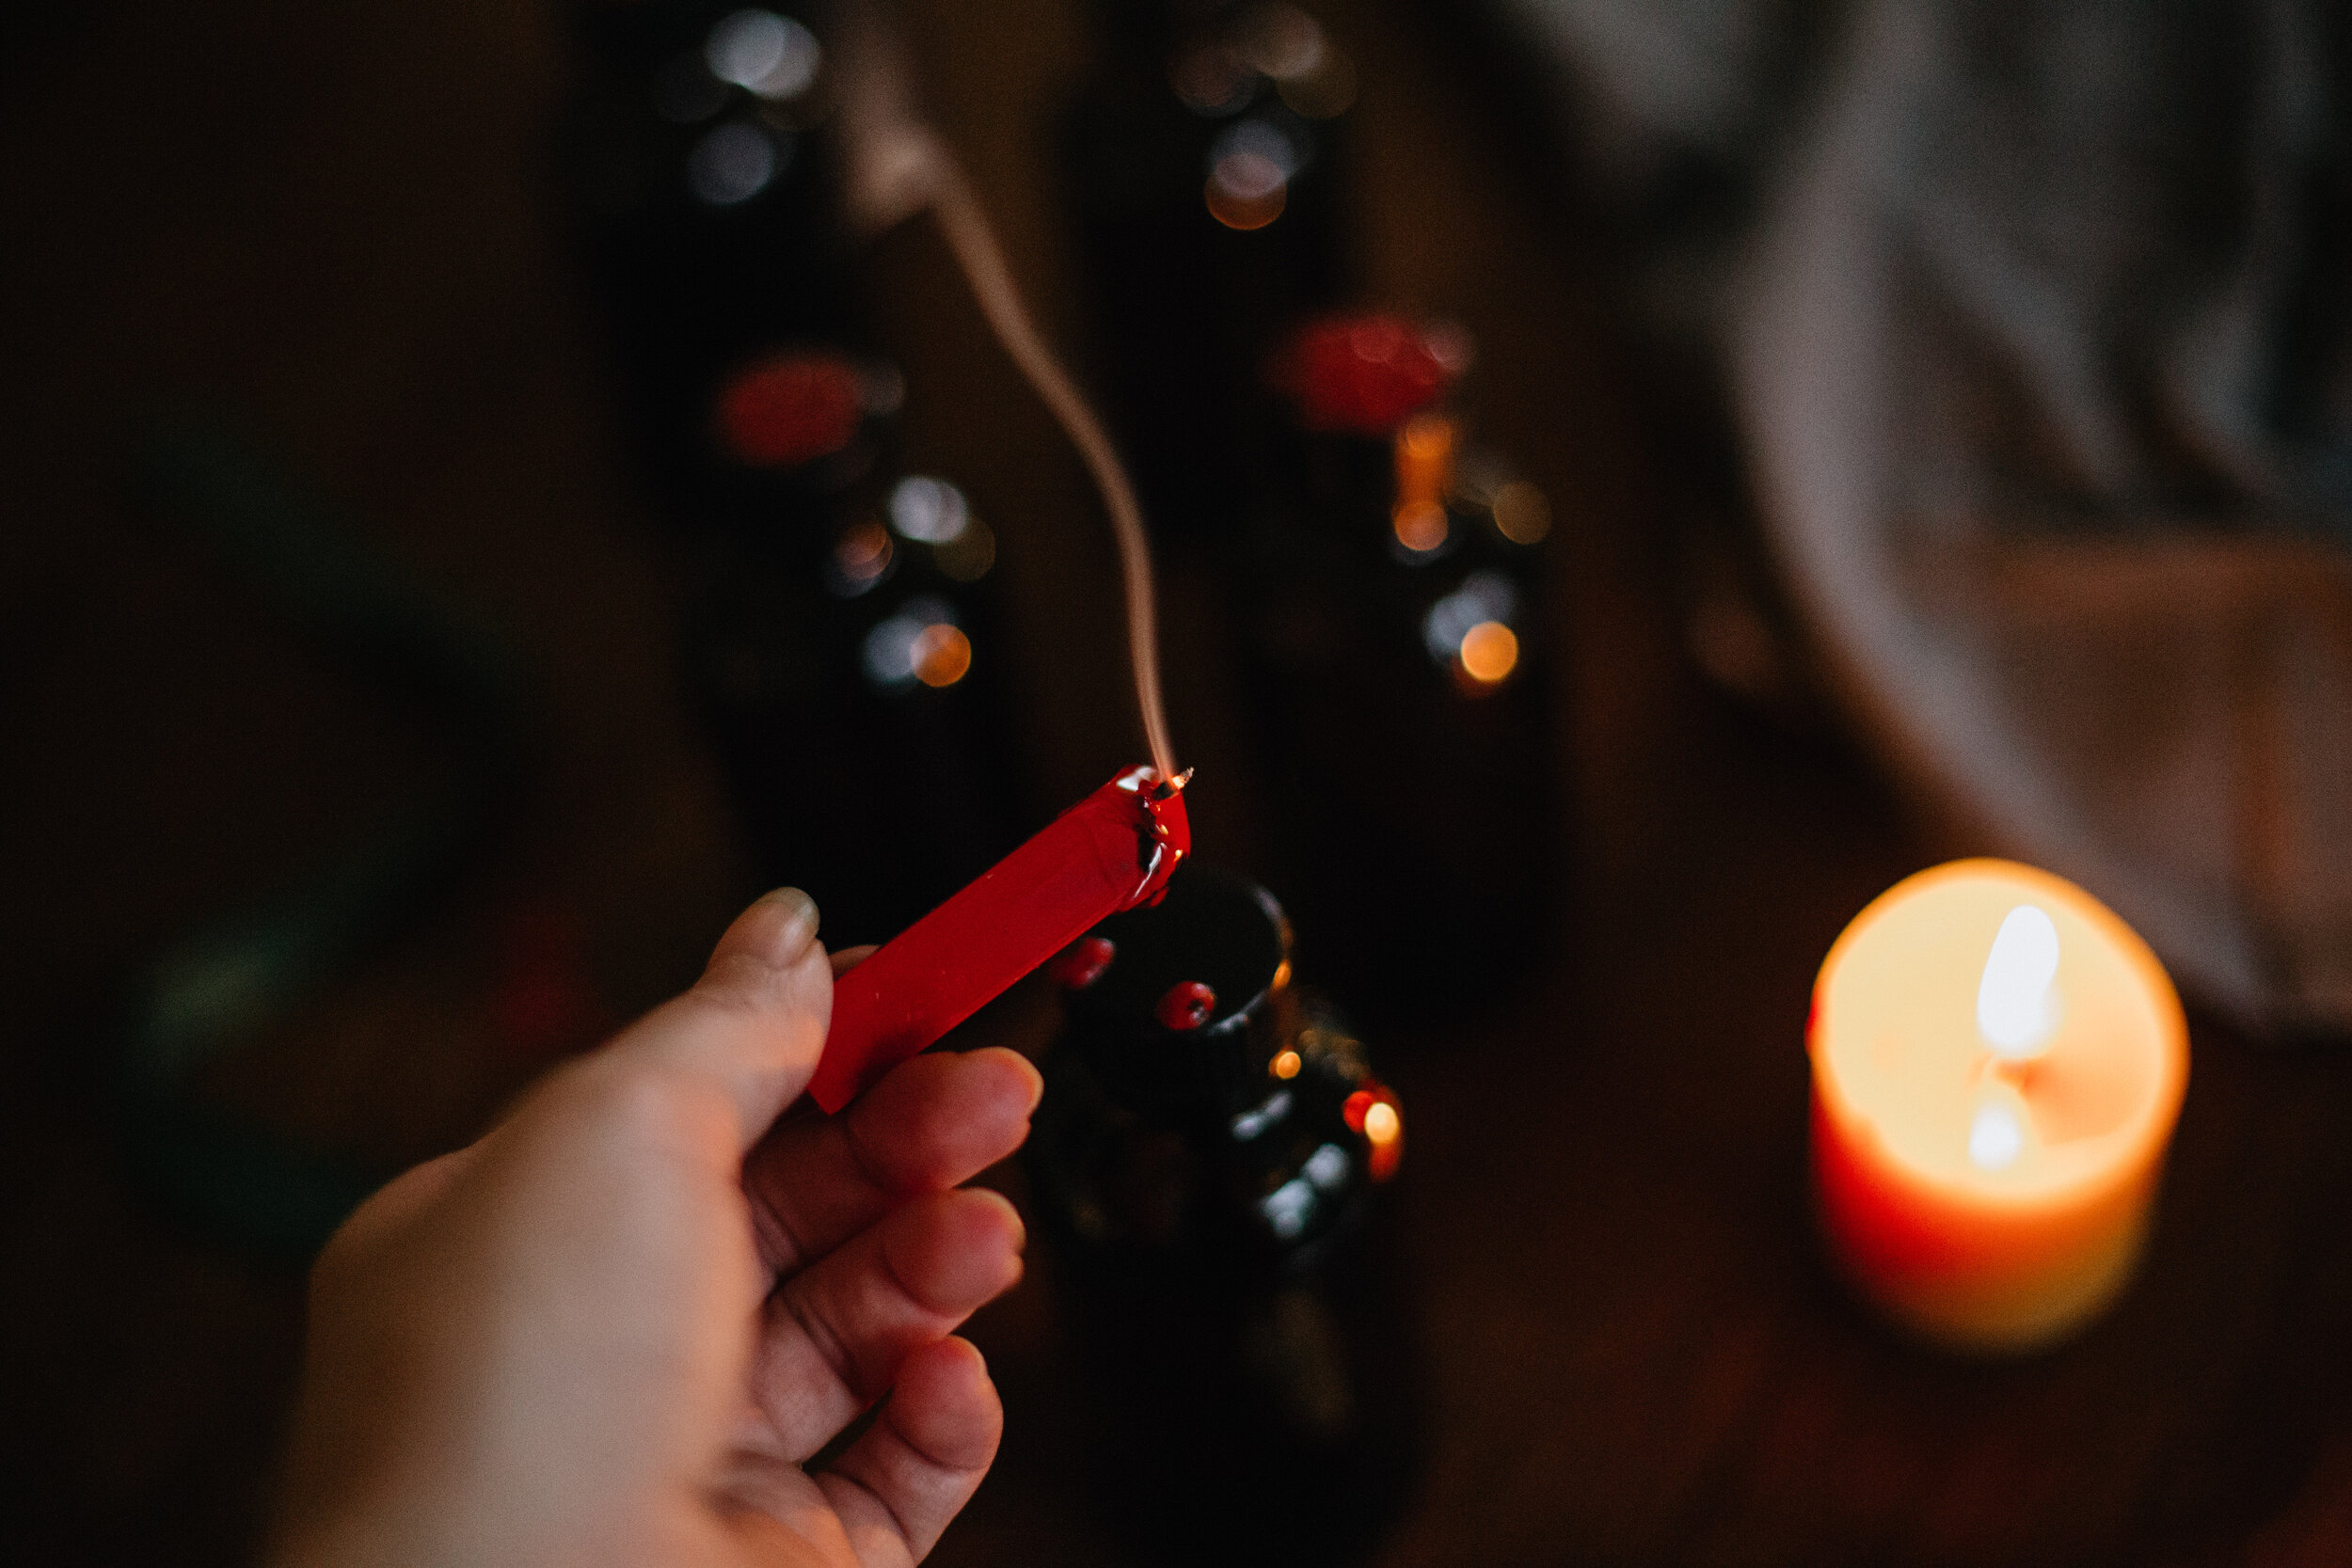
Since I will be gifting most of my bottles, I wanted to elevate the presentation a bit. I kept the packaging simple by melting a little red sealing wax onto each lid, and pressing firmly with a metal seal. I would love to try submerging the entire lid and neck of the bottle in wax to truly seal in the old world magic…but the light was fading and the baby was fussing, so this quick alternative did the trick in a pinch.

VanillaExtract-8371.jpg
VanillaExtract-8394.jpg
VanillaExtract-8380.jpg
VanillaExtract-8362.jpg

xo,

Haileysignature.png
 
VanillaExtract-8445.jpg
November 09, 2020 /Hailey Faust
homemade christmas gifts, vanilla extract, diy, diy vanilla extract, diy holiday, vanilla bean, urban homesteading, easy diy gifts, hygge, homemade, christmas, orange garland
:: Apothecary, :: DIY, :: Eat
Comment
20170906-_85B0628-2.jpg

Wild Huckleberry + Strawberry Jam

September 09, 2017 by Hailey Faust in :: Eat

The mountains are burning. The forests are parched. The hills and valleys are choked with smoke. There's no escape. The whole damn West is on fire. 

I find myself yearning for the crisp clear days of fall like never before. Praying for rain or snow or even a friendly wind to provide some relief from the relentless smoke. To clear our burning lungs and clouded thoughts. It's hard to breathe deep when you can't breathe deep, you know? 

So we have been spending lots of time indoors. Watching the last few weeks of summer fade slowly into the haze. Puttering around the kitchen and garden, canning and preserving. Trying to coax fall into an early arrival. There is something deeply grounding to me about putting up the summer harvest. Squirreling away a few jars for the colder days ahead. Connecting with our food and the changing seasons in a tangible, practical way. 

It's no surprise that jam was one of the first foods we, as humans, learned to preserve. Take some fruit, add honey or sugar, and you have a delicious preserve that lasts well beyond the growing season. A recipe for jam was even included in the earliest known cookbook, De Re Coquinaria (The Art of Cooking), written in the 1st century AD. It is rumored Joan of Arc ate quince jam for courage before battles, and that Mary Queen of Scots used marmalade to cure seasickness. Sailors ate jam rich with Vitamin C to prevent scurvy on long voyages. And during WWII, the Women's Institute put up over 1600 tons of jam to help combat food shortages. Jam has long been our friend in times of scarcity and uncertainty. A small comfort when winter is coming. 

So in the face of fires and floods, after I have called and donated and helped however I can, I make jam. If for no other reason than to carry on and lift morale. To remind myself of the quiet afternoon spent picking huckleberries under a clear sky not so long ago. To thank nature for her gifts even as we stand humbled by her power. 

Stay safe, dear ones. Sending all my love to you. 

20170906-_85B0638.jpg
20170906-_85B0602.jpg
20170906-_85B0706.jpg
20170906-_85B0654.jpg
20170906-_85B0752.jpg
20170906-_85B0798.jpg
huckjam.png
 

Please note, this recipe is for a small batch of fresh or freezer jam (because water bath canning is a whole thing...) 
Makes about four 8 oz jars.


Ingredients:

- 2 cups crushed huckleberries

- 2 cups crushed strawberries

- 1/4 cup lemon juice

- 1 pkg Pomona's Universal Pectin* 
*I like Pomona's because it sets the jam using calcium instead of sugar. This allows for a much lower sugar jam. Low Sugar Pectin would also work just fine. If you choose to use that, follow instructions on that package to ensure jam sets well.

- 1 to 2 cups sugar (depending on how sweet you like it)

Instructions:
 

1. If using Pomona's pectin, mix the calcium powder with 1/2 cup water in a small jar. Shake vigorously.

- Put a small plate or saucer in the freezer (you will use this later to check if your jam is set.)

- Make sure your jars and lids have been cleaned and sterilized. 

2. After cleaning fruit and hulling strawberries, crush strawberries and huckleberries in a medium bowl using a potato masher. You should have about 4 cups crushed fruit. Feel free to adjust ratio of strawberries to huckleberries to taste.

3. Measure 4 cups crushed fruit into large pan. Add lemon juice.

4. Add 2 teaspoons of the premixed calcium water. This is all you will need for this recipe (you can keep the rest of the jar for several months in the fridge if you plan to do more canning.)

5. In a separate bowl, combine sugar and 2 teaspoons pectin powder.  

6. Bring pan with fruit, lemon juice and calcium water to a full boil. Stirring to keep from burning. Add a small pad of butter to help reduce foaming. Gently spoon off any foam that forms at the top (it won't hurt ya but it makes the jam less pretty.)

7. Add sugar / pectin mix all at once. Simmer and stir vigorously for 3 mins to dissolve pectin and sugar. 

8. Take the cold plate out of the freezer and spoon a small dollop of jam onto it. Let it sit for a few moments then gently run your finger through the puddle of jam. If it leaves a clean line through the jam, and it is begining to take on a gelatinous structure, it is done. If the jam runny and saucy, and your finger doesn't leave a clean line, simmer for a few more minutes and then repeat the test on another cold plate.

The longer you cook the more "set" your jam will be. If you like a softer runnier jam cook for only 2-3 mins. If you like your jam to have more structure and gel, cook for a bit longer. I cooked mine for 5 mins and it came out just right. 

9. Fill sterilized jars to within 1/2" of top. Screw on lids. Let cool in fridge and then move to freezer as soon as they are no longer warm to the touch. Keeps in freezer for 1 year. 

10. Spread on good crusty bread with butter. Hibernate. 

20170906-_85B0647.jpg

xo,

Haileysignature.png
 
20170906-_85B0721.jpg
September 09, 2017 /Hailey Faust
homemade, jam, jelly, huckleberry, strawberry, the art of slow living, slow living, hygge, recipes, recipe, diy, simple
:: Eat
Comment
20170401-_85B9108.jpg

Slow Coffee :: Homemade Rose + Vanilla Bean Iced Lattes

April 11, 2017 by Hailey Faust in :: Eat

I have been thinking a lot about time lately. How we spend it. How we value it. How we never seem to have enough of it.

We live in a culture that idolizes "busy" and pencils in happiness for a later date...for some fabled time in the distant future when the work is done and the bills are paid and the to-do lists have finally been conquered. It's so easy to forget that we are only allotted a few fleeting hours on this planet. That they will pass no matter how we choose to spend them. That time is a precious and non-renewable resource.

Lately, I have been falling into the trap of "busy." Hook, line, and sinker. Days have been blurring into weeks, and weeks into months, and it isn't until a friend sincerely asks, "What's new?" that I realize I haven't been making time for any of the things that bring me joy. That I have nothing to say except, "Oh, you know...just working a lot." That I have been so caught up in the day-to-day grind, that I have forgotten to actually enjoy life.

So for my birthday this year, I am promising myself the gift of time and committing to carving out a little space, each and every day, to live slowly and mindfully. To start manifesting the creative projects that have been rolling around in the quiet corners of my mind for the past few months. To make things by hand. To play. To plant. To make room for the quiet daily joys I so often rush past. 

And this means I'm going to need to get real cozy with the word "no" (something I have historically been terrible at.) I'm starting to realize that slow living is as much about saying "no" to things that don't serve you, as it is about saying "yes" to things that do. Prioritizing, lovelies. Cutting out what's not essential. Simplifying. Like Marie Kondo-ing your closet, but with your planner. 

So to mark my renewed commitment to slowing down and celebrate the first few glorious days of spring, I made a batch of these lovely Rose + Vanilla Bean Iced Lattes. Infusing the almond milk with whole vanilla bean and rose petals takes a little more time and a little more love, but really, don't all the best things? The end result is floral and creamy and refreshing and barely sweet. The perfect addition to a sunshiny morning spent lounging on the patio, ignoring your inbox. 


Ingredients:

*Please note, like many of my recipes, the amounts here are merely suggestions. Feel free to adjust to your taste. Makes enough for 2.

- 2 cups organic almond milk (soy, coconut or dairy would also work beautifully)

- 1 whole vanilla bean

- 3 T of organic food-grade dried rose petals 

- 2 cups cold brew coffee or fresh espresso shots

Instructions: 

1. Freeze cold brew coffee in ice cube tray to make coffee ice cubes. This will keep the ice from watering down your latte as it melts.

2. Add almond milk to a small pan. Using a sharp knife, cut vanilla bean length-wise to expose the tiny seeds inside. Scrape the inside flecks of vanilla bean into the pan of milk, then add the empty husks to the milk as well. Add rose petals.

3. Heat pan over low heat until it begins to simmer. Once the creamer simmers, remove from heat. Cover and allow to steep for 30 mins - 1 hr. (The longer you steep, the stronger the rose flavor will be.)

4. Strain creamer into a clean jar or bowl to remove vanilla bean husks and rose petals. Those gorgeous little flecks of vanilla bean will stay in the creamer. Chill in fridge.

5. Add coffee ice cubes and fresh espresso shots (or cold brew coffee) to highball glass. Add creamer to taste. Garnish with crushed rose petals.

xo, 

 
April 11, 2017 /Hailey Faust
Coffee, recipes, iced latte, slow living, the art of slow living, the lovely wild, rose, vanilla bean, homemade, almond milk, food photography, lifestyle blog, lifestyle
:: Eat
1 Comment

DIY :: Sandlewood Beard Oil with Rosemary and Cedarwood

February 14, 2017 by Hailey Faust in :: Apothecary, :: DIY, Gifts

A fast and furious post for you today lovelies!

This little elixir comes to us from one of my very favorite souls - the lovely Kendra Potter of Sistermoon Wellness. Kendra whips up a batch of this fragrant oil for the bearded men in her life every holiday season. My husband has gotten so addicted to the stuff that come November he starts to drop her a series not-so-subtle hints that his supply is running low. It smells warm and earthy and woodsy and romantic all at once.  A subtle fragrance for the man who loves the mountains. 

And if you are a procrastinator like myself, you're in luck! This little gem only takes 5 minutes to mix up. Package it up in a vintage tin with a beard brush or comb and you have a unique and personal handmade gift he will actually use. 

Happy love day, dear ones!


***Disclaimer: I’m not a doctor, nurse, or licensed healthcare practitioner. Some herbs, botanicals, and essential oils are not safe for pregnant or nursing mothers or children and may not be suitable to take with certain medications or conditions. This information is not meant to diagnose, treat, cure, or prevent any disease. Always consult your doctor before beginning any kind of new vitamin, herbal, diet, or exercise regime. Make sure to research all of the ingredients to make sure they are safe for you and your family. 

Recipe by Kendra Potter. I used organic oils wherever possible. If you are looking for high quality essential oils, I highly recommend our friends at White Stone Essentials. 

Ingredients

  • 2 oz organic Jojoba Oil

  • 7 - 9 drops Cedarwood essential oil

  • 7 - 9 drops Rosemary essential oil

  • 7 - 9 drops Lavender essential oil

  • 4 - 5 drops Sandlewood essential oil

  • 4 - 5 drops Cypress essential oil

  • 4 - 5 drops Rose essential oil

Instructions

1. Add jojoba oil to a small vial. I found that the metal tip of a pastry bag makes a perfect little funnel.

2. Add all oils, feeling free to modify amounts to preference.

3. Close vial and shake well. Use a few drops in beard after bathing.

xo,

 
February 14, 2017 /Hailey Faust
diy, christmas, diy christmas gifts, homemade, beard, oil, recipe, diy gifts for him, holiday, beard oil, slow living, the art of slow living, Holiday, apothecary, gifts, presents, winter
:: Apothecary, :: DIY, Gifts
Comment

DIY :: Bay Laurel Eucalyptus Wreath & the Dark Days of Winter

December 01, 2016 by Hailey Faust in :: DIY, :: Celebrate, :: Make

For thousands of years, the approach of winter was a dire, fearful time for humans. It meant famine and illness and death were on the horizon. That the world would be plunged into relentless cold and darkness and that not everyone would survive. It was a time to huddle together. To batten down the hatches. To hide away and hold on till spring.

December (and the winter solstice specifically), marked the pinnacle of this desolate season. But many cultures also used this as a time to celebrate life and light in the face of the encroaching darkness. To gather with loved ones around the fire. To feast and sing and share what little we had squirreled away. To celebrate the simple fact that we were still alive. Now don't get me wrong, humans have plenty of flaws, but I think there is something deeply beautiful about that. That on the longest, coldest nights of the year, when all was quiet and frozen and bleak, we shined our flickering lights into the vast darkness and found joy. 

I love that you can still find remnants of these ancient rituals in our modern holiday traditions. Little echoes of forgotten customs. We still hang lights in dark windows. We feast and sing. We bring in evergreens that don't mind the cold. Perhaps one of the most ubiquitous of these symbols is the humble wreath. There are many theories on the origin of this tradition, but my personal favorite is that the hearty evergreens and circular shape represent eternal life in the face of winter. We hang them in our doors and windows to remind our neighbors, "It's alright, friends. Even on the darkest days of the year, something green remains." What a lovely thought.

I made this simple wreath with bay laurel and eucalyptus and an old embroidery hoop. Nothing too fancy. Just simple supplies, a little time and a cup of peppermint tea. It felt good to slow down and breathe deep and play with plants for a while. A nice slow segue into the bustle of the holiday season. 

Happy December, dear ones. Here's to sharing and celebrating and shining our little lights. So much love to you. 


Supplies

- Hearty greens (I used branches of bay laurel as my base. They hold up nicely and smell amazing)

- Smaller greens & berries for texture (I used gunny, blue and seeded eucalyptus as well as a few dried pepper berries)

- Embroidery hoop of any size

- Floral wire

- Ribbon

Instructions

1. Start by cutting your bay laurel branches into more manageable lengths. I cut mine into roughly 1 foot sections. The size of these will depend on the size of your embroidery hoop. I set aside a few small sprigs to fill in any sparse spots later.

2. Play with the natural curve of the branches to find where they want to lay on the hoop. Word to the wise: don't try to fight the natural curve of the branches. Let them lay how they want to lay and work around their natural shape. Bay laurel lends itself beautifully to a circular wreath. Using segments of floral wire, begin wrapping the branches in segments around the hoop. It's okay if the wire is visible or there are some bare spots. You can cover these will smaller greens later. Use small lengths of wire to attach each branch in 2 - 3 spots.

3. Once you have your base greenery secured around the hoop you can start playing with the smaller greens. I wove in blue and seeded eucalyptus to fill in bare spots and cover any exposed wire. I also added a few more sprigs of bay laurel here and there. Even some pheasant feathers would be cool. There is no right answer here! Have fun and play with finding the right balance. I tend to like things a little more organic and unfussy so I left mine a bit wild. You can easily tame it with some additional floral wire if thats more your style. It helps to hold the wreath up to the wall now and then to get perspective and make sure the weight is balanced.

4. Tie a pretty ribbon or twine around the top of the wreath. You can either use this to hang it, or if you have a wreath hanger you could opt for the traditional bow. As a finishing touch, I wove in a few dried pepper berries left over from our Thanksgiving table. Those little guys last forever. 

5. Hang and enjoy! You can definitely hang these little loves outside, but I couldn't bare to be parted with the spicy, earthy aroma of the bay leaves. I opted to display ours in our front window so it can be seen from the street, but we can still smell it in the house. Everybody wins.

xo,

 
Follow my blog with Bloglovin
December 01, 2016 /Hailey Faust
wreath, christmas, celebrate, the lovely wild, slow living, lifestyle, craft, holiday, decoration, diy, eucalyptus, homemade, organic, natural, apothecary, the art of slow living, handmade, simple christmas decorations
:: DIY, :: Celebrate, :: Make
3 Comments

Apothecary :: DIY Lemon + Rosemary Sugar Scrub

February 03, 2016 by Hailey Faust in :: Pamper, :: DIY, :: Apothecary, Gifts

We are still restlessly hibernating here in the mountains of Montana. A fresh six inches of snow over the past few days has dashed any hopes of an early spring and forced us to retreat back to our blankets and books and baths with a general harrumph. For someone who strives to live seasonally and embrace the beauty of each phase, late winter has always been the hardest to love for me.  One of my favorite littles recently asked her Mama, "Can we at least pretend it's spring?" I hear you, sister.  And yes. Yes we can. 

But if we can see past the grey, there is also a lovely energy buzzing beneath the surface this time of year. Days are slowly getting longer. Seeds are stirring in the ground, preparing to launch triumphant green shoots when given the word. Animals and humans are rolling over in their dens. It reminds me of that final hour of sleep in the early morning, when you are subtly aware the sun is rising, but still lost in a dream world. 

I'm using these last moments of rest to indulge in some serious self care. At home spa days have become a weekend staple over here. This Lemon Rosemary Sugar Scrub takes about 5 minutes to make and feels super pampery. I love using lemons in beauty rituals because they are bright and cheerful as well as highly beneficial. They have antibacterial and immune-boosting properties and also reduce the sight of blemishes. Win-win-win. Rosemary is an inflammatory and improves circulation. Also, it smells awesome. Sugar is a great exfoliator and moisturizer. Coconut oil has approximately one million beneficial properties. You are killing like 15 birds with one sugar scrub. 

Take a few moments to slow down and pamper yourself. You deserve it. 


Ingredients

2 cups organic raw sugar

1 organic lemon 

1 - 2 sprigs of rosemary

3 - 4 tablespoons coconut oil (olive or jojoba oil work great too)

10 - 15 drops lemon essential oil

Instructions

1. Add sugar to medium bowl and squeeze in the juice of one lemon.

2. Coarsely chop the rosemary leaves and add as much or as little as you'd like. 

3. Melt coconut oil and add a little at a time until you reach your desired constancy. I like my scrubs to be a little grittier so I used about 3 tablespoons. Mix in chopped rosemary leaves and essential oil.*

4. Store in mason jars or other airtight container for up to one month. 

* Tips: Add a few drops of essential oil at a time to make sure you don't create an aroma that's overpowering. There is no right way to do this, just keep adding ingredients until it feels finished. I like to use this in the shower so that there is no cleanup and the sugar goes right down the drain. My skin has been so so soft. I used 1/2 pint jam jars (recipe makes 5) and delivered to some of my girl friends as an early Galentines day treat. (Yep. Galentines. I went there.) 

xo,

 
February 03, 2016 /Hailey Faust
self care, the art of slow living, slow living, apothecary, Diy, sugar scrub, bath, homemade, organic, beauty, ritual, holiday gifts
:: Pamper, :: DIY, :: Apothecary, Gifts
2 Comments

Subscribe

Subscribe below to keep up on all the lovely!
We promise to never send spam or share your info with anyone else. For realzies. xo

We respect your privacy and will not share your information with any third parties. 

Thank you!

© 2016 HAILEY FAUST LLC. ALL RIGHTS RESERVED.