the Lovely Wild

  • Blog
  • Archive
    • :: Archive
    • :: Apothecary
    • :: Celebrate
    • :: DIY
    • :: Eat
    • :: Wander
  • About
  • Design
  • Contact
20170906-_85B0628-2.jpg

Wild Huckleberry + Strawberry Jam

September 09, 2017 by Hailey Faust in :: Eat

The mountains are burning. The forests are parched. The hills and valleys are choked with smoke. There's no escape. The whole damn West is on fire. 

I find myself yearning for the crisp clear days of fall like never before. Praying for rain or snow or even a friendly wind to provide some relief from the relentless smoke. To clear our burning lungs and clouded thoughts. It's hard to breathe deep when you can't breathe deep, you know? 

So we have been spending lots of time indoors. Watching the last few weeks of summer fade slowly into the haze. Puttering around the kitchen and garden, canning and preserving. Trying to coax fall into an early arrival. There is something deeply grounding to me about putting up the summer harvest. Squirreling away a few jars for the colder days ahead. Connecting with our food and the changing seasons in a tangible, practical way. 

It's no surprise that jam was one of the first foods we, as humans, learned to preserve. Take some fruit, add honey or sugar, and you have a delicious preserve that lasts well beyond the growing season. A recipe for jam was even included in the earliest known cookbook, De Re Coquinaria (The Art of Cooking), written in the 1st century AD. It is rumored Joan of Arc ate quince jam for courage before battles, and that Mary Queen of Scots used marmalade to cure seasickness. Sailors ate jam rich with Vitamin C to prevent scurvy on long voyages. And during WWII, the Women's Institute put up over 1600 tons of jam to help combat food shortages. Jam has long been our friend in times of scarcity and uncertainty. A small comfort when winter is coming. 

So in the face of fires and floods, after I have called and donated and helped however I can, I make jam. If for no other reason than to carry on and lift morale. To remind myself of the quiet afternoon spent picking huckleberries under a clear sky not so long ago. To thank nature for her gifts even as we stand humbled by her power. 

Stay safe, dear ones. Sending all my love to you. 

20170906-_85B0638.jpg
20170906-_85B0602.jpg
20170906-_85B0706.jpg
20170906-_85B0654.jpg
20170906-_85B0752.jpg
20170906-_85B0798.jpg
huckjam.png
 

Please note, this recipe is for a small batch of fresh or freezer jam (because water bath canning is a whole thing...) 
Makes about four 8 oz jars.


Ingredients:

- 2 cups crushed huckleberries

- 2 cups crushed strawberries

- 1/4 cup lemon juice

- 1 pkg Pomona's Universal Pectin* 
*I like Pomona's because it sets the jam using calcium instead of sugar. This allows for a much lower sugar jam. Low Sugar Pectin would also work just fine. If you choose to use that, follow instructions on that package to ensure jam sets well.

- 1 to 2 cups sugar (depending on how sweet you like it)

Instructions:
 

1. If using Pomona's pectin, mix the calcium powder with 1/2 cup water in a small jar. Shake vigorously.

- Put a small plate or saucer in the freezer (you will use this later to check if your jam is set.)

- Make sure your jars and lids have been cleaned and sterilized. 

2. After cleaning fruit and hulling strawberries, crush strawberries and huckleberries in a medium bowl using a potato masher. You should have about 4 cups crushed fruit. Feel free to adjust ratio of strawberries to huckleberries to taste.

3. Measure 4 cups crushed fruit into large pan. Add lemon juice.

4. Add 2 teaspoons of the premixed calcium water. This is all you will need for this recipe (you can keep the rest of the jar for several months in the fridge if you plan to do more canning.)

5. In a separate bowl, combine sugar and 2 teaspoons pectin powder.  

6. Bring pan with fruit, lemon juice and calcium water to a full boil. Stirring to keep from burning. Add a small pad of butter to help reduce foaming. Gently spoon off any foam that forms at the top (it won't hurt ya but it makes the jam less pretty.)

7. Add sugar / pectin mix all at once. Simmer and stir vigorously for 3 mins to dissolve pectin and sugar. 

8. Take the cold plate out of the freezer and spoon a small dollop of jam onto it. Let it sit for a few moments then gently run your finger through the puddle of jam. If it leaves a clean line through the jam, and it is begining to take on a gelatinous structure, it is done. If the jam runny and saucy, and your finger doesn't leave a clean line, simmer for a few more minutes and then repeat the test on another cold plate.

The longer you cook the more "set" your jam will be. If you like a softer runnier jam cook for only 2-3 mins. If you like your jam to have more structure and gel, cook for a bit longer. I cooked mine for 5 mins and it came out just right. 

9. Fill sterilized jars to within 1/2" of top. Screw on lids. Let cool in fridge and then move to freezer as soon as they are no longer warm to the touch. Keeps in freezer for 1 year. 

10. Spread on good crusty bread with butter. Hibernate. 

20170906-_85B0647.jpg

xo,

Haileysignature.png
 
20170906-_85B0721.jpg
September 09, 2017 /Hailey Faust
homemade, jam, jelly, huckleberry, strawberry, the art of slow living, slow living, hygge, recipes, recipe, diy, simple
:: Eat
Comment
20170401-_85B9108.jpg

Slow Coffee :: Homemade Rose + Vanilla Bean Iced Lattes

April 11, 2017 by Hailey Faust in :: Eat

I have been thinking a lot about time lately. How we spend it. How we value it. How we never seem to have enough of it.

We live in a culture that idolizes "busy" and pencils in happiness for a later date...for some fabled time in the distant future when the work is done and the bills are paid and the to-do lists have finally been conquered. It's so easy to forget that we are only allotted a few fleeting hours on this planet. That they will pass no matter how we choose to spend them. That time is a precious and non-renewable resource.

Lately, I have been falling into the trap of "busy." Hook, line, and sinker. Days have been blurring into weeks, and weeks into months, and it isn't until a friend sincerely asks, "What's new?" that I realize I haven't been making time for any of the things that bring me joy. That I have nothing to say except, "Oh, you know...just working a lot." That I have been so caught up in the day-to-day grind, that I have forgotten to actually enjoy life.

So for my birthday this year, I am promising myself the gift of time and committing to carving out a little space, each and every day, to live slowly and mindfully. To start manifesting the creative projects that have been rolling around in the quiet corners of my mind for the past few months. To make things by hand. To play. To plant. To make room for the quiet daily joys I so often rush past. 

And this means I'm going to need to get real cozy with the word "no" (something I have historically been terrible at.) I'm starting to realize that slow living is as much about saying "no" to things that don't serve you, as it is about saying "yes" to things that do. Prioritizing, lovelies. Cutting out what's not essential. Simplifying. Like Marie Kondo-ing your closet, but with your planner. 

So to mark my renewed commitment to slowing down and celebrate the first few glorious days of spring, I made a batch of these lovely Rose + Vanilla Bean Iced Lattes. Infusing the almond milk with whole vanilla bean and rose petals takes a little more time and a little more love, but really, don't all the best things? The end result is floral and creamy and refreshing and barely sweet. The perfect addition to a sunshiny morning spent lounging on the patio, ignoring your inbox. 


Ingredients:

*Please note, like many of my recipes, the amounts here are merely suggestions. Feel free to adjust to your taste. Makes enough for 2.

- 2 cups organic almond milk (soy, coconut or dairy would also work beautifully)

- 1 whole vanilla bean

- 3 T of organic food-grade dried rose petals 

- 2 cups cold brew coffee or fresh espresso shots

Instructions: 

1. Freeze cold brew coffee in ice cube tray to make coffee ice cubes. This will keep the ice from watering down your latte as it melts.

2. Add almond milk to a small pan. Using a sharp knife, cut vanilla bean length-wise to expose the tiny seeds inside. Scrape the inside flecks of vanilla bean into the pan of milk, then add the empty husks to the milk as well. Add rose petals.

3. Heat pan over low heat until it begins to simmer. Once the creamer simmers, remove from heat. Cover and allow to steep for 30 mins - 1 hr. (The longer you steep, the stronger the rose flavor will be.)

4. Strain creamer into a clean jar or bowl to remove vanilla bean husks and rose petals. Those gorgeous little flecks of vanilla bean will stay in the creamer. Chill in fridge.

5. Add coffee ice cubes and fresh espresso shots (or cold brew coffee) to highball glass. Add creamer to taste. Garnish with crushed rose petals.

xo, 

 
April 11, 2017 /Hailey Faust
Coffee, recipes, iced latte, slow living, the art of slow living, the lovely wild, rose, vanilla bean, homemade, almond milk, food photography, lifestyle blog, lifestyle
:: Eat
1 Comment

Apothecary :: Elderberry + Echinacea Syrup & Golden Turmeric Milk

September 25, 2016 by Hailey Faust in :: Apothecary, :: Eat, Gifts

When I was a kid, I always had this strange sense of dread when it came to Sundays. Sundays meant piles of unfinished homework and lists of chores and early bedtimes. They meant the weekend was over and it was time to get back to reality. To responsibilities. To the daily grind. Sunday was just a nicer word for Monday. 

But the older I get, the more and more I appreciate the quiet productivity of a slow Sunday spent at home. Baking and cleaning and preparing for the week. Folding laundry.  Making lists. Roasting chicken. Sharing space.  I notice I tend to have a markedly more positive and productive week when I carve out the time to cleanse and nest and practice self care on Sundays. Slowing down for even a moment can feel like such a luxury these days. 

This Sunday I found myself trailing my fingers across endless rows of glass spice jars in my favorite little dusty corner of Missoula. If you are from around these parts, you know that Butterfly Herbs is a magical apothecary/teashop/bulk-spice oasis located in a turn-of-the-century pharmacy. Floor to ceiling bookshelves house enormous jars containing every herb, tea, and spice you can imagine. Oh, and did I mention they have a sliding library ladder used to access said herbs, teas and spices? Yeah, well...they do. It's the dreamiest and the loveliest and it's my happy place. 

After much meandering and much jar-smelling, I chose dried elderberries, echinacea, rose hips, calendula flowers, star anise and turmeric to add to my fall apothecary. A personal arsenal to fight off a lingering head cold. Oh, and a few scoops of my favorite loose leaf Irish Breakfast tea. Just for good measure. 

Elderberry syrup is one of the most effective herbal remedies I have ever personally experienced. I admit, I was very skeptical at first, but when I take a spoonful daily, I just do not get sick. Which is saying something, because I get sick a lot. And when I run out, like clockwork, I will come down with something within a week or two. This elixir is powerful stuff. To kick it up a notch for cold and flu season, I also threw in some dried rose hips (loaded with vitamin C and antioxidants), echinacea (immune boosting and antiviral), ginger (anti-inflammatory, antibacterial, antiviral, antioxidant), and cinnamon (anti-inflammatory and antioxidant.) Top it off with some local, raw honey and you have a cold and flu fighting powerhouse. 

Another immune booster I have been brewing this fall is this gorgeous Golden Turmeric Milk. You guys. This is the coziest, most soothing fall drink. Think foamy hot-spiced hug in a mug. And that color! Come on. Not to mention how wonderful it is for you. An ancient Ayurvedic remedy, Turmeric has been used to treat everything from inflammation and arthritis, to depression and even cancer. Combining Turmeric with black pepper greatly increases it's bioavailability, so be sure to include an extra dash of pepper just before drinking.  

So take a moment to slow down and reset. To brew up something warm and natural and soothing and seasonal. To prepare for the coming week and the coming season. To tend to the housekeeping of your space and mind and body. 

Happy Sunday. Have a lovely week, dear ones. 

***Disclaimer: I’m not a doctor, nurse, or licensed healthcare practitioner. Some herbs and botanicals are not safe for pregnant or nursing mothers and may not be suitable to take with certain medications or conditions. This information is not meant to diagnose, treat, cure, or prevent any disease. Always consult your doctor before beginning any kind of new vitamin, herbal, diet, or exercise regime. Make sure to research all of the ingredients to make sure they are safe for you and your family. 


Ingredients

2.5 cups water

1/2 cup dried elderberries

1  TBS dried echinacea root

1 TBS dried rose hips

1/2 tsp cinnamon or 1 cinnamon stick

1 tsp dried ginger

1/4 - 1/2 cup raw local honey (to taste)
 

Instructions

1. Bring water and all ingredients except honey to a boil in a small or medium sized pot. 

2. As soon as the water boils, reduce heat to low and simmer covered for 45 mins. Stir occasionally to keep anything from sticking.

3. After 45 - 60 mins the mixture will have reduced by half. Remove pot from heat and let cool. 

4. Use a mesh strainer to strain the juice from the berries into a clean bowl. You may want to use the back of a wooden spoon to really squeeze the liquid out from the mixture. Lining the strainer with cheesecloth can make cleanup a bit easier. 

5. Transfer liquid to mason jar and mix in honey until combined. Keep in fridge. Take 1 TBS of this medicinal syrup every day to boost immune system. 

TurmericMilk.png
 

Ingredients

1 cup milk or almond milk

3/4 tsp dried turmeric 

1/2 tsp dried ginger 

1/4 tsp cinnamon (or to taste)

1 tsp coconut oil

2 cloves (or a dash of powdered)

Fresh ground black pepper (I usually do about 5 grinds on our pepper mill)

Star anise (optional - if you are into that kind of thing. I add mine after as a garnish.)
 

Instructions

1. Mix all ingredients in small saucepan over low heat.

2. Gently simmer, stirring constantly, until coconut oil has melted. Use a whisk to foam up the milk to make it nice and creamy.

3. Pour and serve. Garnish with a few grinds of black pepper, a dash of cinnamon, and a star anise. 

xo,

 
September 25, 2016 /Hailey Faust
apothecary, herbal remedies, turmeric, elderberry, cold and flu remedies, herbs, spices, natural remedies, diy, recipes, slow living, the art of slow living
:: Apothecary, :: Eat, Gifts
3 Comments

Apothecary :: Solstice Sun Tea

June 20, 2016 by Hailey Faust in :: Eat, :: Apothecary, :: Celebrate

Happy Midsummer dear ones! 

There is a special kind of celestial magic in the air today. Not only is today the Summer Solstice, but it also just so happens to coincide with the full moon. The Strawberry Moon to be exact. The last time this happened was in 1967 - the summer of love. I don't know about you, but that just makes my heart go pitter-patter. 

I couldn't resist whipping up a quick batch of sun tea to honor the longest day of the year and absorb a little bit of this lovely cosmic energy raining down on us. I think I will let it continue to steep in the light of the full moon as well - just for good measure. 

Oh and it also helps if you make a flower crown and float around the yard in a linen kaftan. Trust me on this. 

Please note - this is really more of a suggestion than a recipe. You can use whatever you have to hand. A quick traipse through the garden, some loose leaf tea and a large jar are all you need. 


Ingredients

- 3 TBS black or herbal tea. My favorite blend is called "Rose Congou" from the herb shop down the street

- 1 tsp organic edible rose petals

- 2 sprigs organic edible lavender 

- 1 sprig (or a few leaves) fresh lemon verbena

Instructions

Add all ingredients into a large tea strainer. Fill the largest jar you have with clean water. Place tea strainer inside and let steep in direct sun for at least 5 hours, or until desired color is reached. Add ice and enjoy. 

xo,

 
June 20, 2016 /Hailey Faust
sun tea, recipes, herbal remedies, self care, solstice
:: Eat, :: Apothecary, :: Celebrate
Comment

Salted Preserved Lemons

February 24, 2016 by Hailey Faust in :: Eat

There is something so endlessly satisfying about making something from scratch you once had to buy.

It's what I love most about urban homesteading. That very particular kind of magic that comes with growing, creating and preserving your own food. Opening a fresh jar of garden tomatoes in the depths of winter or hanging bushels of herbs to dry in a warm attic. Baking your own bread. Picking berries for jam. It's a quiet beauty. A productive meditation of sorts. Investing a few moments of effort now as a lovely offering to your future self.

These Moroccan-inspired Salted Preserved Lemons take a little foresight and a little patience.  But I'm *hoping* they will be well worth the wait. Spring is in the air and I am already dreaming of using these beauties on fresh salmon fillets with dill and crisp summer salads from the garden. Preserved Lemons take about one month to cure, but only 15 minutes of real hands-on time to make.

I recommend using the traditional Meyer lemons if you can find them. Meyers are thought to be a cross between a lemon and a mandarin, so they are a little sweeter and have a thinner, softer rind than your average lemon. 

I wish I could say these were each plucked lovingly from my own little Meyer lemon tree, but that would be a total lie. If I get two lemons a year from her, I chalk it up as a bountiful harvest. Oh well. I love her anyway. 

Oh, one last thing. It's really imperative to the process that you pretend you are on a sun-baked Mediterranean villa as you make these. A glass of mint tea is really helpful for this. Just a tip. 


Ingredients

- Organic Meyer Lemons (as many as you can fit into your jar. I used about 7. Regular organic lemons will work great too, but it's imperative that they are organic since you will be eating the rind.)

- Sea salt

- Sterilized jar (any size works, as long as you can sterilize it and fit at least 3 lemons.)

Instructions

1. Wash and scrub the lemons thoroughly. Cut the ends off of each lemon.

2. Cut a lemon into quarters, but only about 3/4s of the way through. The quarters should still be connected by the stem end. Just cut far enough so that the lemon opens up a bit. 

3. Add 1 tbs of salt to the bottom of your sterilized jar. Add 1 tsp of salt to the inside of the cut lemon and close it up again. 

4. Push the salted lemon down firmly (cut side down) in the jar until the juices squish out. Cover with 1 tsp of salt. 

4. Repeat the process. Quarter another lemon, cover the inside with 1 tsp salt and squish it on top of the last lemon in the jar, adding 1 tsp of salt between layers. (Yeah. It takes a lot of salt.) 

5. I was able to get enough juice from squishing the lemons to totally cover them, which is the goal. If your lemon juice does not cover your lemons entirely, keep adding fresh lemon juice until it does. Anything that is sticking up out of the brine will likely get moldy. 

6. Let sit at room temperature for 3 days, turning over several times a day. After that, refrigerate for an additional 3 - 4 weeks before eating. They can supposedly keep for up to six months in the fridge, but this is my first batch so I don't speak from experience. Many cultures don't even bother refrigerating, but I'm not much of a risk taker when it comes to food safety. 

7. Before using, discard the pulp and wash excess salt off. It's the rind you want. Using a little bit of the juice can also great for brightening up a dish. 

Heres to springtime and little jars of sunshine. Have a great week everyone. 

xo,

 
February 24, 2016 /Hailey Faust
Lemons, recipes, preserves, urban homesteading
:: Eat
Comment

Mardi Gras King Cake

February 09, 2016 by Hailey Faust in :: Eat, :: Celebrate


I'll be the first to admit that, if a recipe takes longer than 40 minutes, I'm probably not going to tackle it. I'm an instant gratification baker. I like recipes that are quick and easy and rustic enough to hide my slapdash kitchen tendencies.

I'm gonna warn you right from the get-go: This King Cake is not one of those recipes. It takes some time and some kneading and not one, but two rises. But it's Mardi Gras. And Valentines. And Chinese New Year! And if that isn't reason enough to bake a cake, I don't know what is. 

A King Cake is really more of a brioche than an actual "cake." A tea-ring / cinnamon roll of sorts with a sweet bready texture that makes it totally acceptable to eat for breakfast. Traditionally made only in the days between twelfth night and  Mardi Gras, King Cakes have a ton of fun rituals and traditions associated. The baker hides a bean or a tiny plastic baby in the cake after baking, and whoever finds the baby in their slice is king or queen of the party. They then have to throw the next Mardi Gras party and procure the next King Cake. Everybody wins. 

This year, I made the traditional cinnamon sugar King Cake, as well as a braided strawberry cream cheese variation. My first time tackling my mother's tried and true recipe from when we lived in New Orleans. The smell of these baking in the oven instantly takes me back to stirring jambalaya on a stool in my Mom's kitchen.  

It's worth the kneading. 

Laissez les bons temps rouler!

dough.jpg
 

Ingredients

(Makes 2 rings)

1/4 c. butter

16 oz sour cream

1/3 c. sugar

1 tsp salt

2 pkgs active dry yeast

1 TBS sugar

1/2 c. warm water

2 eggs

5 cups all purpose flour

Filling:

1/4 c. strawberry preserves  

1/4 c. cream cheese

or

1.5 tsp cinnamon

 1/2 c. sugar and

1/3 c. softened butter

Instructions

1. Combine first four ingredients in a sauce pan. Heat until butter melts, stirring occasionally. Cool mixture to 105 - 115°F. 

2. Dissolve yeast and 1 TBS sugar in warm water and let stand 5 - 10 mins. Add butter mixture, eggs and 2 cups flour. Beat at medium speed with electric mixer for 2 - 3 mins or until smooth. Gradually mix in enough remaining flour to make a soft dough. 

3. Turn dough out on a floured surface and knead until smooth and elastic (10 - 15 mins.) Place in a well greased bowl, turning once to grease top. Cover and let rise in a warm place (about 85°) with no drafts for about an hour or until dough has doubled in size. 

4. Punch dough down gently and divide into two equal parts. On a lightly floured surface, roll one portion out into a 28" x 10" rectangle. 

5. Mix cinnamon and sugar in small bowl. Spread the softened butter over the dough, followed by the cinnamon sugar mixture. If you are using cream cheese and jam instead, spread a thin layer of each on your dough. Then roll the down (from the long side) jelly roll style, to create one long roll. Bring the ends of the roll together to form an oval. Repeat with second cake. Place on a greased cookie sheet.

6. Let rise again, covered in a warm area for about 30 mins.

7. Bake at 375° for 15 - 20 mins or until golden brown.

8. Optional: Let cool and ice with a simple powdered sugar icing. If you want to be super traditional, decorate with purple, gold and green sugar. Just shake a few drops of food coloring in a small mason jar with some sugar. Slip a plastic baby in from the bottom of the cake, so it's hidden within. 

* Note: I haven't included instructions for the braided version as I haven't quite perfected the technique yet. This attempt was a little uneven and lost some of the filling. Will update as soon as I nail it!

xo,


February 09, 2016 /Hailey Faust
Mardi Gras, Holiday, King Cake, Celebrate, recipes
:: Eat, :: Celebrate
1 Comment

Easy Homemade Maple Pecan Granola

January 26, 2016 by Hailey Faust in :: Eat, Gifts

The last few weeks have been a blur of meetings and deadlines and head colds and wedding planning in our little corner of the world. The days have been true to their January nature and unflinchingly grey. It's taking more and more resolve to get out of my warm blanket cocoon every morning and plod down the chilly steps to begin the day. Sometimes I lose the battle and end up bringing my work back to bed with me. Winter: 1, Hailey: 0. 

But when I must join the land of the living, I like to use the early hours to reset and indulge in a few moments of quiet self care. A steaming shower with eucalyptus oil, a foamy almond milk latte and this sweet, toasty granola do wonders for softening the blow and luring me out of bed on chilly days. This granola recipe is absurdly easy and can likely be made with what you already have in your cupboard. It's best served with plain greek yogurt, fresh fruit and cozy slippers. 

Enjoy, lovelies. 


Ingredients

2 3/4 cups old fashioned rolled oats

1 cup unsweetened coconut chips

1/2 cup coarsely chopped pecans

1/2 cup coarsely chopped almonds

1/2 tsp coarse kosher salt

1/3 cup real maple syrup

1/3 cup extra virgin olive oil (coconut oil would work too)

1/2 cup brown sugar

1/2 cup dried cherries or other dried fruit

Instructions

1. Preheat oven to 325° F. Mix the oats, coconut chips, chopped nuts and salt in a large mixing bowl. 

2. Over medium heat, mix the sugar, olive oil and maple syrup in a small saucepan. Stir constantly until the sugar is completely dissolved.

3. Pour the hot syrup mixture over the oat mixture and mix together until all dry ingredients are completely coated. You may want to use your hands to combine.

4. Spread the granola out evenly over a large, ungreased baking sheet. 

5. Bake for 20 minutes. Toss and flip granola with a spatula. Return to oven and continue checking and flipping granola every five minutes until golden brown. Do not undercook, this granola is best nice and toasty. 

6. Let cool and mix in dried cherries. Store at room temperature in airtight container. 

xo,

Haileysignature.png
 
January 26, 2016 /Hailey Faust
recipes, slow living, granola, nourish, morning, self care, christmas, diy christmas gifts, holiday, gifts, winter, the art of slow living
:: Eat, Gifts
1 Comment

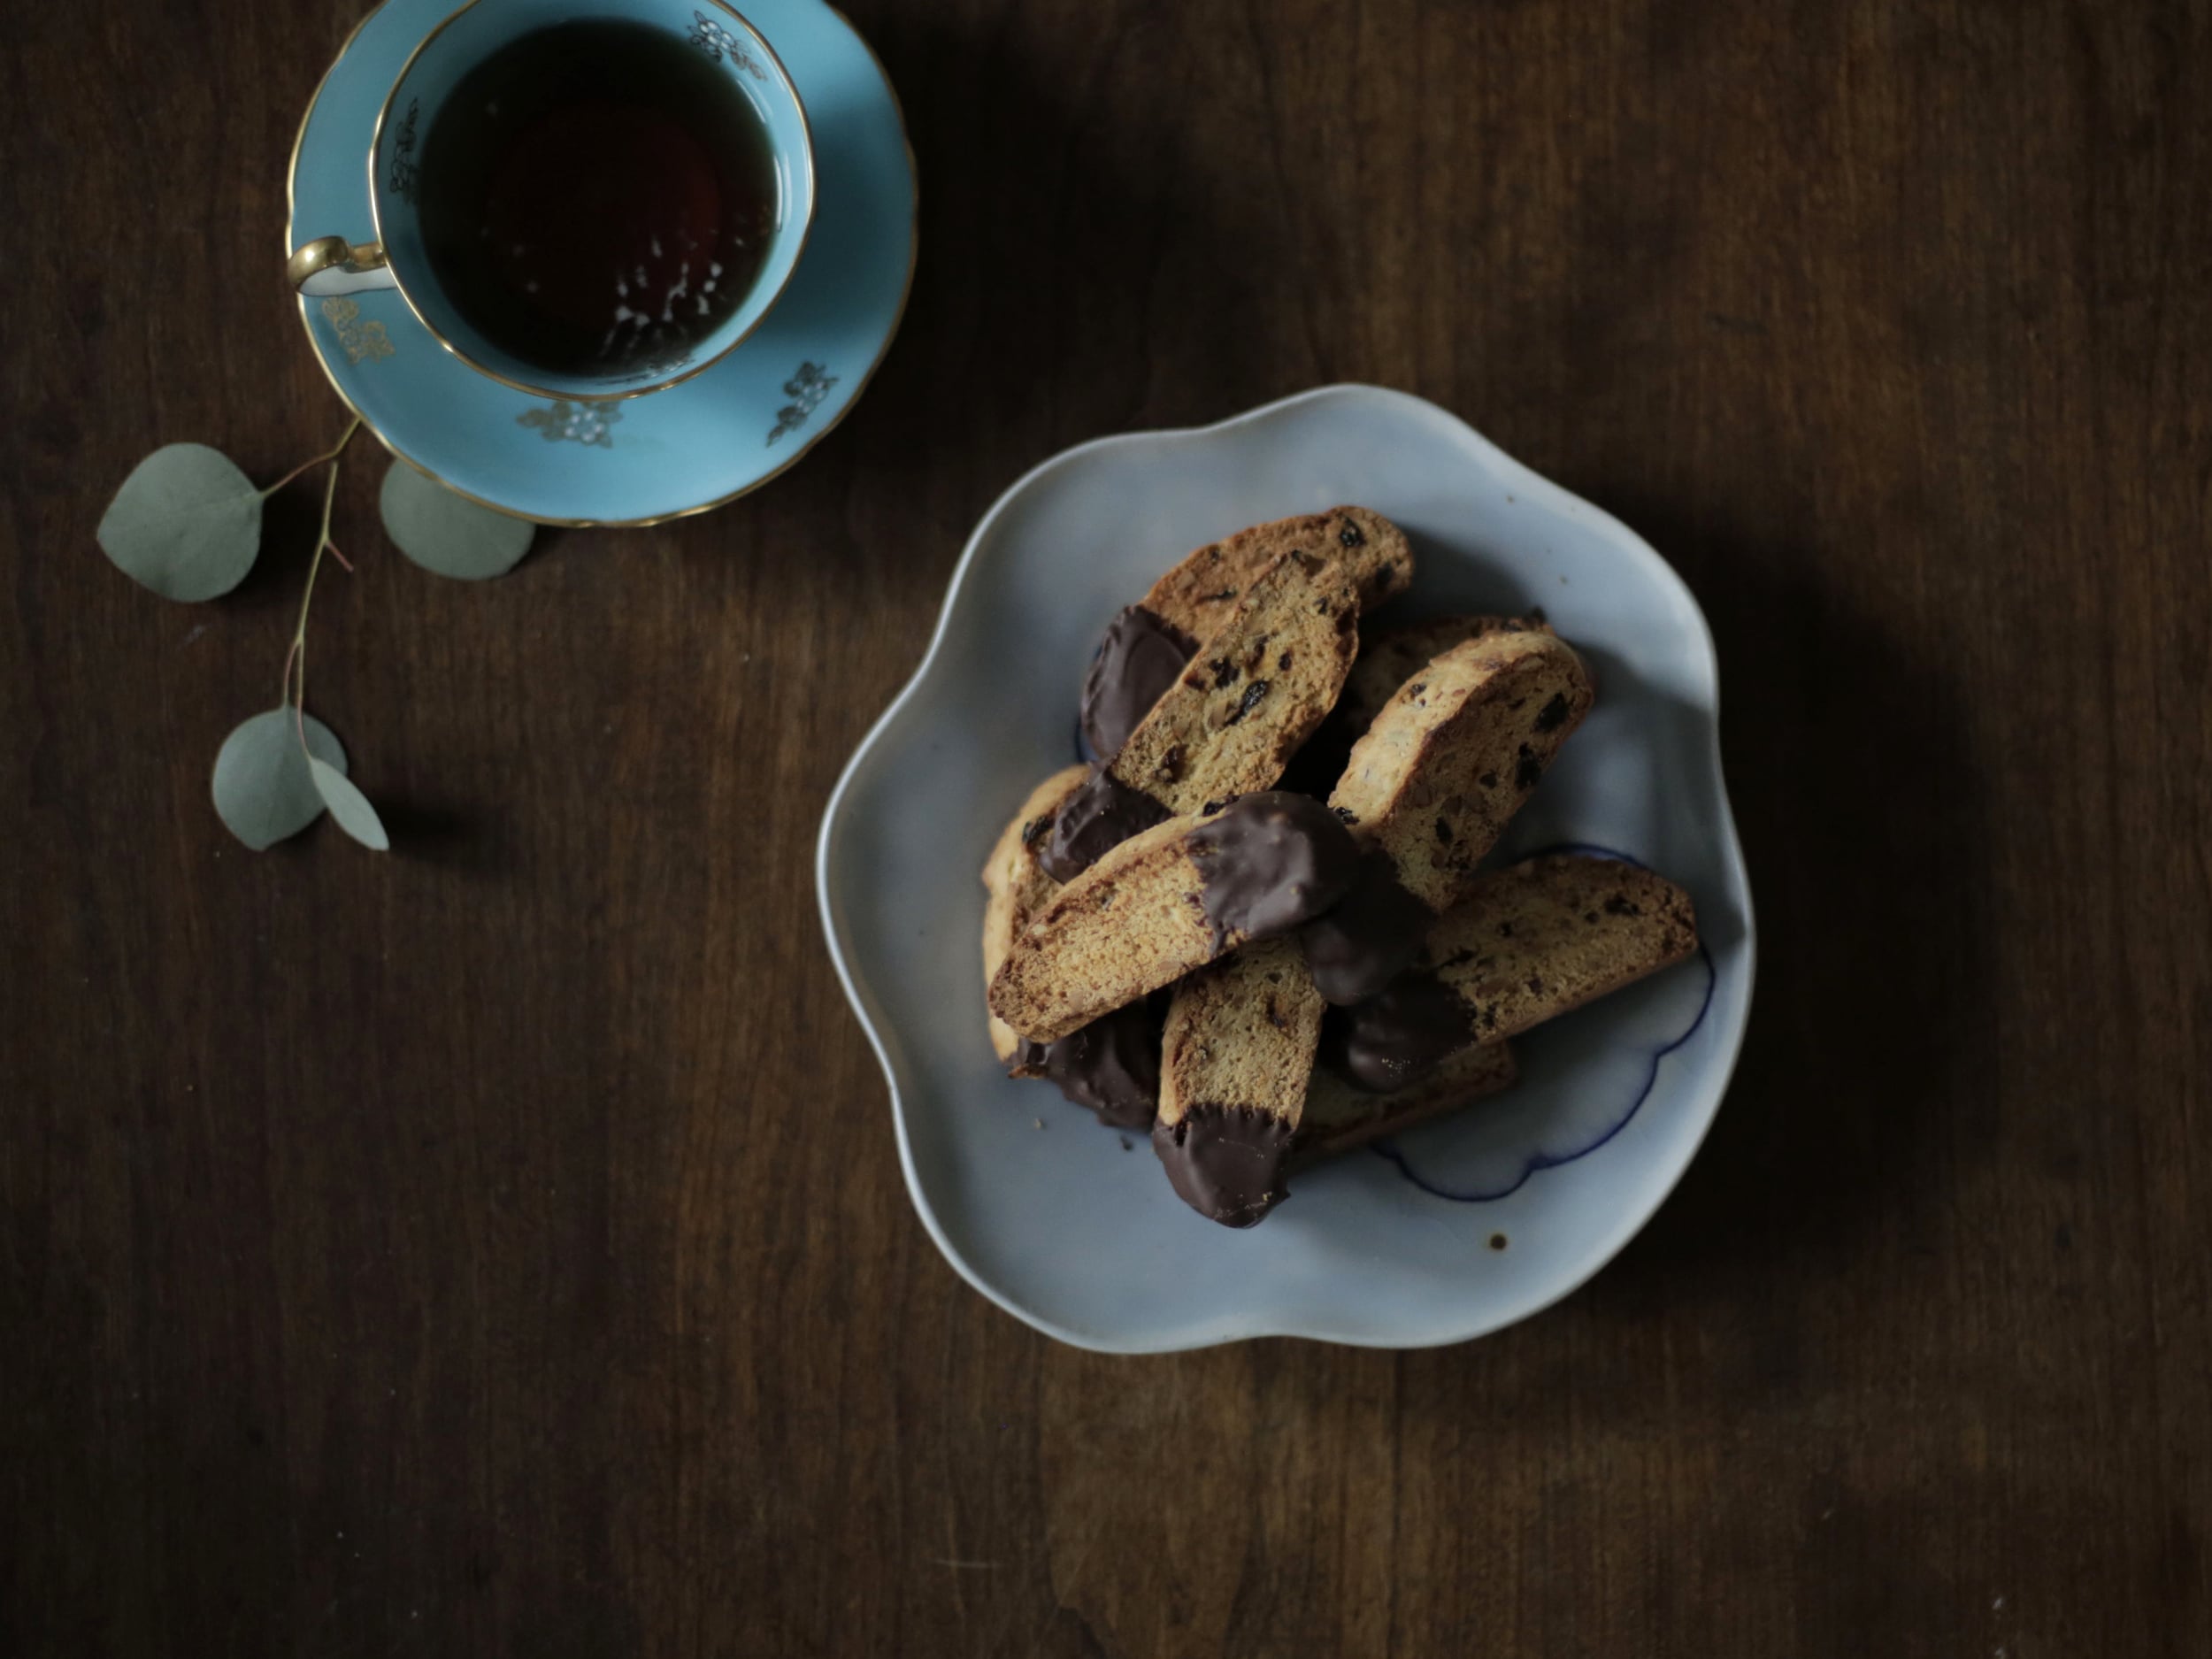
Dark Chocolate Cherry Almond Biscotti

January 12, 2016 by Hailey Faust in :: Eat, Gifts

January is...formidable. For humans. For animals. For all living things really.  We don't get enough sunlight. The days are grey. Our feet are cold. 

But there can also be something lovely about the quiet productivity of this first month. I personally find a lot of comfort in slipping back into my daily rhythms after the chaos of the holidays. Reading new books. Rearranging furniture. Trying recipes. Making plans. Folding laundry.

I woke up the other morning with a need to bake. To do something with my hands that didn't involve a screen and get a little dough under my fingernails. This Cherry Almond biscotti recipe came to mind immediately.  It's barely-sweet, with a crisp crumbly texture perfect for dunking in your morning coffee. They are great right out the oven, but just wait. They get even better in about 2 - 3 days. 

This is also one of those recipes that can be endlessly experimented with, which is my favorite kind. I think next time I will try pistachio cranberry. This recipe makes about 30 cookies so you will have plenty to share the love and run a quick batch to a friend or neighbor or colleague or mailman. A cozy little winter pick-me-up. 

_85B3371.jpg
biscotti3.jpg
_85B3566.jpg
 

Ingredients

3 tablespoons Amaretto 

1 cup sugar

1/2 cup melted butter

3 teaspoons almond extract

1 teaspoon vanilla extract

1/2 cup whole almonds

1/2 cup dried cherries

3 eggs

1 1/2 teaspoons baking powder

2 3/4 cups flour

1/2 teaspoon salt

1/2 cup dark chocolate chips


Instructions

1. Preheat the oven to 350° and toast the almonds whole for 5 - 10 mins. Remove from oven and let cool. Chop almonds coarsely. 

2. In a medium size bowl, stir together sugar, amaretto and melted butter until well combined. Stir in the almond extract and vanilla extract.

3. Stir in the eggs, chopped almonds and dried cherries.

4. Stir in the baking powder, flour and salt until well combined. Cover and chill in the fridge for 30 - 45 mins. 

5. Remove the chilled dough and moisten hands to help make it more manageable (it will be a bit sticky.) Split the dough in half and make two 14 x 3" loafs on the baking sheet. Flatten the loaves so they have an even thickness all the way through. 

6. Bake loaves at 350° for about 25 minutes or until golden brown. 

7. Remove loaves from oven and let cool completely. Slice into 3/4" slices with a very sharp knife. 

8. Place the biscottis back on a baking sheet and bake for an additional 25 minutes or until toasted. I like to flip them halfway through to make sure both sides get equally browned. Let cool. 

9.  Optional: Melt dark chocolate chips to dip biscottis in. You can just dip one end in, or if you are like me and are in it for the chocolate, dip one whole side in. Place on parchment paper and chill in the fridge until chocolate hardens. Keep biscottis on the counter in an airtight container. 

Enjoy lovelies! 

xo, 

 
January 12, 2016 /Hailey Faust
recipes, biscotti, dark chocolate, cherry, slow living, the art of slow living, Diy
:: Eat, Gifts
Comment

Subscribe

Subscribe below to keep up on all the lovely!
We promise to never send spam or share your info with anyone else. For realzies. xo

We respect your privacy and will not share your information with any third parties. 

Thank you!

© 2016 HAILEY FAUST LLC. ALL RIGHTS RESERVED.