the Lovely Wild

  • Blog
  • Archive
    • :: Archive
    • :: Apothecary
    • :: Celebrate
    • :: DIY
    • :: Eat
    • :: Wander
  • About
  • Design
  • Contact

Wild Wanderings :: Garnet Ghost Town

September 12, 2016 by Hailey Faust in :: Wander

And now we walk quietly into the darker days. Into the days of mist and fog and dark forests and flickering candles. Of shuttered windows and crackling fires and root cellars and ghost stories. Fall is here, dear ones. 

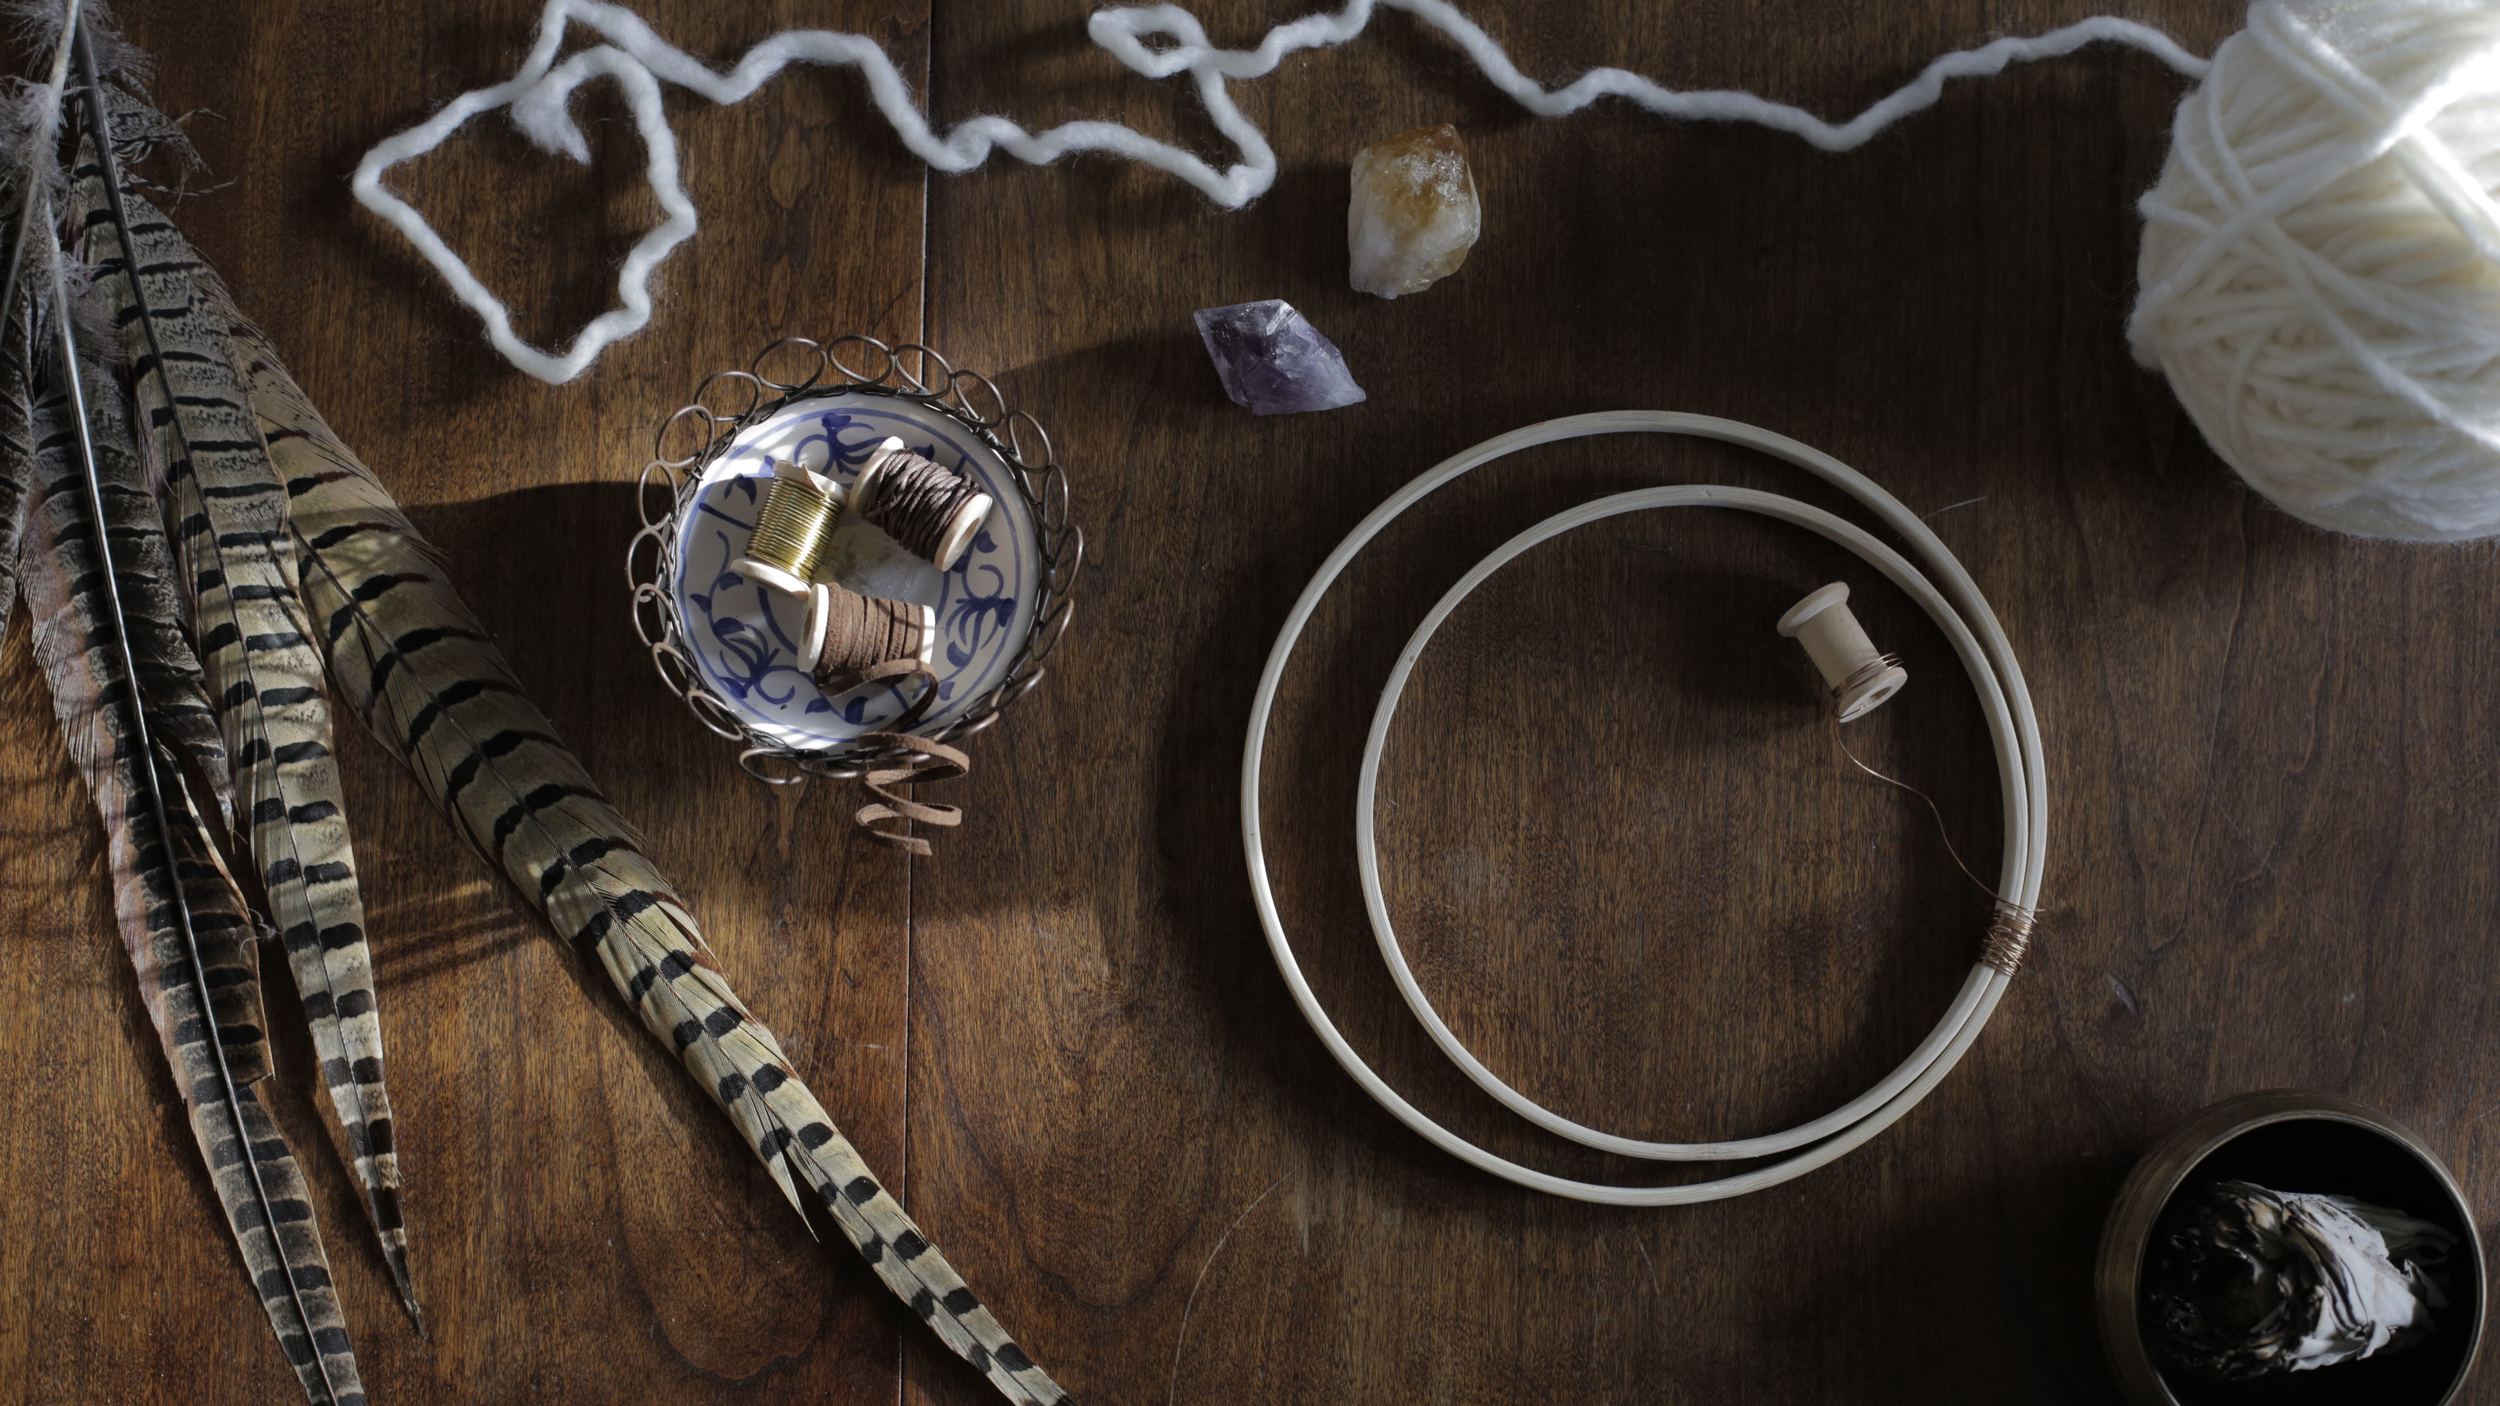
I have always loved the sense of dark mystery that this season carries. The old magic. From a time when preparing for winter meant lots of foraging and preserving and ritual and superstition. This season never ceases to turn my attention to other realms. To other times. They say the veil between worlds is thinner this time of year. What a lovely thought.

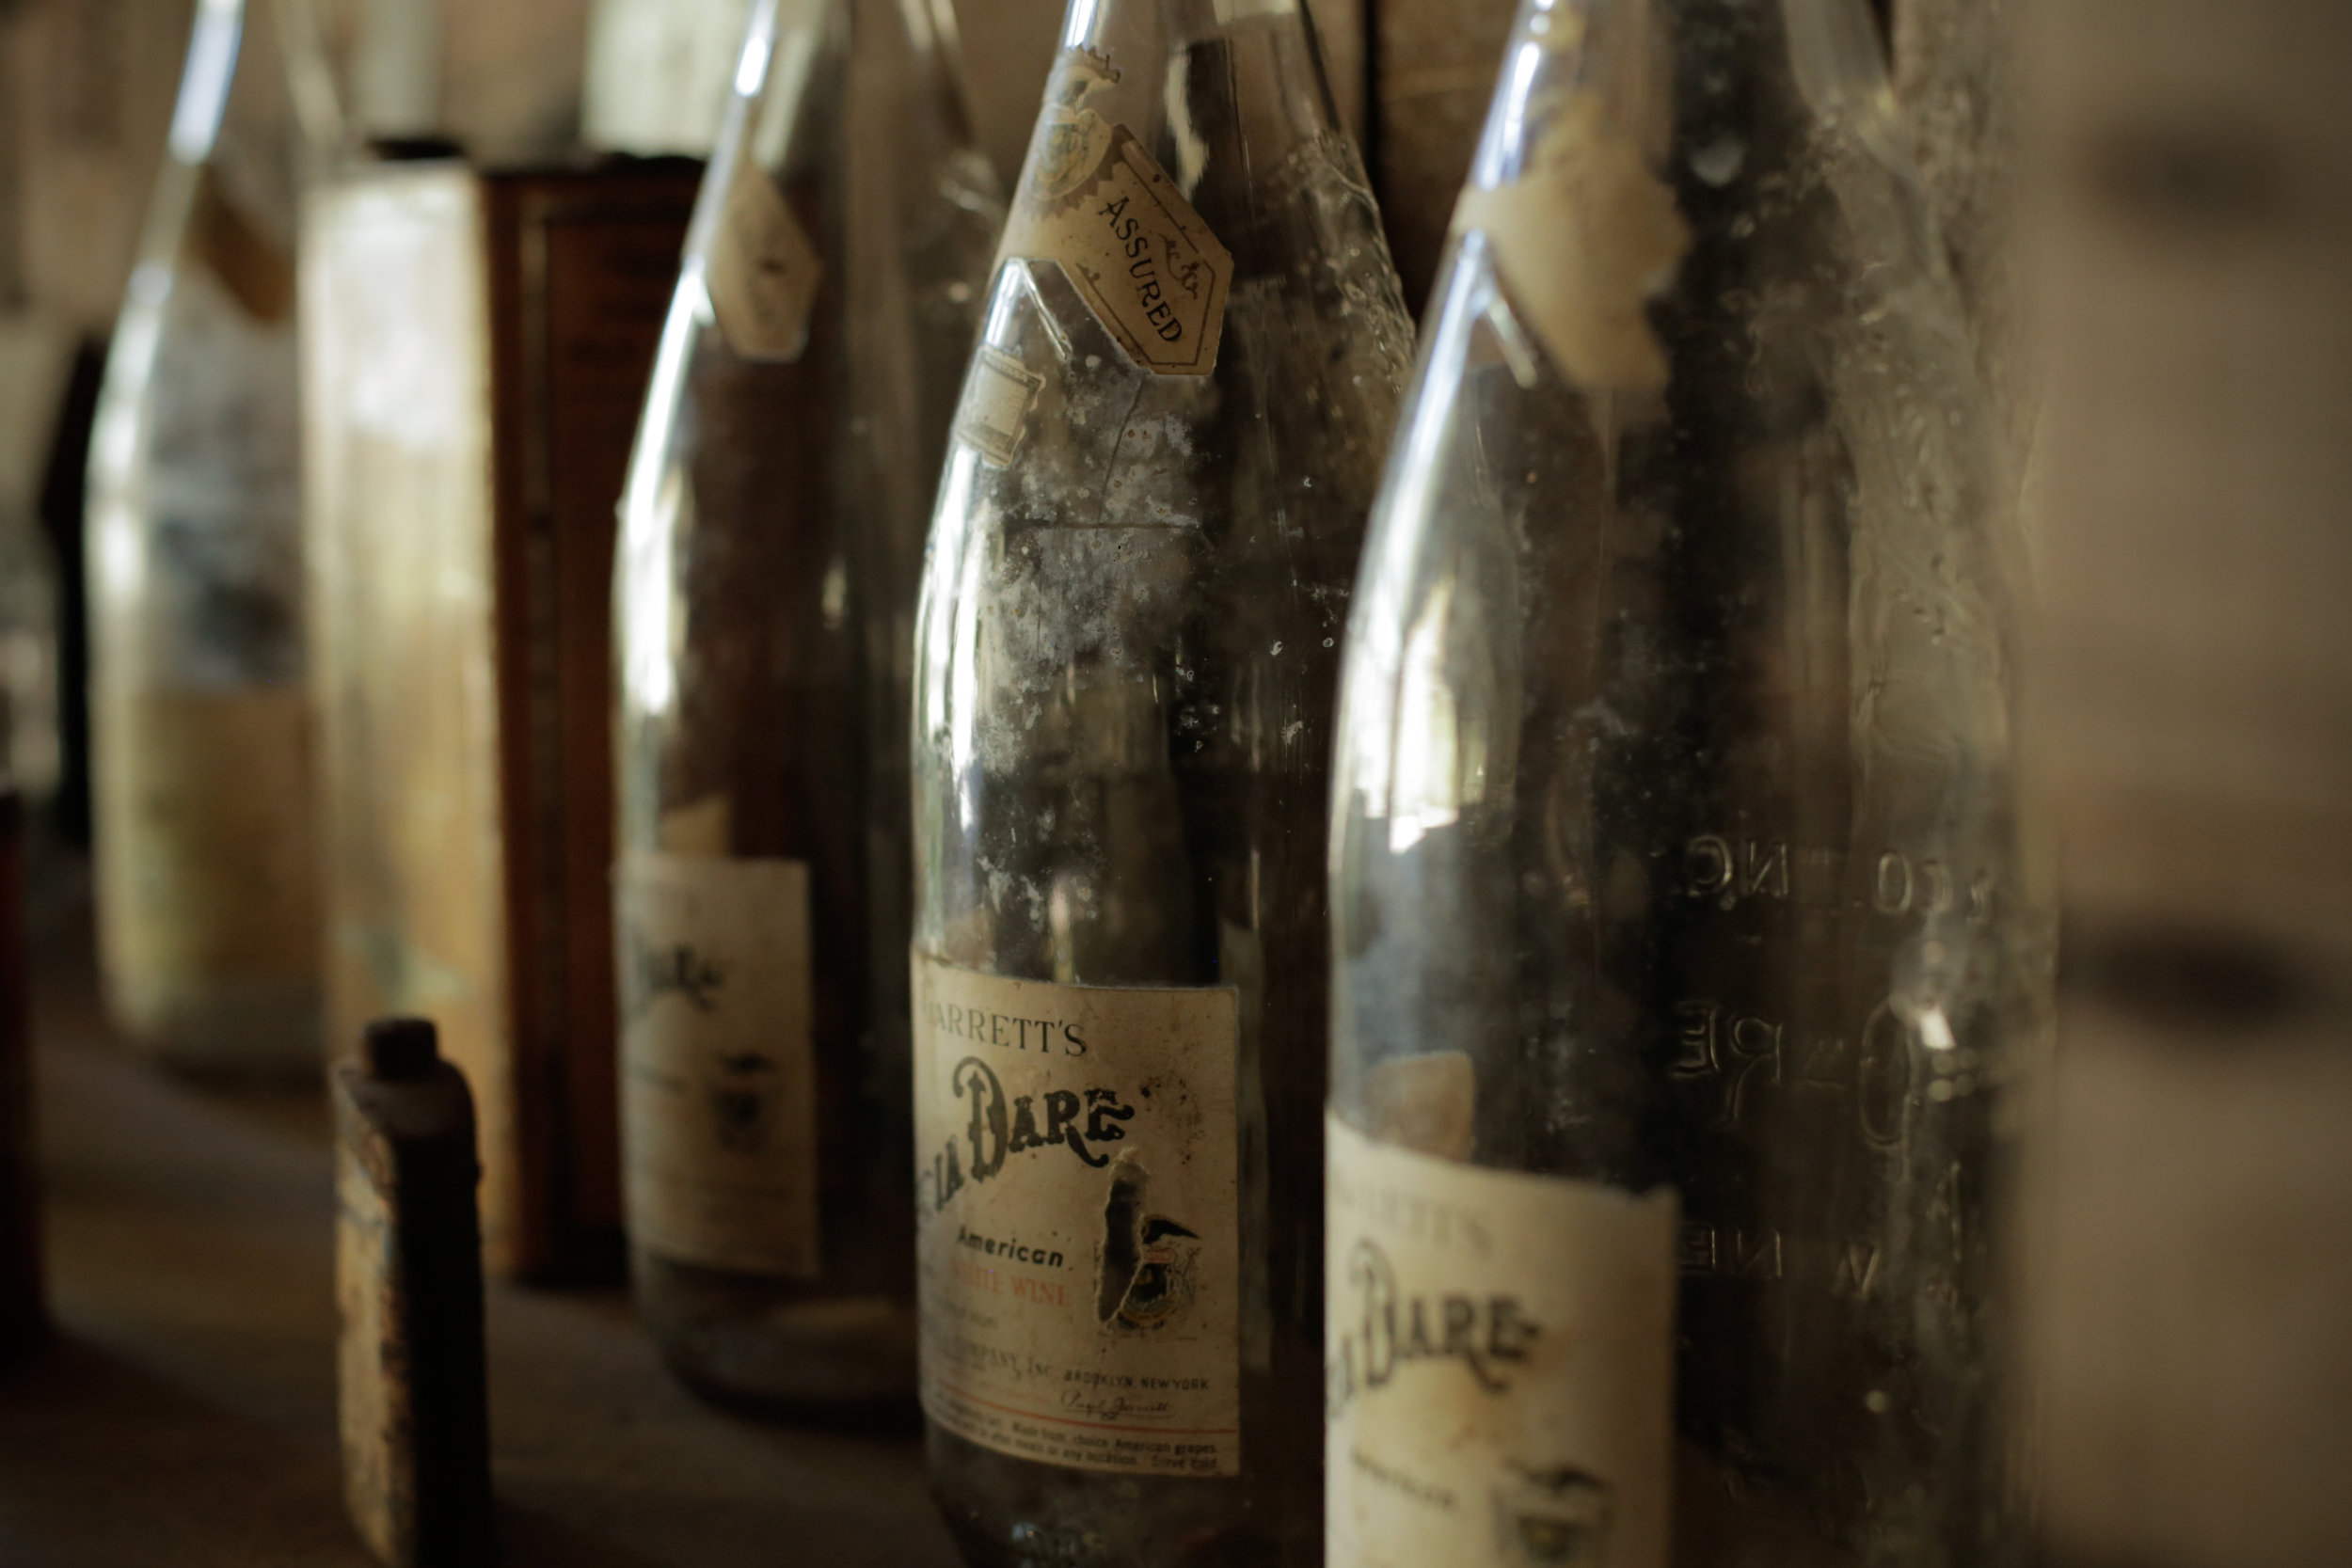
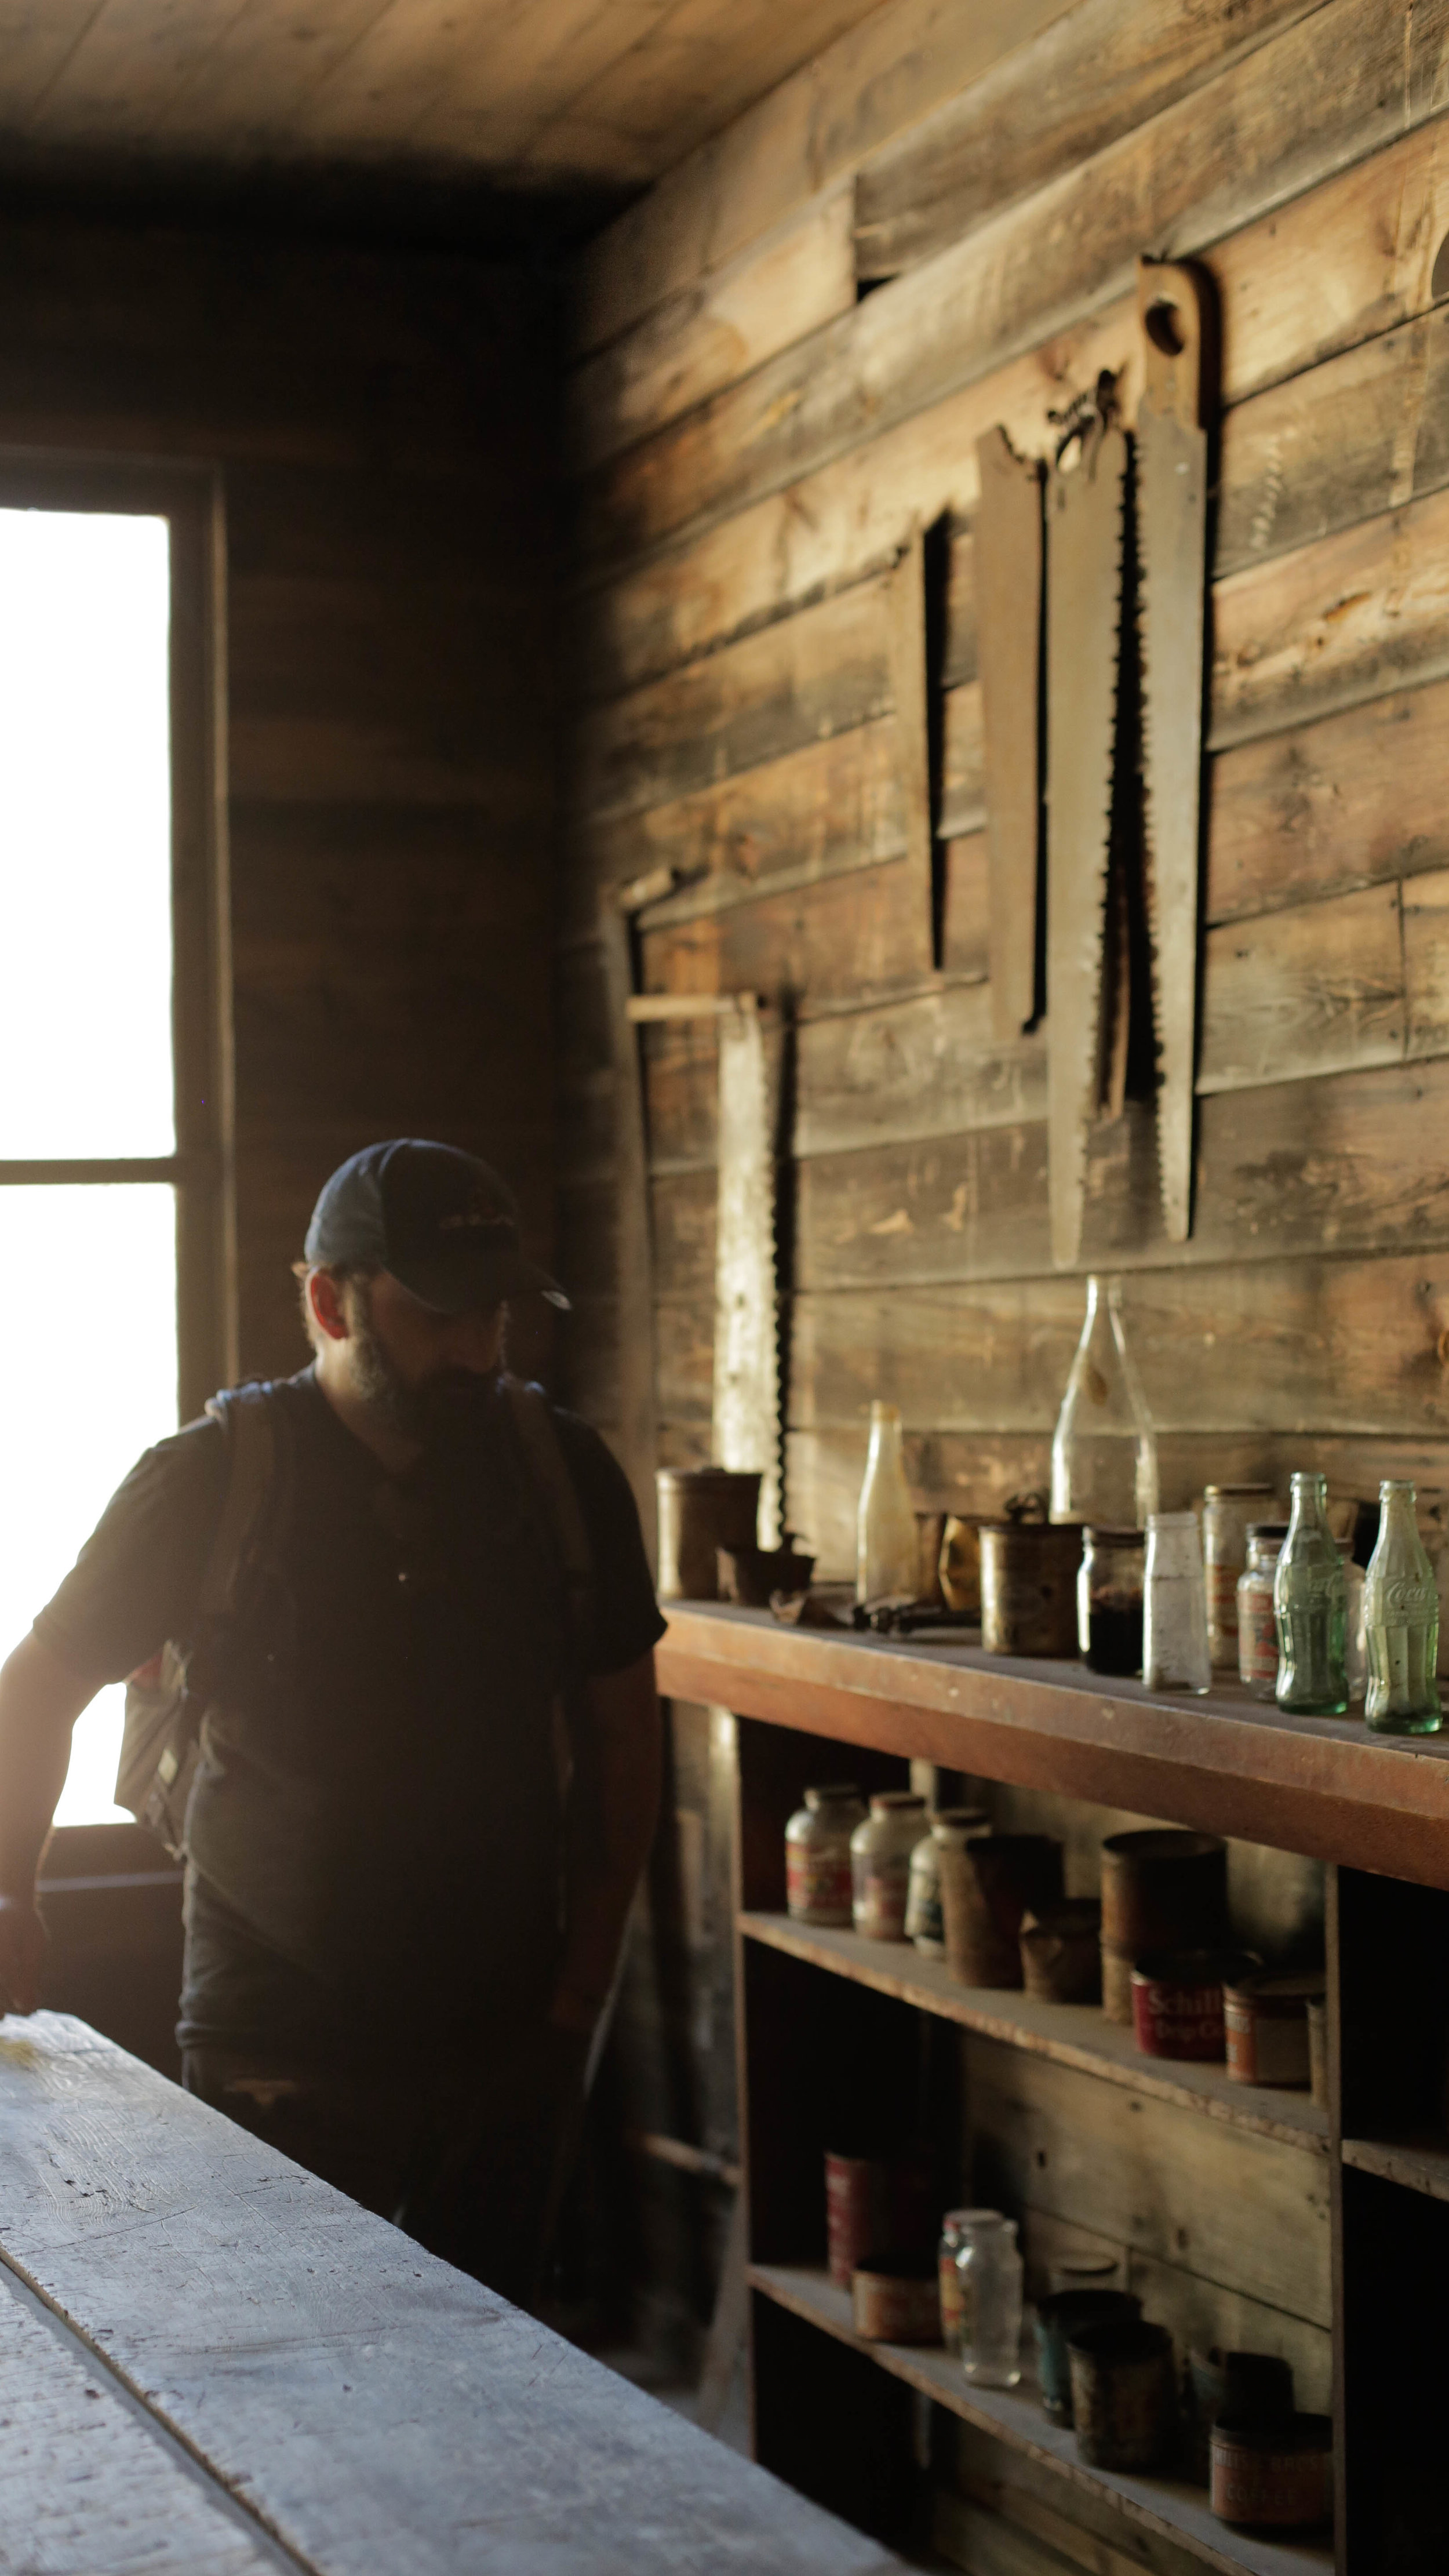
This past weekend, Rooster and I took a drive through the winding mountain road that leads to Garnet Ghost Town. The underbrush that surrounds the abandoned gold mine was already donning it's fiery fall colors as we walked quietly down the trail leading to the village. Places like these, frozen in time, demand a certain silence. A reverence. Almost like a cemetery. The artifacts you come across feel so personal.  A child's shoe. A handwritten ledger. A torn petticoat. Left in a perfect state of arrested decay. Like their owner just stepped into the hall to fetch a needle and thread. Places like these make my heart go pitter-patter. 

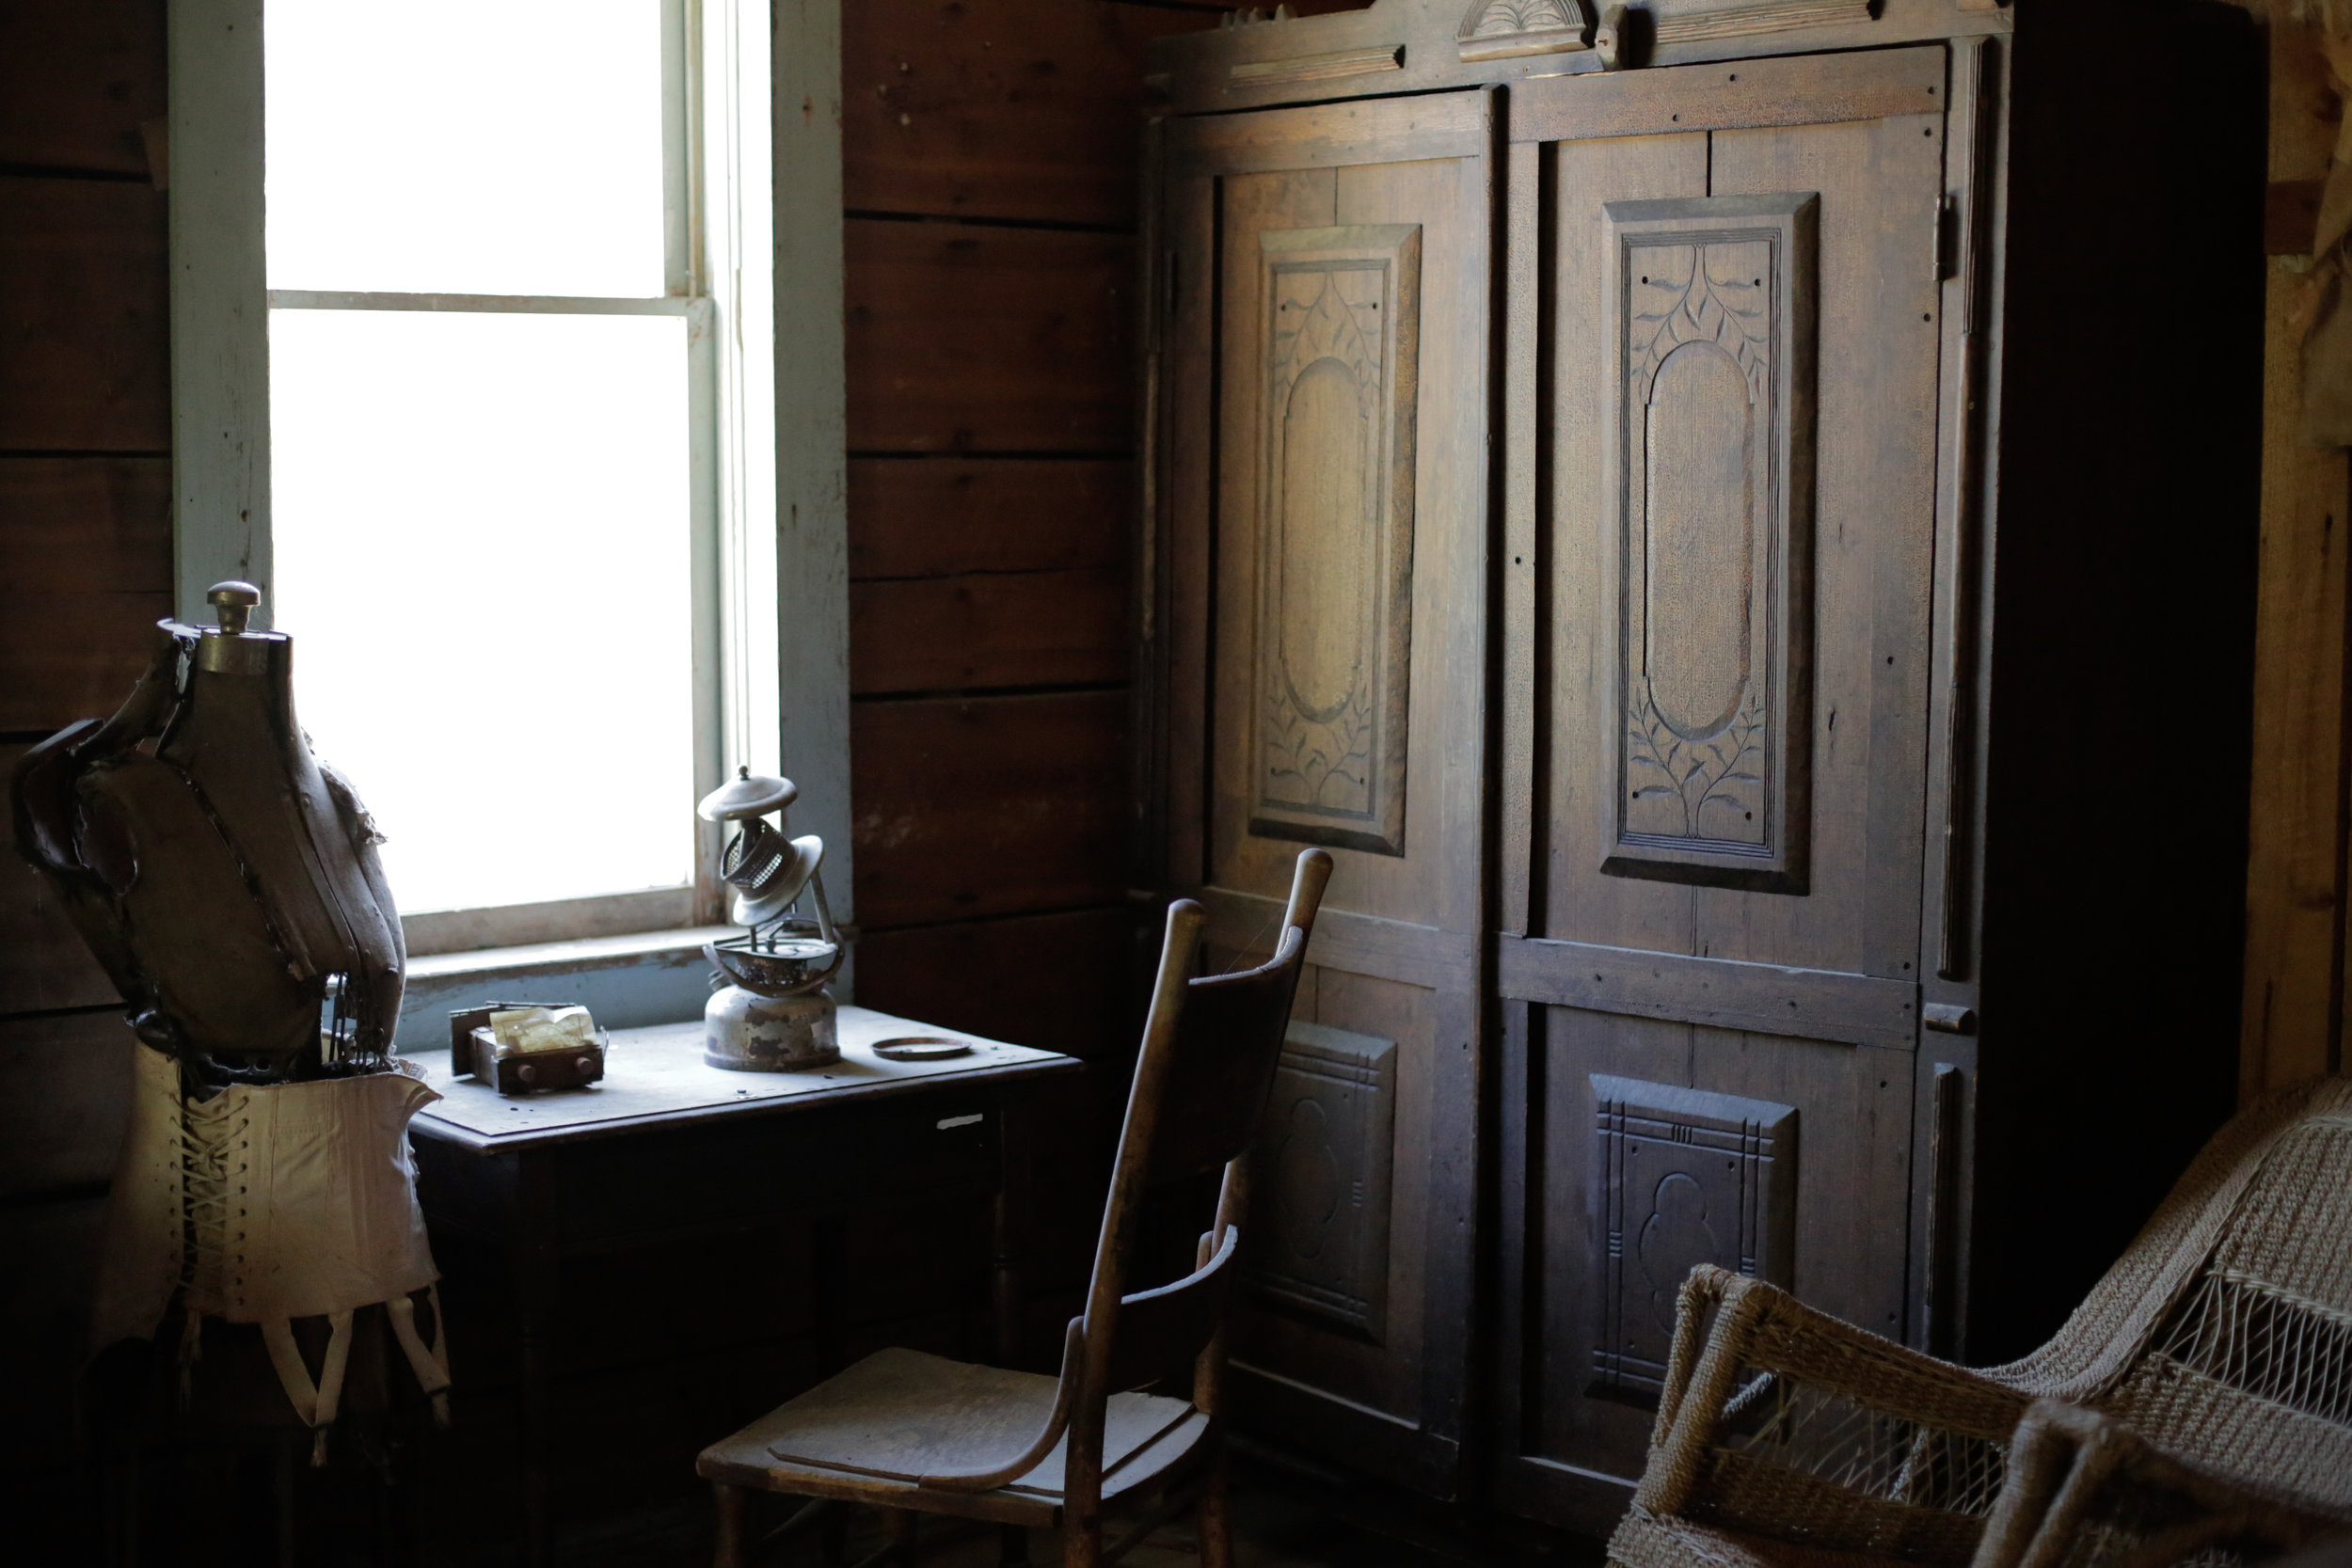
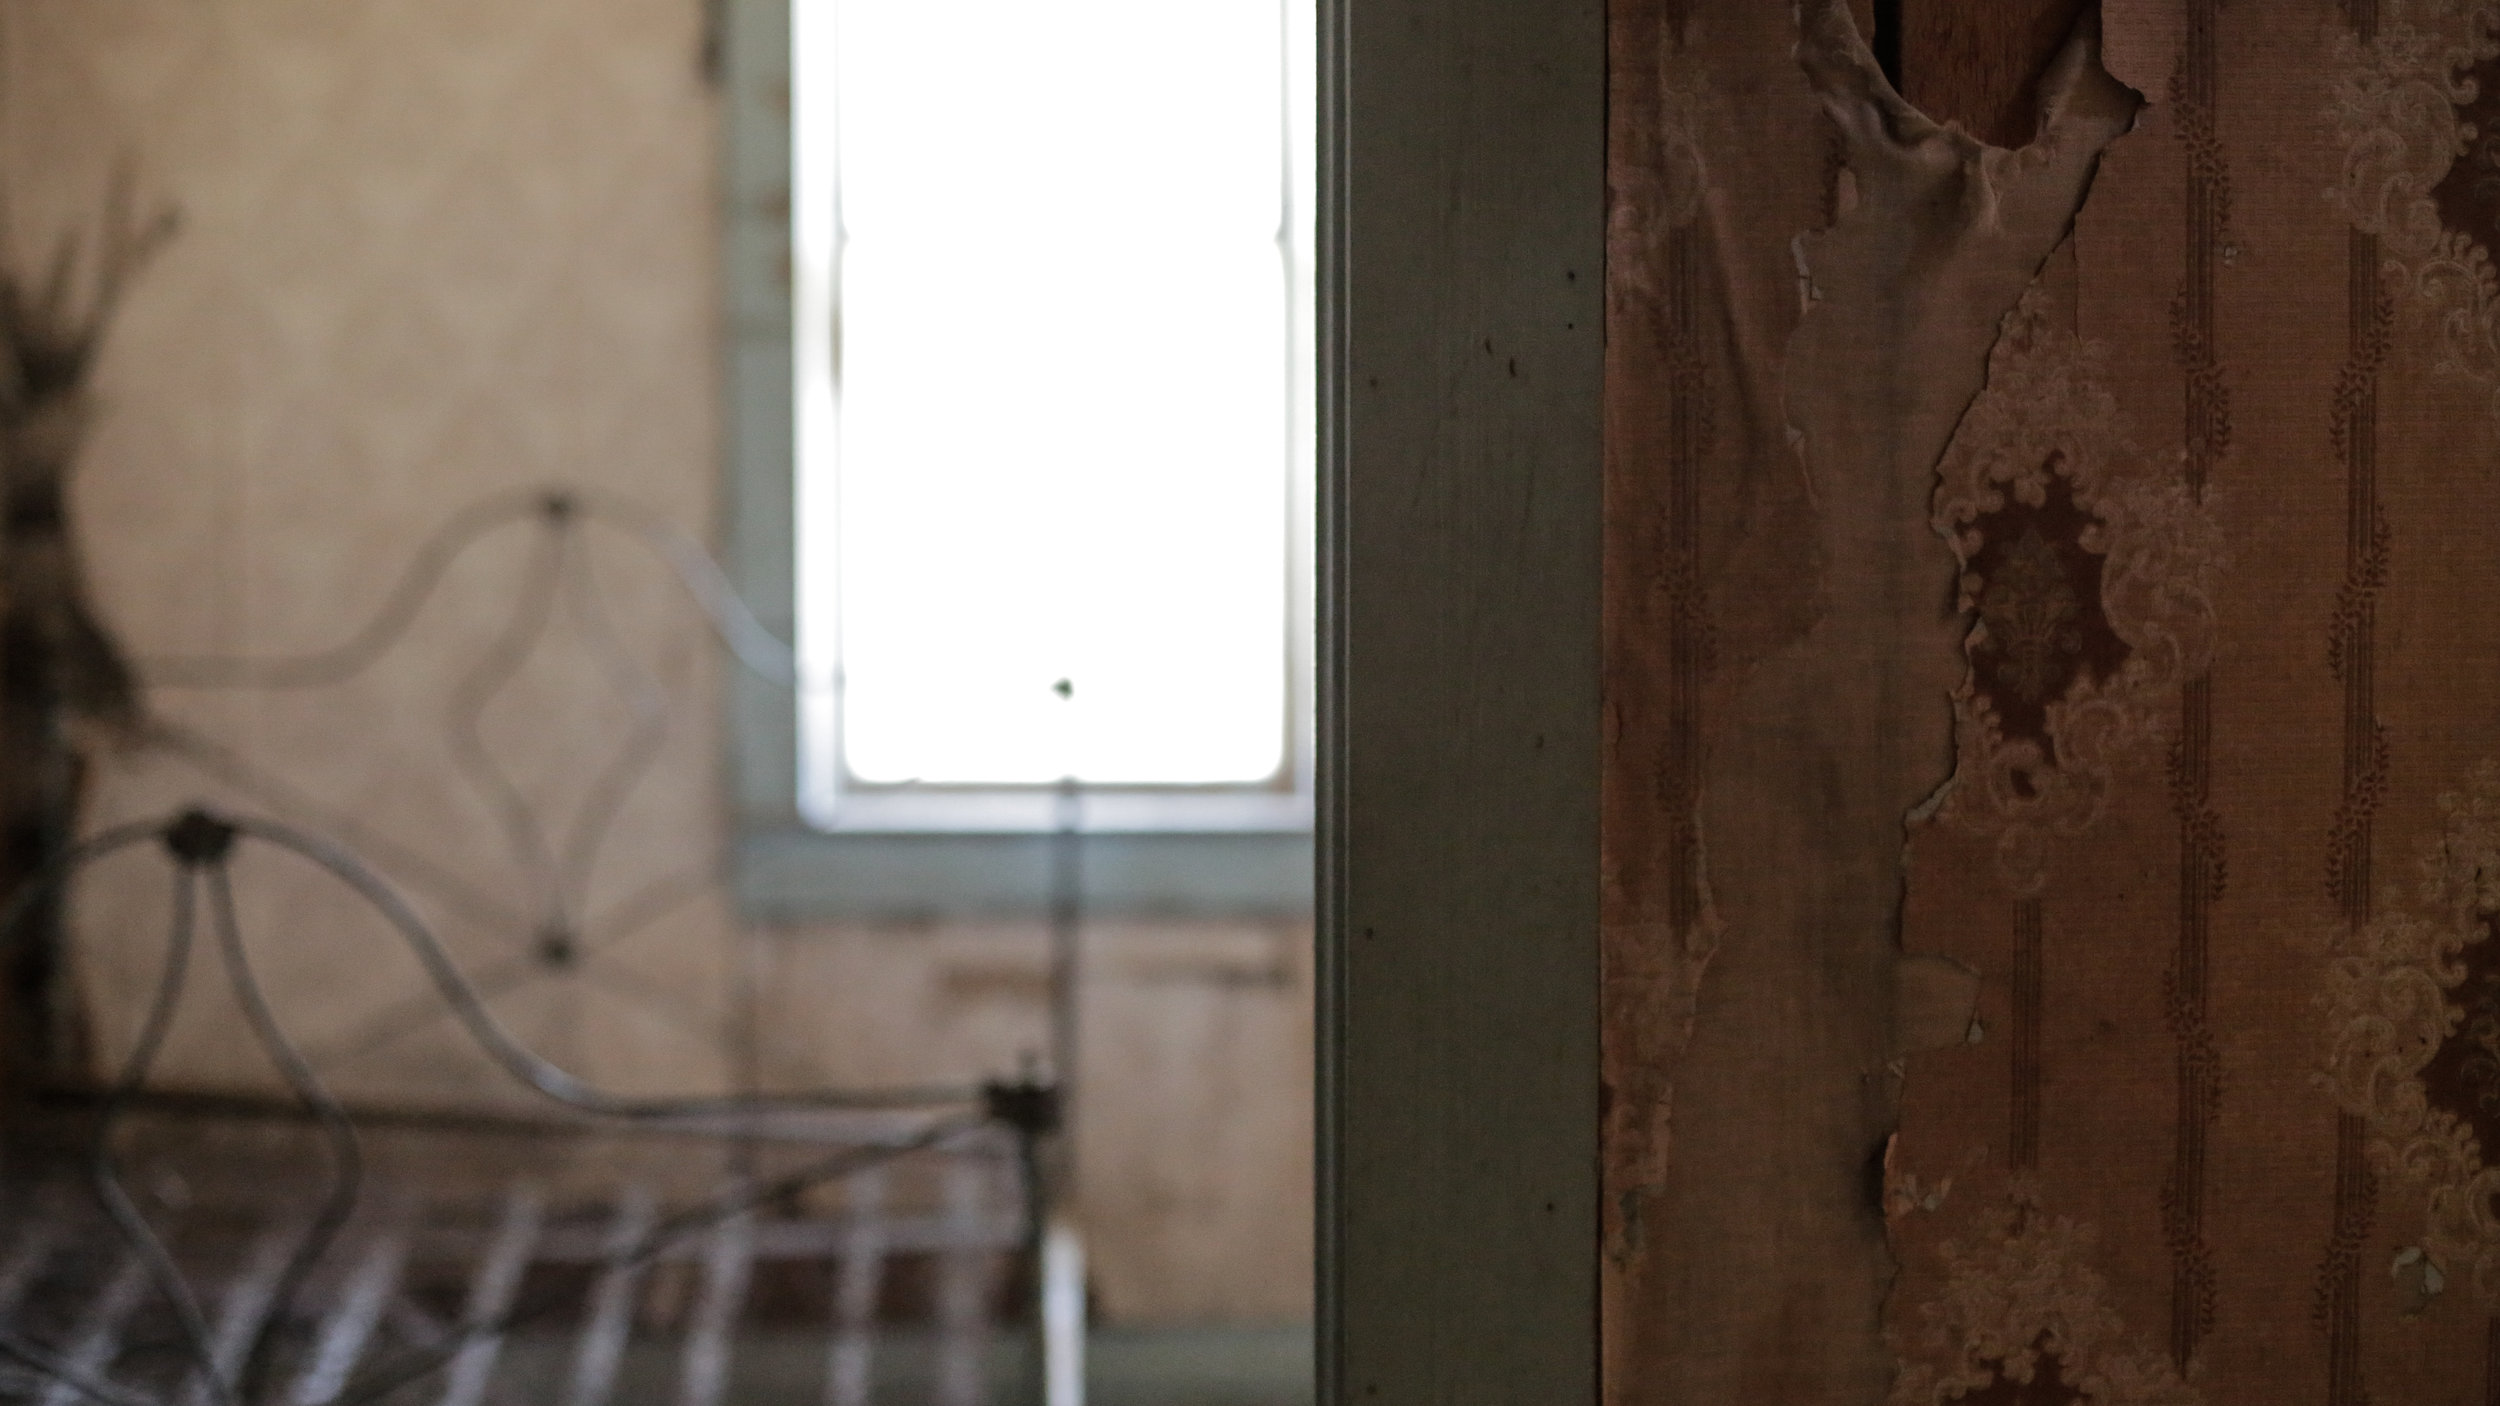
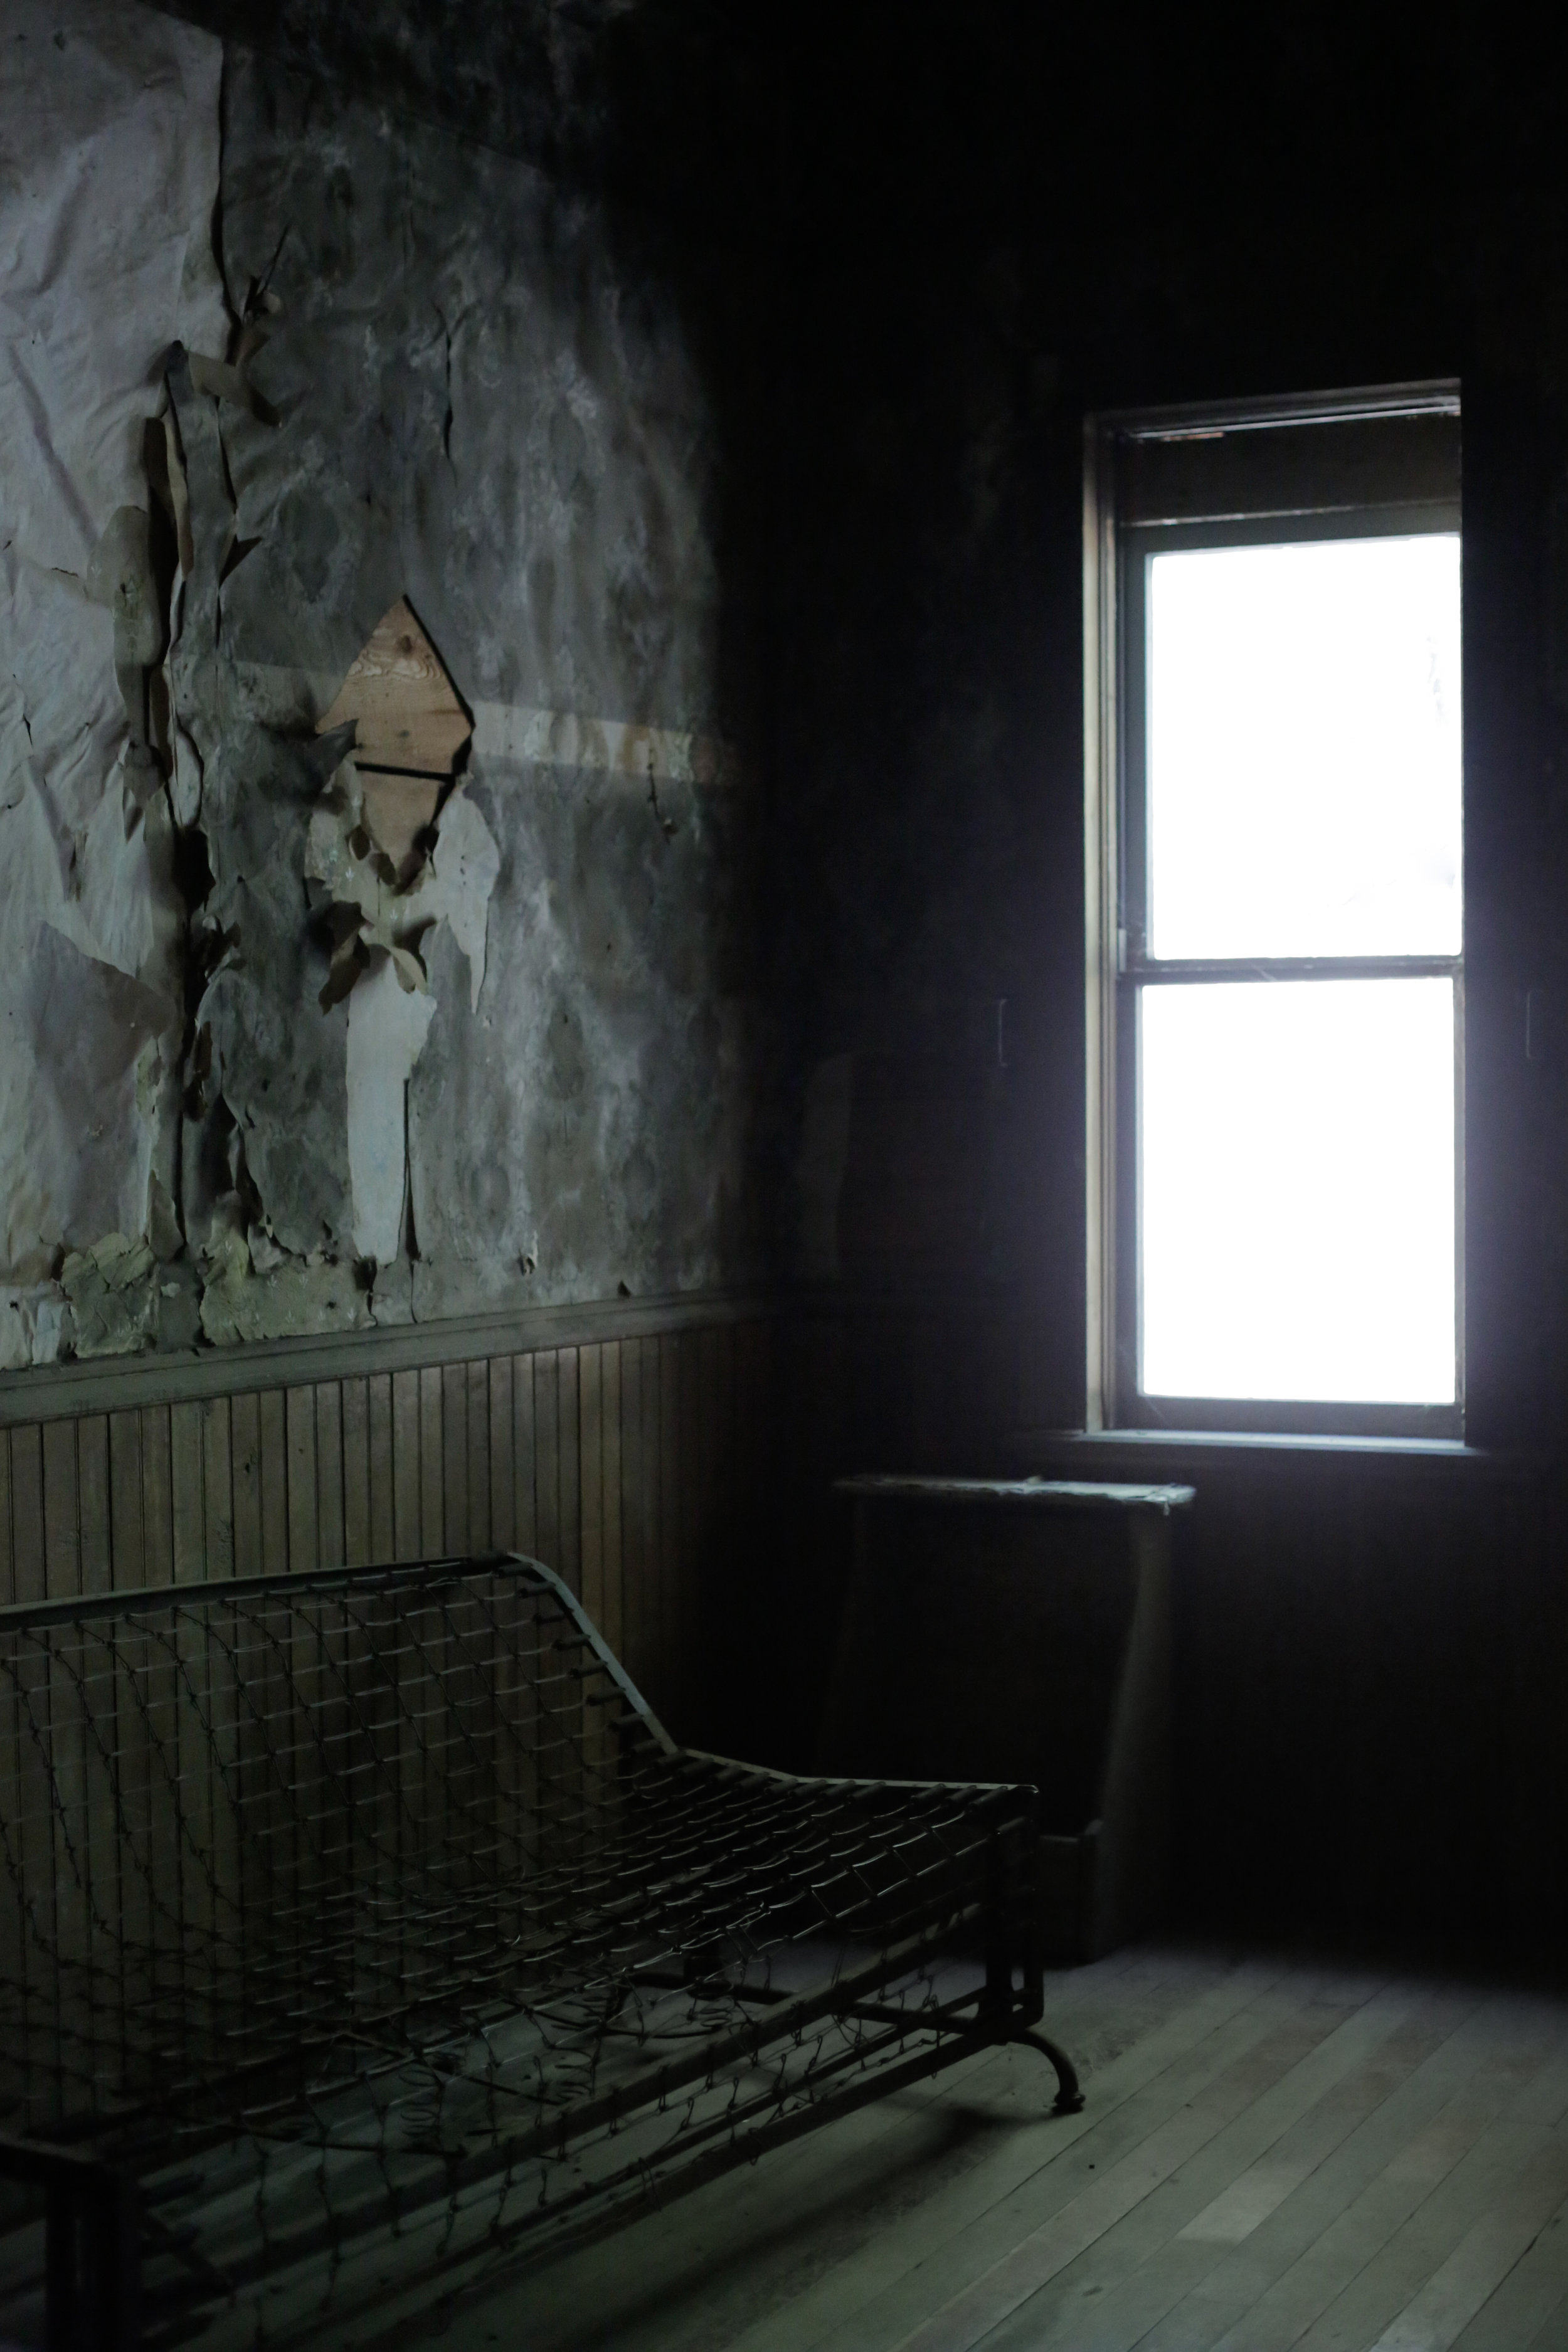
I tiptoed quietly through the dust of the Grand Hotel, channeling my inner Nancy Drew. I couldn't shake the feeling of being watched. But it wasn't an unnerving presence...more like a maternal inn-keeper making sure I wasn't going to make a mess she would have to clean up. You could almost hear the rustle of heavy skirts coming down the attic stairs. I spent a few happy hours in this forgotten place. Watching the light shift on the peeling wall paper and imagining the souls that lived here. 

xo, 

 
September 12, 2016 /Hailey Faust
garnet ghost town, ghost town, slow living, the art of slow living, haunted, montana, missoula, travel, wild wanderings
:: Wander
2 Comments

Sun Dried Garden Tomatoes

August 23, 2016 by Hailey Faust in :: Eat

Change is in the air. 

Do you feel it? There's a subtle shift in the quality of light. In the direction of the wind. In the early morning chill. 

Fall. She's coming for us, friends. 

And with her comes the promise of crisp air and wool slippers and thermoses upon thermoses of steaming coffee. If I'm honest, I am looking forward to the change. To the cold. To the opportunity to turn my attention inward and set intentions and slow down. As a certified homebody, there are few things I love more than the idea of stockpiling the root cellar for a few months of cozy hibernation. 

Putting up the summer's harvest is a lovely way to mentally (and practically) prepare for the coming season. While I love the idea of flitting around the kitchen, canning every ounce of the garden's bounty, my crippling fear of botulism keeps my aspirations at bay. Dehydrating has become one of my favorite ways to preserve seasonal food without the fear of accidentally poisoning all my friends and family. That's what you call a win-win. 

I normally put this recipe to work on the hundreds of sweet cherry tomatoes bursting from the garden this time of year, but getting married in July put a serious damper on our garden time and the harvest has been pretty meager. A trip to the local farmer's market was necessary to supplement our few lonely tomatoes, (and, admittedly, as an excuse to traipse around with this gorgeous new market basket we received as a wedding present from our dear friends at Rabbit Rung Puppetry and Love Yoga. It makes me feel like I am in a provincial fairy tale, which I am pretty sure is my natural state of being.)

Full disclosure: these tomatoes aren't actually "sun-dried." They are oven or dehydrator dried. But I promise they taste (almost) as good as if they were painstakingly turned for days under the mediterranean sun. And your kitchen will smell like a Tuscan delicatessen. So there's that. 

These little beauties only take about 10 mins of hands-on time and keep wonderfully in the fridge. They are perfect for tossing into everything from pastas and salads, to cheeseboards and omelets. So pour yourself a splash of lemoncello and roll up your sleeves. Tomato season is upon us! But not for long...


Note: This is really more of a suggestion than a recipe. No specific measurements are provided as it is one of those "season to taste" types of projects. Feel free to supplement and experiment with your favorite spices. 

Ingredients:

- Cherry tomatoes (other varieties will work as well, but cherry tomatoes are my personal fav)

- Olive oil

- Kosher Salt

- Pepper

- Dried thyme

- Dried basil 

Instructions:

1. Cut the cherry tomatoes in halves or quarters depending on size. The larger the pieces, the longer they will take to dry. 

2. Add the sliced tomatoes to a large bowl. Add enough olive oil to lightly coat all the tomatoes (usually about 1 TBS). Season to taste with salt, pepper, thyme and basil. I sometimes throw in a splash of balsamic vinegar as well. 

3.  If you don't have a food dehydrator, I can't recommend them enough. They are seriously my favorite kitchen tool. I purchased this one on Amazon a few years ago and we get a ton of use out of it for everything from kale chips and fruit leather, to dried herbs and oranges. This thing pays for itself in time and deliciousness. 

Dehydrator: Place the tomato slices skin down, cut side up on the drying racks of your dehydrator. Set the temperature to 140° F and leave to dry for 8 - 10 hours. Flip after about 6 hours. Texture is all a matter of preference, I like mine a bit crispier so I dry them for the full 10 hours. I would recommend checking in a few times until they reach your desired texture. They should be leathery and dry. 

Oven: Preheat the oven to 170° F or as low temp as it will go. Place the tomatoes on a parchment lined baking sheet and place in the oven, leaving the door propped open a few inches. Bake for 3 hours, then flip tomatoes. Continue to bake until they reach your desired texture (usually about 8 hours.) I would recommend checking in every hour near the end until they reach your desired texture. They should be leathery and dry. 
Note: I haven't used the oven method in years since we purchased our dehydrator. You may need to add or decrease baking time depending on the size of your tomatoes and your oven. It goes without saying, but always babysit the oven when it is on for extended periods like this. 

4. Store in the fridge in an airtight container. 

Have a lovely week dear ones. 

xo,

 
August 23, 2016 /Hailey Faust
blog, sun dried tomatoes, garden, preserve, fall, the art of slow living
:: Eat
Comment

Apothecary :: DIY Rose Water

August 15, 2016 by Hailey Faust in :: DIY, :: Pamper, :: Make, :: Apothecary

And just like that, it was August.

Slowly but surely, summer is slipping quietly out the back door, leaving only a few precious weeks of bursting gardens and heirloom tomatoes and sun-drenched afternoons trailing behind her. I love how everything becomes a little wild this time of year. A little overgrown. Untended. Abundant. Exploding with life. Maybe it's the heat, or the heady scent of jasmine, but these final weeks of summer always makes me a little dreamy. Nostalgic. Less bound to reality. 

I'm always looking for ways to preserve the last few golden drops of sunshine and squirrel them away for the coming season. A steaming cup of lemon verbena tea and a jar of wild huckleberry jam can go a long way in the cold dark days of winter. January Hailey is always elated, and a little surprised, that August Hailey had a few fleeting moments of foresight.

Distilling a batch of rose water is one of my favorite late-summer rituals. An ancient remedy, rose water can be used in everything from facial toner to teacakes. Cleopatra swore by rose water for supple skin and, according to legend, Michelangelo drank it every morning with his tea. There is old magic in this stuff. I personally like to sprits a little on clean sheets and laundry, or add a tablespoons to bath water if I'm feeling extra fancy. It can even be used in the kitchen to add a delicate floral note to aromatic dishes and sweets, or as a cooling body mist on hot days. The possibilities are endless. A few minutes of time invested now will pay itself back ten-fold when you have this lovely tincture waiting in your apothecary.  

The key to high quality rose water is (surprise, surprise) high quality roses. Be sure to use only fresh organic roses that have never been sprayed with anything. The more fragrant, the better. This is the perfect project for the rose bush out back that has started to shower her petals. There is something deeply satisfying about finding a second life for fading blooms. 


You Will Need: 

- Fresh, fragrent organic rose petals

- 1 tray of ice cubes

- Large stock pot

- 2 oven safe jars or ramekins 

- Distilled water

Instructions:

1. Separate the petals from the roses and rinse with fresh water to remove any dirt or insects. 

2. Place petals in a large stock pot. 

3. Place a wide-mouth jar or ramekin upside down in the center of the pot. This is essentially just used as a base to lift the second jar off the bottom of the pot. Place the second jar right-side up on the ramekin. This jar will collect the rose water.

4. Fill the pot with water until it just covers the rose petals. The collection jar should be above the water line. Place the lid upside down on the pot and heat on medium until the water begins to boil. 

5. As soon as the water boils, place ice cubes on top of the upside-down lid. This will help bring the rose-filled condensation to the center of the lid where it will slowly drip into the waiting collection jar. 

6. Gently simmer for 15 - 20 mins or until the petals start to lose their color. Be sure not to over-cook, as this will dilute your rose water and change the fragrance. 

7. Turn off the heat and let cool for a minute. Using pot holders, carefully remove the lid which will now be filled with water from the melted ice cubes. Gently remove the jar filled with rose water (careful: it's hot!) and quickly transfer it to a waiting receptacle (or just put a lid on the jar.) The lovely rose oil you have just distilled can slip away as vapors so it's important to contain it quickly. 

8. Store in a cool dark place until you need a little splash of summer in your life. 

Have a lovely week dear ones.

xo, 

 
August 15, 2016 /Hailey Faust
DIY, apothecary, rose water, lovely wild
:: DIY, :: Pamper, :: Make, :: Apothecary
Comment

Apothecary :: Solstice Sun Tea

June 20, 2016 by Hailey Faust in :: Eat, :: Apothecary, :: Celebrate

Happy Midsummer dear ones! 

There is a special kind of celestial magic in the air today. Not only is today the Summer Solstice, but it also just so happens to coincide with the full moon. The Strawberry Moon to be exact. The last time this happened was in 1967 - the summer of love. I don't know about you, but that just makes my heart go pitter-patter. 

I couldn't resist whipping up a quick batch of sun tea to honor the longest day of the year and absorb a little bit of this lovely cosmic energy raining down on us. I think I will let it continue to steep in the light of the full moon as well - just for good measure. 

Oh and it also helps if you make a flower crown and float around the yard in a linen kaftan. Trust me on this. 

Please note - this is really more of a suggestion than a recipe. You can use whatever you have to hand. A quick traipse through the garden, some loose leaf tea and a large jar are all you need. 


Ingredients

- 3 TBS black or herbal tea. My favorite blend is called "Rose Congou" from the herb shop down the street

- 1 tsp organic edible rose petals

- 2 sprigs organic edible lavender 

- 1 sprig (or a few leaves) fresh lemon verbena

Instructions

Add all ingredients into a large tea strainer. Fill the largest jar you have with clean water. Place tea strainer inside and let steep in direct sun for at least 5 hours, or until desired color is reached. Add ice and enjoy. 

xo,

 
June 20, 2016 /Hailey Faust
sun tea, recipes, herbal remedies, self care, solstice
:: Eat, :: Apothecary, :: Celebrate
Comment

Apothecary :: New Moon Herb Bath

May 05, 2016 by Hailey Faust in :: DIY, :: Make, :: Pamper, :: Apothecary

The new moon asks us to set intentions. To turn inward and greet the part of ourselves we have maybe been neglecting. To take careful inventory and plant the seeds we want to grow. This Friday, May 6th, marks the new moon in Taurus. And this isn't just any new moon, dear ones.

It's got a special magic.

A knack for manifesting abundance and bringing things into the physical realm. It invites us to take the first step. To write it down. To get really specific about what it is we want. This is fertile ground, lovelies. 

And for those of us in the Northern Rockies, this new moon ALSO just so happens to hit right smack dab in the middle of our stunning-but-fleeting lilac bloom. Which is pretty much my favorite week of the year. Abundance abounds.

moonbath5.jpg

Since the new year, I have been marking every new and full moon with a moon bath and I am now totally addicted to the practice. Our deep, century-old porcelain bathtub has become a very sacred spot in our house. A quiet respite to soak and think and meditate and release. To sing and stretch and practice self care. To steep in all the luna love.

My moon bath recipe changes from month to month depending on what is in season and what's happening astrologically. Many of the herbs used in this recipe are prescribed by folklore for purification, release of negative energy and/or manifesting and were chosen specially for the new moon in Taurus. Feel free to substitute or amend this recipe, but make sure to research each herb or flower you wish to add to confirm it is safe to be used in a bath. 

So tonight, channel your inner Cleopatra and bathe yourself in herbs and petals by candlelight. It's a nourishing way to stay connected with the natural cycles of the moon and to make space to reflect on what you want to manifest in the coming month. Oh, and it smells amazing. Win-win-win.


Ingredients: 

Note: I don't use any specific measurements for the herbs. Just a handful of this and a pinch of that. Feel free to adjust amounts as you go. A little lavender goes a long way. :)

  • Lavender - for relaxation, release & higher consciousness
  • Sage - for cleansing energy
  • Rose petals - to manifest love & happiness
  • Rosemary - to enhance concentration - it is also full of anti-inflammatory & antioxidant compounds
  • Bay Leaves- for purification & protection
  • Lilac blooms - for their gorgeous scent and to honor the abundance of spring
  • Epsom salt - to detoxify the body
  • Pink Himalayan salt- to reduce inflammation and provide mental balance
  • Cheesecloth

Instructions:

1. Start by crushing any larger dried herbs with a mortar and pestle. Then tie the sage, lavender, rosemary and bay leaves in a square of cheesecloth. I also added the pink salt to my cheesecloth but it ended up falling out so I wouldn't recommend it. You will use this bundle like a tea bag in the bath.  

moonbath9.jpg

2. Tie the bundle below the faucet so the hot water passes through it as the tub fills. This will wake the herbs up and infuse the bath water as it fills.

3.  As the tub is filling, add 1 to 2 cups epsom salts and 1/2 cup Pink Himalayan Salt directly to the bathwater. 

4. Throw in a handful of lilac blooms and bay leaves. You can also add rose petals or eucalyptus leaves.

5. After you have filled the tub, untie the bundle from the faucet and let it continue to steep in the bath water. 

6. Light a few candles and turn the lights out. Maybe dry brush your skin if you feel so inclined.

7. Focus on what you would like to manifest. On what you would like to release. Get specific. Breathe deep. Soak in the new moon energy.

Pro tip: After you have drained the bath, just let any remaining herbs or petals dry in the tub so you can easily sweep them out the next morning. Much easier than trying to clean them out while they are wet. 

Looking for last minute Mother's Day ideas? Simply use dried herbs instead of fresh and package your custom new moon bath blend in a pretty jar or tube. An easy, thoughtful gift for the lunar goddess in your life. 

xo, 

 
May 05, 2016 /Hailey Faust
Diy, gift, mother's day
:: DIY, :: Make, :: Pamper, :: Apothecary
1 Comment

DIY :: Red Cabbage Dyed Robin Eggs for Spring

March 26, 2016 by Hailey Faust in :: DIY, :: Celebrate

Hello lovelies!

How is it Saturday already? This week went by in a blur of meetings and deadlines and taxes and paperwork and left me daydreaming about running away into the forest or throwing my phone into the river. Or both.

Do you ever have times when you just feel completely overwhelmed with being "plugged-in" every second of every day? That is totally where I am at right now. So this morning I decided to gift myself the time and space to step away from my inbox and get my hands a little dirty. That always seems to help.

One of my nearest and dearest, Kendra Potter of Brooklyn Light, introduced me to the wonders of using red cabbage to dye eggs. You guys, this is crazy. Who would have thought the humble red cabbage would create such a gorgeous deep cyan dye? It feels a little bit like magic. 

These little guys can be hidden by your resident bunny or gifted to a friend or placed in a nest as a lovely spring centerpiece. Kendra and I even filled some with intentions for Tuesday's full moon. Who says Easter has a monopoly on eggs? I plan on keeping mine out long after the holiday to welcome the coming season.


Supplies:

- Eggs

- 1/2 of a red cabbage

- 3 TBS white vinegar

- Flower petals 

- Black / White paint (I used watercolors)

- Paper 

- Blue tissue paper

- Glue

Step 1: Making the Dye

Start by chopping up about half of a red cabbage. 

Step 2: Making the Dye

Add the cabbage to a medium sized pot with about 5 cups of water. Bring to a boil then turn down the temperature and simmer for 45 minutes. Remove from heat and add in 3 TBS white vinegar. Let cool and strain cabbage out with a collendar, collecting the dye in a jar or bowl.

Step 3: Dying the Eggs

Add your uncooked eggs to the dye and let sit for at least 3 hours. Keep an eye on them and remove when you have reached your desired shade of blue. I left mine overnight in the fridge to get this lovely deep cyan color. 

Step 4: Blowing out the Eggs

Using a needle or metal skewer, poke a small hole in the top and a slightly larger hole in the bottom of the egg. Then put your lips to the smaller hole and gently blow out the inside of the egg into a bowl. This will leave you with an empty egg shell. Rinse the shell out and allow to dry on a clean towel.

Step 5: Painting the Speckles

To create the speckled Robin's egg effect, I used an old tooth brush and flicked black and white paint onto the hollowed egg shells. 

Step 6: Filling the Eggs

Next I filled the eggs with a natural confetti made of rose petals, lavender and dried lemon peel as well as little love notes and fortunes for spring. Gently push the flower petals through the larger hole in the bottom of the egg. To insert the note, simply roll it up as tightly as you can and slip it into the egg after the flower petals. 

Step 7: Sealing the Hole

I just happened to have a little bit of peacock blue tissue paper which worked perfectly to seal up the holes in the top and the bottom of the eggs. Serendipity! I just used a dot of Elmers glue on the tissue and smoothed it over the holes.

Step 8: Break the Eggs!

Make sure your recipient knows to break open the egg to find the surprises you have hidden inside!

Happy Easter everyone! Wishing you a happy, restful weekend.

xo, 

 
March 26, 2016 /Hailey Faust
:: DIY, :: Celebrate
Comment

DIY :: Hand Stamped Brass Bracelets

March 14, 2016 by Hailey Faust in :: DIY, Gifts

March blew in on a cold wind from the east and brought with it the smell of fresh rain and the promise of Spring. It's coming, you guys. Spring. Is. Coming. There may still be a few late snows standing between us and it, but the light at the end of the tunnel is growing brighter every day. In like a lion, out like a lamb...isn't that what they always say?

The first fluttering breaths of spring are some of my favorite moments of the whole year. There is something so lovely and cleansing about throwing open the long-sealed windows to welcome fresh air into the house. This season buzzes with new energy. It encourages us to venture out from our cramped dens to stretch our legs and feel the cool breeze against our skin. To let the smell of wet soil and new grass fill our nostrils and refresh our spirits. To plant seeds of both the vegetable and spiritual variety. To sweep out the old and create space for the new.

Spring cleaning. It's a thing for a reason. 

Rooster and I spent the weekend shaking off the dust of winter and embarking on our own mini spring clean. We moved into this nearly century-old house on the first blizzard of winter (literally - 10" of snow the day we moved in), so we are happily unearthing little surprises that were hidden by the snow until now. Yesterday, R discovered a secret bed of irises sprouting triumphantly near his wood shop. They had been completely covered by a pile of old wood and were yellowed from lack of sunlight, but still they grew. Plants are magic like that. 

After cleansing the house, I was feeling refreshed and wanted to take the opportunity to plant some seeds of a different nature. I had a few brass bracelet blanks rolling around the back of my craft drawer that seemed to be just the ticket. I brewed a cup of strong tea and stamped each bracelet with a phrase or intention that reminded me of it's recipient, then popped them in some pretty envelopes heading for far away friends. I'm hoping these little lovelies work as gentle, pretty reminders to slow down, make space and smell the rain in the hustle and bustle of the coming months. 

stamped1b.jpg
 

Supplies

- Brass Bracelet Blanks 

- Hammer

- Steel block

- Metal Stamping Alphabet

- Masking Tape

- Permanent Marker

- Rubbing Alcohol

Instructions

1. Start by using masking tape to attach your bracelet blank to the steel block. Make sure the tape is straight, as you will use this as a guide for your letters. Next, take a marker and evenly mark a dot on the tape for each letter in the phrase you are stamping. This should help you keep the letters even and at least kind of straight.

2. You may want to place your steel block with the taped blank on a book to dampen the noise a bit. Take your first letter stamp and line it up with the first dot you marked on the tape. I gave mine about 5 - 8 good whacks with a stamping hammer and it made a nice impression. Repeat the process with the rest of your letters, using the tape as a guide to keeping them straight and even. If you miss a part of a letter, you can try to slip the stamp back in the impression and give it a few more whacks. As you can see, my letters are far from perfect, but I think the imperfections just make it that much more "handmade."

3. Once you have stamped out your phrase, take a permanent marker and draw over each letter. Don't worry about being careful where you mark as you will wipe off the excess ink. Focus on getting the ink deep in the grooves of each letter. Then take a little rubbing alcohol on a cotton ball and rub off the extra ink on the rest of the bracelet. This will help darken the letters a bit to make them more visible.

4. Bend the bracelet around something round to get the basic shape (I used the top of a mason jar) and then form it to the shape of your wrist. This brass is really flexible, so even if you are making this as a gift, the recipient should be able to reshape to fit their own wrist as needed. 

Have a great week, dear ones!

xo, 

 
March 14, 2016 /Hailey Faust
DIY, Metal Stamping, Bracelets, Gifts, Handmade
:: DIY, Gifts
2 Comments

Salted Preserved Lemons

February 24, 2016 by Hailey Faust in :: Eat

There is something so endlessly satisfying about making something from scratch you once had to buy.

It's what I love most about urban homesteading. That very particular kind of magic that comes with growing, creating and preserving your own food. Opening a fresh jar of garden tomatoes in the depths of winter or hanging bushels of herbs to dry in a warm attic. Baking your own bread. Picking berries for jam. It's a quiet beauty. A productive meditation of sorts. Investing a few moments of effort now as a lovely offering to your future self.

These Moroccan-inspired Salted Preserved Lemons take a little foresight and a little patience.  But I'm *hoping* they will be well worth the wait. Spring is in the air and I am already dreaming of using these beauties on fresh salmon fillets with dill and crisp summer salads from the garden. Preserved Lemons take about one month to cure, but only 15 minutes of real hands-on time to make.

I recommend using the traditional Meyer lemons if you can find them. Meyers are thought to be a cross between a lemon and a mandarin, so they are a little sweeter and have a thinner, softer rind than your average lemon. 

I wish I could say these were each plucked lovingly from my own little Meyer lemon tree, but that would be a total lie. If I get two lemons a year from her, I chalk it up as a bountiful harvest. Oh well. I love her anyway. 

Oh, one last thing. It's really imperative to the process that you pretend you are on a sun-baked Mediterranean villa as you make these. A glass of mint tea is really helpful for this. Just a tip. 


Ingredients

- Organic Meyer Lemons (as many as you can fit into your jar. I used about 7. Regular organic lemons will work great too, but it's imperative that they are organic since you will be eating the rind.)

- Sea salt

- Sterilized jar (any size works, as long as you can sterilize it and fit at least 3 lemons.)

Instructions

1. Wash and scrub the lemons thoroughly. Cut the ends off of each lemon.

2. Cut a lemon into quarters, but only about 3/4s of the way through. The quarters should still be connected by the stem end. Just cut far enough so that the lemon opens up a bit. 

3. Add 1 tbs of salt to the bottom of your sterilized jar. Add 1 tsp of salt to the inside of the cut lemon and close it up again. 

4. Push the salted lemon down firmly (cut side down) in the jar until the juices squish out. Cover with 1 tsp of salt. 

4. Repeat the process. Quarter another lemon, cover the inside with 1 tsp salt and squish it on top of the last lemon in the jar, adding 1 tsp of salt between layers. (Yeah. It takes a lot of salt.) 

5. I was able to get enough juice from squishing the lemons to totally cover them, which is the goal. If your lemon juice does not cover your lemons entirely, keep adding fresh lemon juice until it does. Anything that is sticking up out of the brine will likely get moldy. 

6. Let sit at room temperature for 3 days, turning over several times a day. After that, refrigerate for an additional 3 - 4 weeks before eating. They can supposedly keep for up to six months in the fridge, but this is my first batch so I don't speak from experience. Many cultures don't even bother refrigerating, but I'm not much of a risk taker when it comes to food safety. 

7. Before using, discard the pulp and wash excess salt off. It's the rind you want. Using a little bit of the juice can also great for brightening up a dish. 

Heres to springtime and little jars of sunshine. Have a great week everyone. 

xo,

 
February 24, 2016 /Hailey Faust
Lemons, recipes, preserves, urban homesteading
:: Eat
Comment

Valentines Day :: Golden Eggs and Sweet Nothings

February 14, 2016 by Hailey Faust in :: Celebrate, :: DIY

A quiet morning spent exchanging sweet nothings over coffee. 

Whether you are spending today with your partner, mom, lover, kids, sister, bestie or on a marathon of self-care, I wish you so much love. 

Happy Valentines Day, dear ones. 

For Rooster this year, I made this gold leaf egg filled with flower petals and a secret love note. Full DIY on these lovelies coming soon. 

R brought me back a collection of natural baubles from his recent desert journey. This man knows me so well. 

Have a lovely Sunday darlings. 

xo, 

 
February 14, 2016 /Hailey Faust
DIY, Gifts, Valentines, eggs, love
:: Celebrate, :: DIY
Comment

Mardi Gras King Cake

February 09, 2016 by Hailey Faust in :: Eat, :: Celebrate


I'll be the first to admit that, if a recipe takes longer than 40 minutes, I'm probably not going to tackle it. I'm an instant gratification baker. I like recipes that are quick and easy and rustic enough to hide my slapdash kitchen tendencies.

I'm gonna warn you right from the get-go: This King Cake is not one of those recipes. It takes some time and some kneading and not one, but two rises. But it's Mardi Gras. And Valentines. And Chinese New Year! And if that isn't reason enough to bake a cake, I don't know what is. 

A King Cake is really more of a brioche than an actual "cake." A tea-ring / cinnamon roll of sorts with a sweet bready texture that makes it totally acceptable to eat for breakfast. Traditionally made only in the days between twelfth night and  Mardi Gras, King Cakes have a ton of fun rituals and traditions associated. The baker hides a bean or a tiny plastic baby in the cake after baking, and whoever finds the baby in their slice is king or queen of the party. They then have to throw the next Mardi Gras party and procure the next King Cake. Everybody wins. 

This year, I made the traditional cinnamon sugar King Cake, as well as a braided strawberry cream cheese variation. My first time tackling my mother's tried and true recipe from when we lived in New Orleans. The smell of these baking in the oven instantly takes me back to stirring jambalaya on a stool in my Mom's kitchen.  

It's worth the kneading. 

Laissez les bons temps rouler!

dough.jpg
 

Ingredients

(Makes 2 rings)

1/4 c. butter

16 oz sour cream

1/3 c. sugar

1 tsp salt

2 pkgs active dry yeast

1 TBS sugar

1/2 c. warm water

2 eggs

5 cups all purpose flour

Filling:

1/4 c. strawberry preserves  

1/4 c. cream cheese

or

1.5 tsp cinnamon

 1/2 c. sugar and

1/3 c. softened butter

Instructions

1. Combine first four ingredients in a sauce pan. Heat until butter melts, stirring occasionally. Cool mixture to 105 - 115°F. 

2. Dissolve yeast and 1 TBS sugar in warm water and let stand 5 - 10 mins. Add butter mixture, eggs and 2 cups flour. Beat at medium speed with electric mixer for 2 - 3 mins or until smooth. Gradually mix in enough remaining flour to make a soft dough. 

3. Turn dough out on a floured surface and knead until smooth and elastic (10 - 15 mins.) Place in a well greased bowl, turning once to grease top. Cover and let rise in a warm place (about 85°) with no drafts for about an hour or until dough has doubled in size. 

4. Punch dough down gently and divide into two equal parts. On a lightly floured surface, roll one portion out into a 28" x 10" rectangle. 

5. Mix cinnamon and sugar in small bowl. Spread the softened butter over the dough, followed by the cinnamon sugar mixture. If you are using cream cheese and jam instead, spread a thin layer of each on your dough. Then roll the down (from the long side) jelly roll style, to create one long roll. Bring the ends of the roll together to form an oval. Repeat with second cake. Place on a greased cookie sheet.

6. Let rise again, covered in a warm area for about 30 mins.

7. Bake at 375° for 15 - 20 mins or until golden brown.

8. Optional: Let cool and ice with a simple powdered sugar icing. If you want to be super traditional, decorate with purple, gold and green sugar. Just shake a few drops of food coloring in a small mason jar with some sugar. Slip a plastic baby in from the bottom of the cake, so it's hidden within. 

* Note: I haven't included instructions for the braided version as I haven't quite perfected the technique yet. This attempt was a little uneven and lost some of the filling. Will update as soon as I nail it!

xo,


February 09, 2016 /Hailey Faust
Mardi Gras, Holiday, King Cake, Celebrate, recipes
:: Eat, :: Celebrate
1 Comment

Apothecary :: DIY Lemon + Rosemary Sugar Scrub

February 03, 2016 by Hailey Faust in :: Pamper, :: DIY, :: Apothecary, Gifts

We are still restlessly hibernating here in the mountains of Montana. A fresh six inches of snow over the past few days has dashed any hopes of an early spring and forced us to retreat back to our blankets and books and baths with a general harrumph. For someone who strives to live seasonally and embrace the beauty of each phase, late winter has always been the hardest to love for me.  One of my favorite littles recently asked her Mama, "Can we at least pretend it's spring?" I hear you, sister.  And yes. Yes we can. 

But if we can see past the grey, there is also a lovely energy buzzing beneath the surface this time of year. Days are slowly getting longer. Seeds are stirring in the ground, preparing to launch triumphant green shoots when given the word. Animals and humans are rolling over in their dens. It reminds me of that final hour of sleep in the early morning, when you are subtly aware the sun is rising, but still lost in a dream world. 

I'm using these last moments of rest to indulge in some serious self care. At home spa days have become a weekend staple over here. This Lemon Rosemary Sugar Scrub takes about 5 minutes to make and feels super pampery. I love using lemons in beauty rituals because they are bright and cheerful as well as highly beneficial. They have antibacterial and immune-boosting properties and also reduce the sight of blemishes. Win-win-win. Rosemary is an inflammatory and improves circulation. Also, it smells awesome. Sugar is a great exfoliator and moisturizer. Coconut oil has approximately one million beneficial properties. You are killing like 15 birds with one sugar scrub. 

Take a few moments to slow down and pamper yourself. You deserve it. 


Ingredients

2 cups organic raw sugar

1 organic lemon 

1 - 2 sprigs of rosemary

3 - 4 tablespoons coconut oil (olive or jojoba oil work great too)

10 - 15 drops lemon essential oil

Instructions

1. Add sugar to medium bowl and squeeze in the juice of one lemon.

2. Coarsely chop the rosemary leaves and add as much or as little as you'd like. 

3. Melt coconut oil and add a little at a time until you reach your desired constancy. I like my scrubs to be a little grittier so I used about 3 tablespoons. Mix in chopped rosemary leaves and essential oil.*

4. Store in mason jars or other airtight container for up to one month. 

* Tips: Add a few drops of essential oil at a time to make sure you don't create an aroma that's overpowering. There is no right way to do this, just keep adding ingredients until it feels finished. I like to use this in the shower so that there is no cleanup and the sugar goes right down the drain. My skin has been so so soft. I used 1/2 pint jam jars (recipe makes 5) and delivered to some of my girl friends as an early Galentines day treat. (Yep. Galentines. I went there.) 

xo,

 
February 03, 2016 /Hailey Faust
self care, the art of slow living, slow living, apothecary, Diy, sugar scrub, bath, homemade, organic, beauty, ritual, holiday gifts
:: Pamper, :: DIY, :: Apothecary, Gifts
2 Comments

Easy Homemade Maple Pecan Granola

January 26, 2016 by Hailey Faust in :: Eat, Gifts

The last few weeks have been a blur of meetings and deadlines and head colds and wedding planning in our little corner of the world. The days have been true to their January nature and unflinchingly grey. It's taking more and more resolve to get out of my warm blanket cocoon every morning and plod down the chilly steps to begin the day. Sometimes I lose the battle and end up bringing my work back to bed with me. Winter: 1, Hailey: 0. 

But when I must join the land of the living, I like to use the early hours to reset and indulge in a few moments of quiet self care. A steaming shower with eucalyptus oil, a foamy almond milk latte and this sweet, toasty granola do wonders for softening the blow and luring me out of bed on chilly days. This granola recipe is absurdly easy and can likely be made with what you already have in your cupboard. It's best served with plain greek yogurt, fresh fruit and cozy slippers. 

Enjoy, lovelies. 


Ingredients

2 3/4 cups old fashioned rolled oats

1 cup unsweetened coconut chips

1/2 cup coarsely chopped pecans

1/2 cup coarsely chopped almonds

1/2 tsp coarse kosher salt

1/3 cup real maple syrup

1/3 cup extra virgin olive oil (coconut oil would work too)

1/2 cup brown sugar

1/2 cup dried cherries or other dried fruit

Instructions

1. Preheat oven to 325° F. Mix the oats, coconut chips, chopped nuts and salt in a large mixing bowl. 

2. Over medium heat, mix the sugar, olive oil and maple syrup in a small saucepan. Stir constantly until the sugar is completely dissolved.

3. Pour the hot syrup mixture over the oat mixture and mix together until all dry ingredients are completely coated. You may want to use your hands to combine.

4. Spread the granola out evenly over a large, ungreased baking sheet. 

5. Bake for 20 minutes. Toss and flip granola with a spatula. Return to oven and continue checking and flipping granola every five minutes until golden brown. Do not undercook, this granola is best nice and toasty. 

6. Let cool and mix in dried cherries. Store at room temperature in airtight container. 

xo,

Haileysignature.png
 
January 26, 2016 /Hailey Faust
recipes, slow living, granola, nourish, morning, self care, christmas, diy christmas gifts, holiday, gifts, winter, the art of slow living
:: Eat, Gifts
1 Comment

DIY :: Watercolor Moon Phase Flags

January 22, 2016 by Hailey Faust in :: DIY, Gifts

I am in the midst of a deep love affair with the moon. Can you tell?

She and I have always been close, but recently we have taken things to the next level. It's serious, you guys. Every time I put pen to paper, a moon seems to find it's way to the page. I have moon magic on the mind. 

moonflag3.jpg

I think, as a species, we are hard-wired to love the moon. She and the stars were our first calendar after all. Our first discernible method for knowing when to plant seeds or hunt or harvest or get married or baton down the hatches. Ruler of the tides. Our companion in the darkest hours of the night. The thing every-single-human-who-ever-lived-in-all-of-history has in common. Our nightlight. Our sister moon.  

Tracking the ebbs and flows of the lunar calendar is a lovely way to stay connected to the rhythms of the natural world during the long dark days of winter. It also helps set clear times each month to start and finish projects, give thanks, check in with ourselves and manifest intentions. If this resonates with you, and you haven't checked her out yet, run (don't walk) over to Chani Nicholas's amazing blog. This woman is a mystic moon mama / lunar guru who has changed the way I connect to the night sky. 

I am a big fan of marking occasions, and pretty much any excuse to use gold leaf, so to honor this Saturday's full moon, I pillaged my craft drawer and created these delicate paper moon phase flags. This is one of those projects that is very forgiving and soothing to work on. A creative meditation of sorts. Light a candle, put the kettle on and curl up with the moon for a spell. 

Supplies

- Watercolor paper (at least 7 sheets)

- Watercolors

- 2 paintbrushes ( I used one soft round brush and a shader with a hard edge for details..but whatever you have on hand will work.) 

- Adhesive size for metal leafing

- Gold leaf sheets (Just a bit. I used less than a sheet on the whole project.) 

- Hole punch

- Roughly 6 ft of hemp or ribbon


Instructions

1. Start by tracing something circular very lightly with a pencil to get the shape of your moon on one of your pages of watercolor paper. I used a roll of masking tape as a guide and chose square paper so that I wouldn't have to worry about cutting the flags to an even size. 

2. Start filling in the circle with water with a wet brush. Slowly add little blooms of watered down color (I used grey) around the edges of the circle. Let dry. Repeat, allowing the layers to instersect and flow into one another. 

3. Now you can start adding some darker splotches of color for depth. Play with using less water and more paint on your brush to create craters. Layering is key. Let dry between layers. Experiment and play. My only advice would be to only add a little paint at a time and know when to stop...it's easy to go too far. I found that I liked mine best when I left a little white space within the moon. What I love about this project is that it is very forgiving. If you make a mistake, just add a little water. Easy peasy. You can also use a dry brush to brighten areas if they start to feel too dark. I haven't used watercolors in ages but I could see how they could be very addictive. So calming. 

4. Repeat process with the rest of your moon phases, using a pencil to shape out the area you will be painting for each phase. I only created 7 phases (including 2 new moons) but you could easily add as many phases as you'd like. To create the new moon, I simply splotched* (technical term) my brush around the outside of my masking tape to get this effect. 

6. Once all your phases are totally dry, get a clean brush and apply a small amount of the adhesive size to the areas of the moon you want to gold leaf. I found that asymmetrical brush strokes looked the most "moon-like" when the leaf was applied. Let size dry for 10 - 15 minutes or until clear. 

7. Apply gold leaf to the clear adhesive size. The leaf should stick only to where the adhesive was painted. I just used my fingers to apply it, taking little scraps from here and there to make interesting crater shapes. Use a soft paintbrush to gently brush away the extra gold leaf. Again, work in layers as a little gold goes a long way. 

8. Punch holes in the top 2 corners of your moon phases. I used a jewelry hole punch to get teeny tiny holes, but a regular hole punch would also work. 

9. Carefully string your phrases together with twine or ribbon. Be delicate as you work, it would be easy to rip the paper. I used a little bit of candle wax on the end of my hemp to help make threading it through the holes a bit easier. Worked like a charm. Feel free to add beads or tassels or feathers to the end of your flags if you are feeling extra fancy. 

When I finished my flags I realized how easy it would be to slip them into a pretty envelope and send to a far away friend. Spread that luna love.  

Thanks for stopping by lovelies. Have a lovely cozy lazy wonderful weekend.  

xo, 

 
January 22, 2016 /Hailey Faust
DIY, gold leaf, handmade, prayer flags, watercolor, moon
:: DIY, Gifts
1 Comment

Dark Chocolate Cherry Almond Biscotti

January 12, 2016 by Hailey Faust in :: Eat, Gifts

January is...formidable. For humans. For animals. For all living things really.  We don't get enough sunlight. The days are grey. Our feet are cold. 

But there can also be something lovely about the quiet productivity of this first month. I personally find a lot of comfort in slipping back into my daily rhythms after the chaos of the holidays. Reading new books. Rearranging furniture. Trying recipes. Making plans. Folding laundry.

I woke up the other morning with a need to bake. To do something with my hands that didn't involve a screen and get a little dough under my fingernails. This Cherry Almond biscotti recipe came to mind immediately.  It's barely-sweet, with a crisp crumbly texture perfect for dunking in your morning coffee. They are great right out the oven, but just wait. They get even better in about 2 - 3 days. 

This is also one of those recipes that can be endlessly experimented with, which is my favorite kind. I think next time I will try pistachio cranberry. This recipe makes about 30 cookies so you will have plenty to share the love and run a quick batch to a friend or neighbor or colleague or mailman. A cozy little winter pick-me-up. 

_85B3371.jpg
biscotti3.jpg
_85B3566.jpg
 

Ingredients

3 tablespoons Amaretto 

1 cup sugar

1/2 cup melted butter

3 teaspoons almond extract

1 teaspoon vanilla extract

1/2 cup whole almonds

1/2 cup dried cherries

3 eggs

1 1/2 teaspoons baking powder

2 3/4 cups flour

1/2 teaspoon salt

1/2 cup dark chocolate chips


Instructions

1. Preheat the oven to 350° and toast the almonds whole for 5 - 10 mins. Remove from oven and let cool. Chop almonds coarsely. 

2. In a medium size bowl, stir together sugar, amaretto and melted butter until well combined. Stir in the almond extract and vanilla extract.

3. Stir in the eggs, chopped almonds and dried cherries.

4. Stir in the baking powder, flour and salt until well combined. Cover and chill in the fridge for 30 - 45 mins. 

5. Remove the chilled dough and moisten hands to help make it more manageable (it will be a bit sticky.) Split the dough in half and make two 14 x 3" loafs on the baking sheet. Flatten the loaves so they have an even thickness all the way through. 

6. Bake loaves at 350° for about 25 minutes or until golden brown. 

7. Remove loaves from oven and let cool completely. Slice into 3/4" slices with a very sharp knife. 

8. Place the biscottis back on a baking sheet and bake for an additional 25 minutes or until toasted. I like to flip them halfway through to make sure both sides get equally browned. Let cool. 

9.  Optional: Melt dark chocolate chips to dip biscottis in. You can just dip one end in, or if you are like me and are in it for the chocolate, dip one whole side in. Place on parchment paper and chill in the fridge until chocolate hardens. Keep biscottis on the counter in an airtight container. 

Enjoy lovelies! 

xo, 

 
January 12, 2016 /Hailey Faust
recipes, biscotti, dark chocolate, cherry, slow living, the art of slow living, Diy
:: Eat, Gifts
Comment

Winter Apothecary

January 05, 2016 by Hailey Faust in :: Design, :: Apothecary

Attn: Head Cold - Your days are numbered. 

January 05, 2016 /Hailey Faust
apothecary, tea, winter, orange peel, herbal remedies
:: Design, :: Apothecary
Comment
_85B2890.jpg

DIY :: New Year Moon Intention Wall Hanging

January 04, 2016 by Hailey Faust in :: DIY

I am a firm believer in the power of setting intentions. There has always been something magical for me about writing/drawing/stating goals that sets the universal wheels in motion and brings big dreams into the physical realm. The new year provides us with the perfect opportunity to meditate on what we want to bring more of into our life, what we want to release, and the concrete steps we can take to manifest our goals.

This year my goals are to finally bring the lovely wild into existence (yay!), meditate for at least 15 minutes every day, and practice photography by shooting every day until I have at least one image I sorta-kinda-almost like. What are your goals for 2016? What do you want to attract to your life?

It's easy to make resolutions, but often difficult to keep them in the forefront of our minds once the newness of the new year has worn off. What better way to gently remind of us these goals throughout the year than with a handmade piece of art hung lovingly in our home? And it's pretty! So there's that. 

This simple DIY is the perfect way to spend a lazy afternoon with a cup of tea and can likely be made with whatever bobs and ends are rolling around the back of your craft drawer. If you don't have metal stamping supplies, no worries! You can write your intentions on craft paper, ribbons or wooden beads and attach them that way. Even if noone else can read them, you will know they are there and that's the whole point. 

Materials:

*Please note these are merely suggestions. Feel free to improvise and use whatever you have to hand. Embroidery hoops can easily be replaced with wire bent to form a circle, ribbons can be used instead of yarn, etc.

- 2 embroidery hoops of different sizes

- Natural wool yarn (about 1/2 a skein)

- 1.5 ft of wire 

Optional:

- Metal stamping alphabet

- Steel block

- Metal blanks

- Hammer

Step 1: Making the moon

Start by removing the inside hoops (the ones without the metal clasps) of both embroidery hoops. These will be the hoops to form your moon. Hold the smaller hoop against the inside of the larger hoop (shown above) and play with it until you find the crescent moon shape you want. The bigger the difference in size between the hoops, the larger your crescent will be. These were the only hoops I had on hand so my crescent is more of a sliver.

Once you have a shape you like, tightly wrap the wire around both hoops to hold them together. You can use a drop of hot glue between the hoops to help it hold if necessary, but the wire seemed to do the trick for me. 

Step 2: Cutting lengths of yarn

Decide what length you would like the yarn tassels to be and multiply it by 2. I wanted my tassels to hang about 2 ft down from the moon, so I cut my yarn into roughly 4 ft length so they would be 2 ft when doubled. I wasn't sure how many lengths I would need, so I worked in chunks by cutting about 10 lengths of yarn at a time, attaching them, and then cutting again until it felt finished. 

Step 3: Attaching tassels

_85B2748.jpg

Attaching the lengths of yarn is super simple. Fold your piece of yarn in half. Pull the halfway point (or loop side) through the inside of the bottom of the moon. Now bring the tail ends up, through the loop and pull tight so that tail ends trail down below. Thats it! Now push this tassel to the right and repeat the process with the rest of your yarn lengths. The best part of this project is that you can keep adjusting the spacing between loops as you go, and keep adding tassels until you reach your desired thickness/density. 

Step 4: Adding texture

Once you have completed all your tassels, now we can add some texture. I braided a few strands and tied knots in strands here and there to add depth. Feel free to add beads, feathers, ribbons, whatever calls out to the raven in you. 

Step 5: Preparing to stamp

Metal stamping! One of my most cherished gifts this holiday was a metal stamping alphabet from my ever-crafty mother and I have been looking for any excuse to try it out...can you tell?

Start by using masking tape to attach your metal blank to the steel block. Make sure the tape is straight, as you will use this as a guide for your letters. Next, take a marker and evenly mark a dot on the tape for each letter in the phrase you are stamping. If you are feeling really fancy, you can measure these out, but I'm more of a "wing-it" kinda gal and actually like the look of imperfections. 

Step 6: Metal stamping

This was my first time stamping so I am by no means an expert, but it was definitely one of those instant gratification crafts! You may want to place your steel block with the taped blank on a book to dampen the noise a bit. Take your first letter stamp and line it up with the first dot you marked on the tape. I gave mine about 5 - 8 good whacks with a stamping hammer and it made a nice impression. Repeat the process with the rest of your letters, using the tape as a guide to keeping them straight and even. If you miss a part of a letter, you can try to slip the stamp back in the impression and give it a few more whacks. I just love the imperfect handmade feel of these!

Step 7: Attaching intentions

My blanks came with holes pre-drilled, but it would be easy enough to drill a small hole if yours did not. I attached my stamped intentions with a little leftover wire wrapped around the bottom of the moon, in between the yarn tassels. I played with pushing the tassels around until they mostly hid the wire. 

Step 8: Hang and manifest

That's it! Now hang your lovely New Year Moon Intention hanging somewhere you will see it daily and smile. Here's to good luck and good health in 2016!

Thanks so much for stopping by.

xo,


January 04, 2016 /Hailey Faust
DIY, moon, wall hanging, manifest, intention
:: DIY
1 Comment

Hello Lovely

October 27, 2015 by Hailey Faust

I recently had an epiphany. 

Like a big, wonderful, this-changes-everything, cue-the-angelic-choir major life / pursuit of happiness epiphany. It’s a two-parter so bare with me…

Okay. Part one.

I have recently come to the conclusion that, for me, true happiness is found, not when I achieve my biggest, loftiest life goals, but in the tiny daily joys I grant myself. The simple things. The steaming french press on a drizzly November morning. Making a splotched homemade card for a friend to mark an otherwise unexceptional day. The satisfaction at a quick sprint to the garden for dinner ingredients. Doing things the slow way. Getting my hands dirty. Celebrating love and family and living seasonally. These are my happy places.

As a graphic designer and animator, I spend an awful lot of time staring at screens. So I am christening this space to motivate, document and inspire my adventures in all things handmade and seasonal. A weekly excuse to get out from behind the desktop and work with my hands (the irony of creating an online journal to get away from the computer is not lost on me.)

Which brings me to the second part of my epiphany: Gratitude. 

Gratitude is magic.

Every time I make a conscious effort to practice gratitude, the stars align and magical things begin to manifest. The more I practice, the more obvious it becomes. Be grateful for what you have and happiness creeps into the everyday. Thank the Universe and the Universe thanks you.  Happiness and gratitude are inseparable. You cannot have one without the other. 

So I hereby dedicate this space as a rambling love letter of gratitude for all the little (and big) joys in life. A place to reflect on small moments of happiness and the way they string together to create a big, messy, imperfect, grateful, happy life. 

If this resonates with you, please join me. I promise future posts will have a lot less philosophizing and a lot more modge-podge.

Let’s drink tea and make things and celebrate the seasons.

Welcome to the lovely wild. I'm so glad you're here. 

xo,

 
October 27, 2015 /Hailey Faust
1 Comment
  • Newer
  • Older

Subscribe

Subscribe below to keep up on all the lovely!
We promise to never send spam or share your info with anyone else. For realzies. xo

We respect your privacy and will not share your information with any third parties. 

Thank you!

© 2016 HAILEY FAUST LLC. ALL RIGHTS RESERVED.